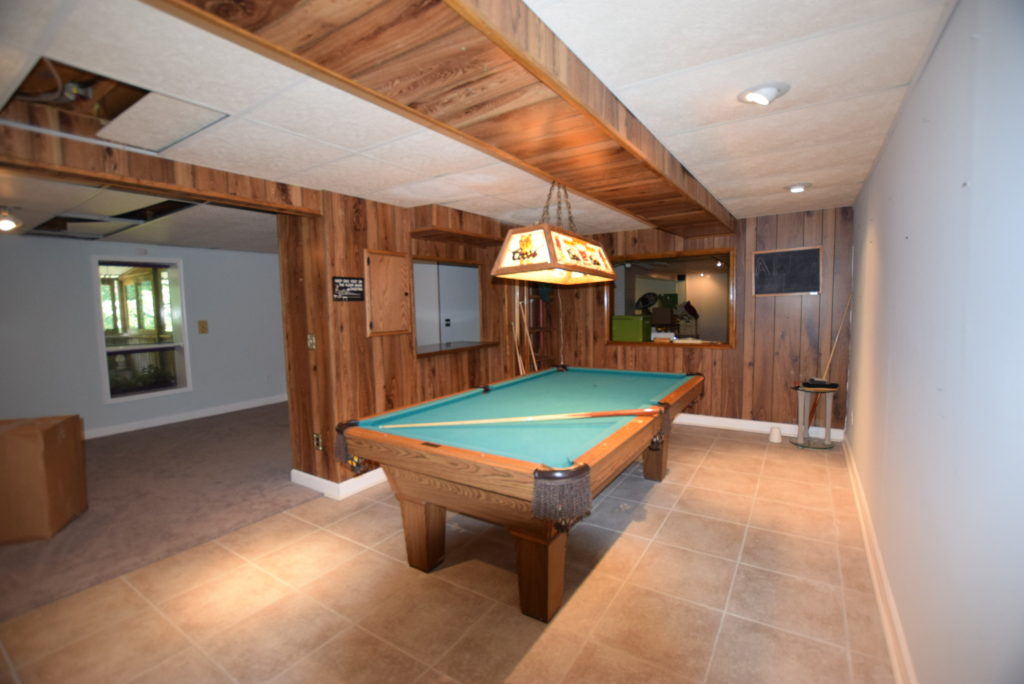
The short answer is, yes. We inherited a 1980’s pool table complete with all of it’s old ugly faux-wood formica trim and worn out kelly green felt when we bought this house almost 3 years ago. It SCREAMED dated, just like the rest of the place. However, for us non-pro billiard table owners, it seemed to be in pretty decent shape otherwise. And truth be told it would probably cost a ton just to get someone to disassemble it and haul it out of here. So I decided to fix it up. And well, since I have a ton of other things I need to spend money on in this house I decided it needed to be a budget friendly, mostly DIY fix.
My fugly (but free) 80’s pool table
What I really wanted was a table that looked more like this gorgeous number from Pottery Barn. And I thought I could pull it off for a fraction of it’s $7500 price tag.
Sweet PB pool table of my dreams
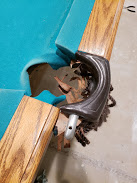
So going in I knew I needed to re-felt the table. The old felt was worn and was nearly bald in spots. While I have read some blogs on DIY’ing this process, I “felt” (sorry couldn’t help myself) that re-felting was something I was going to have a pro do. I contacted a local billiard store and set that up. In the meantime, it meant that I had to disassemble the table and get ready for the re-felting appointment. I removed the faux wood trim that skirts the side lip of the table (it was flimsily tacked on with finishing nails) and it was so old and brittle that it actually crumbled as I pried it off. Eventually I threw out these pieces and replaced them with some select pine boards 1 x 4s that I bought at Home Depot. I removed the bolts from underneath the table that allowed me to pull out the rails and bumpers. In addition to being held in by bolts, these pieces are held to one another by the pockets which have sturdy pins on each end.
Pocket pins hold rails together
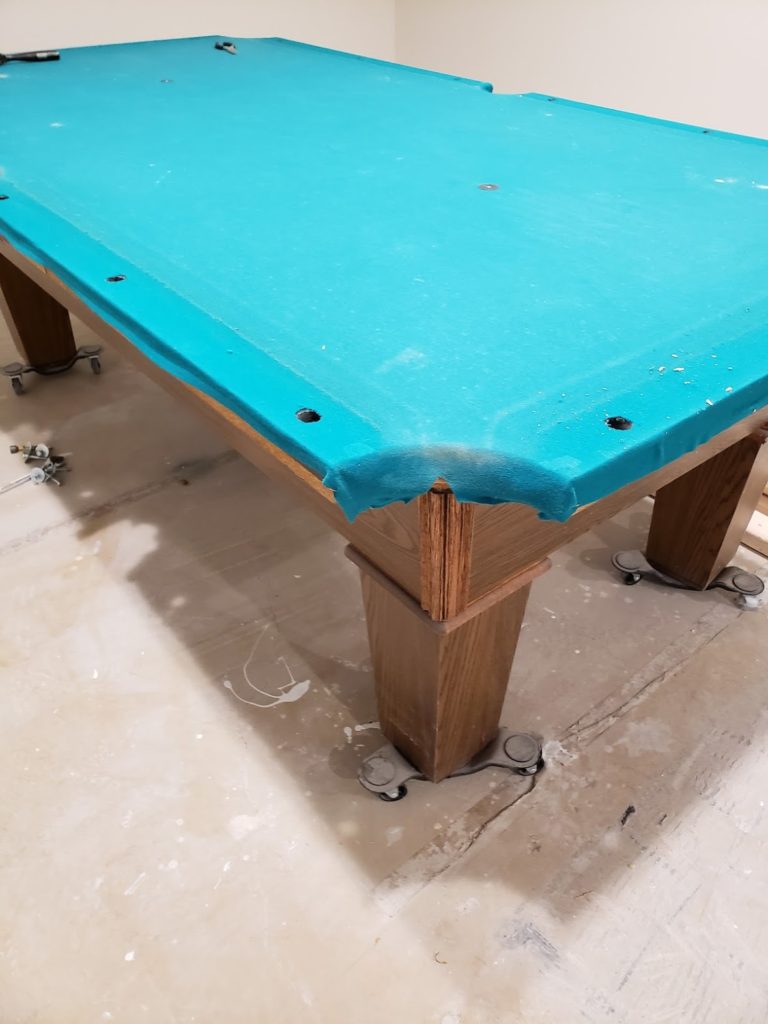
I despised the look of the fringe pockets on our table and ordered a new set of slightly less ugly leather pockets on Amazon (most of the good-looking modern pool tables have rails with integrated pockets – the only options for replacing the older style is either fringe or leather). Hey pool table repair companies, there’s market space available for those that provide attractive replacement pool table pockets – wiiiiide open.
All rails and bumpers and side skirts removed.
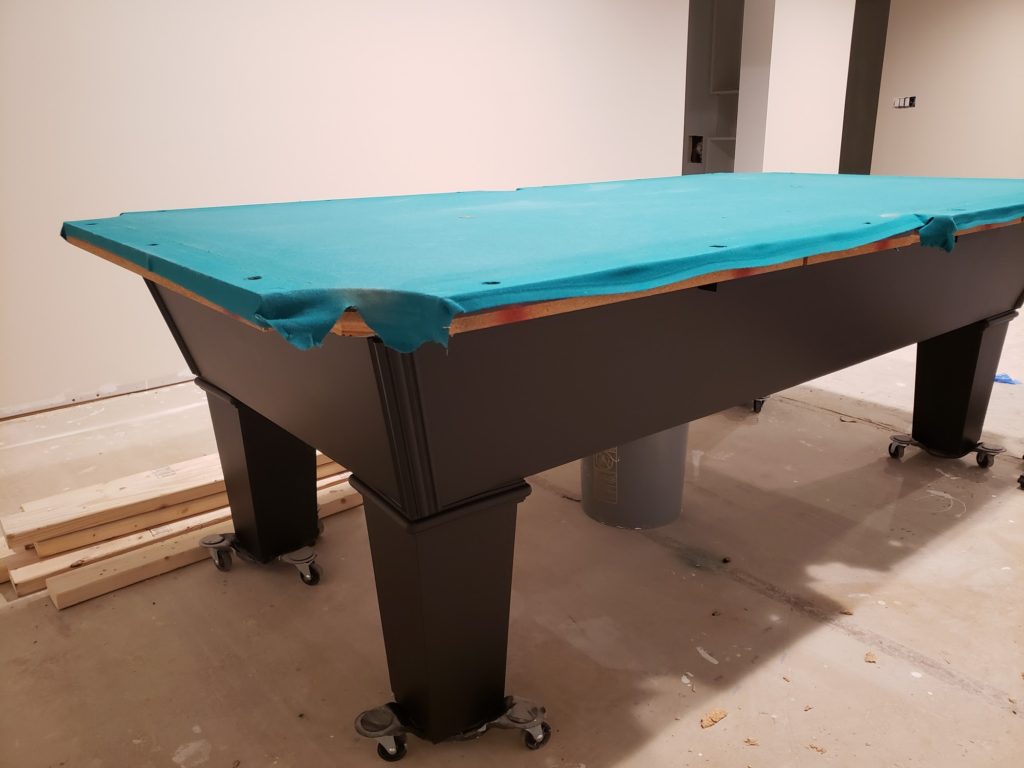
Once I had the rails and pockets off, I used a deglosser called Liquid Sandpaper to prepare the wood for refinishing. I then primed it with Zinsser B-I-N Primer. This is a super polymer-based primer (great for covering knots in wood or stains). I used it because I wasn’t sure how well paint would adhere and be resilient to wear and tear on something like a pool table rail that gets frequent cue hits and arms resting on it. I then took great care using a foam roller and several coats of a satin finish black paint, I think it was leftover paint from some of my interior door and window trim.
Base repainted black. Looking better already!
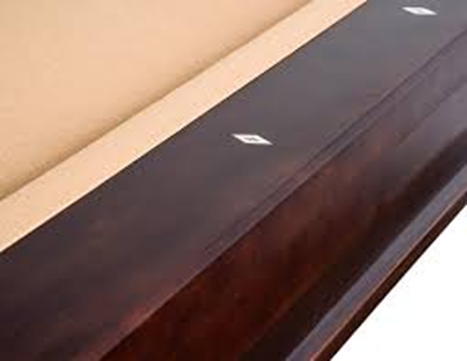
The most challenging part of the painting process was having to take care using many q-tips dipped in acetone to remove the paint on the little inlay pearl rail sight markers that I carelessly painted over.
Pearl inlay rail sights – try to paint around these.
Once painting was complete the pool table was ready to be re-felted. The billiard technician came to my home with all his tools and the dark grey felt that I had selected. After watching him do the re-felting process, I think I probably could have done this part too. He removed the old felt, used a spray adhesive straight on the slate and laid the new felt out, wrapped it over the edges and stapled it to the wood underneath. However, it’s probably best that he did do this because when he removed the felt from the rails he noticed a problem. The rubber bumpers attached to the rails was brittle and rotten. There was no sense in re-felting over bad rubber resulting in a table that performs poorly, so I decided to go ahead and have him replace the bumpers too. The billiard technicians also leveled the table in its final resting place in the room, then they put it all back together including the new pockets, new bumpers, rails and even the painted and primed pine boards I used for side skirts. We completed the area with an inexpensive black cue rack mounted to the wall.
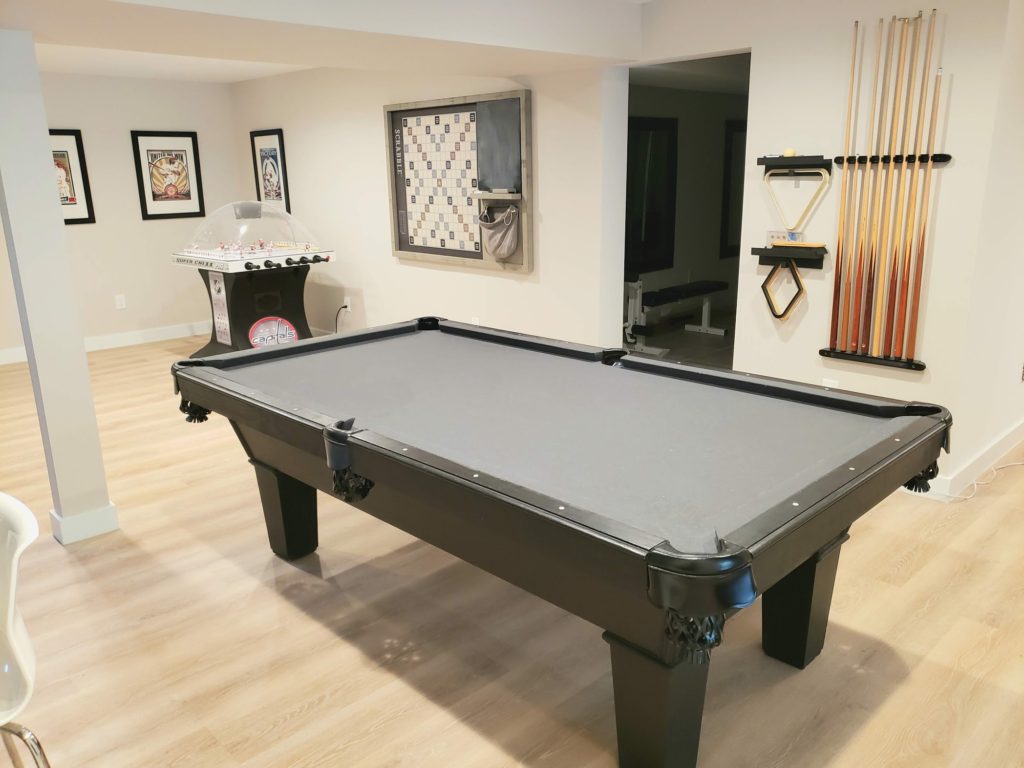
Refinished Pool table
All totaled, refurbishing this full size pool table cost under $800 including the re-felting, re-bumpering, primer, paint, wood trim, leather pockets and cue rack. While that’s not cheap, it’s certainly cheaper than buying a brand new regulation size table which can easily set you back about $3500 on the lower end or in the $7 to 10K range for the modern looking ones at Pottery Barn or Crate and Barrel.
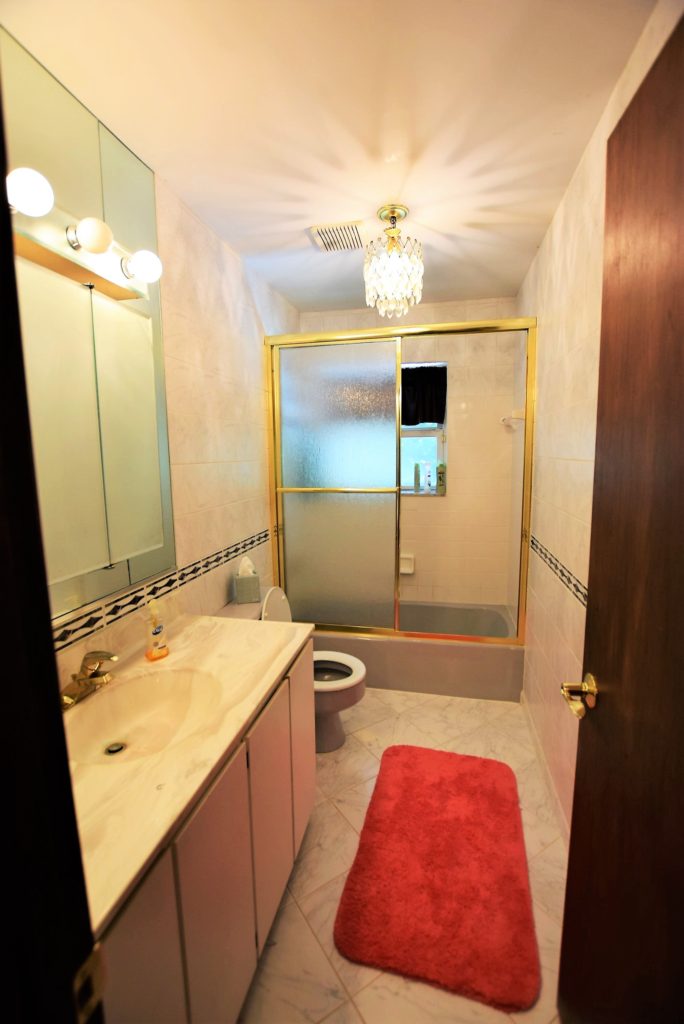
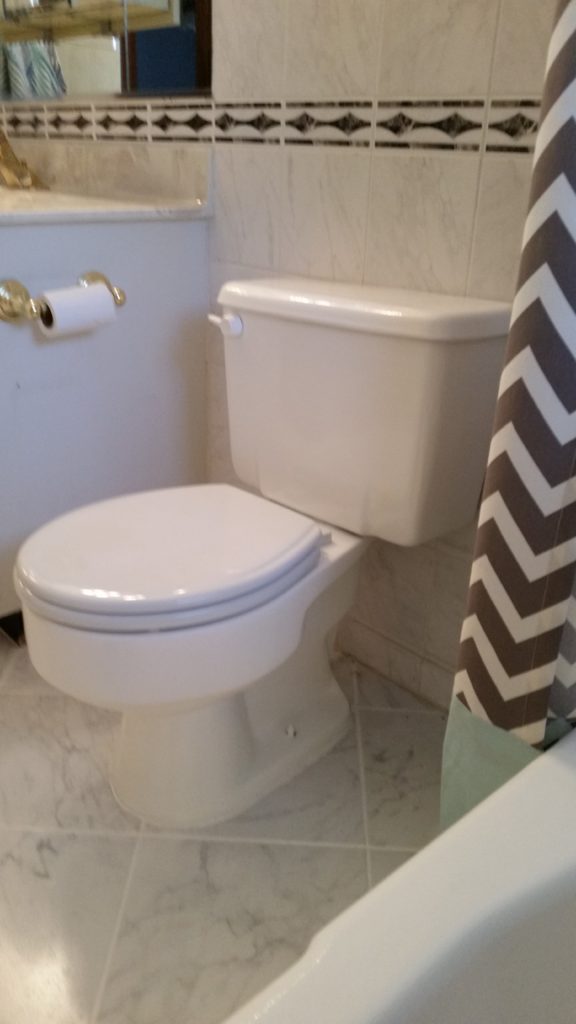
I’ve talked a lot about all the upcoming projects at my new (to me) old house but do you know where I actually started? The nicest bathroom in the house. Ok, nicest is being generous. It is the least ugly. And by least ugly, I mean Carrera look alike ceramic tile from floor to ceiling (varying sizes with a mid-wall border), white builder grade tile in the tub/shower, gold trimmed safety glass sliding shower door, crystal chandeliers (not the good kind), off white circa 1985 laminate vanity with cultured marble top, gold faucets, and a grey tub and toilet. I thought I could work with the tile, especially because I was not relishing the idea of demoing then re-drywalling the entire bathroom, but the rest was gonna have to go. First up – a makeover was in order for that tub and toilet. You really don’t see many colored toilets or tubs in new homes, they are almost always white or occasionally off-white. Even though our grey tub wasn’t as offensive as a mustard yellow, avocado green or, gasp, a burgundy tub, any color other than white just screams “dated!”
Before bathroom with grey toilet and tub and fancy gold shower door!
The Plan
Since I had no plans to totally gut this bathroom Plan A was to try and coat the tub in one of those specially formulated epoxy based paints for tub and tile. If it failed, then Plan B would be to rip out the tub and toilet. I’d heard good things from others who had done this project and read mixed reviews online but still felt it was worth a shot to potentially save over a thousand dollars and the sweat equity involved in replacing the tub and toilet.
Materials
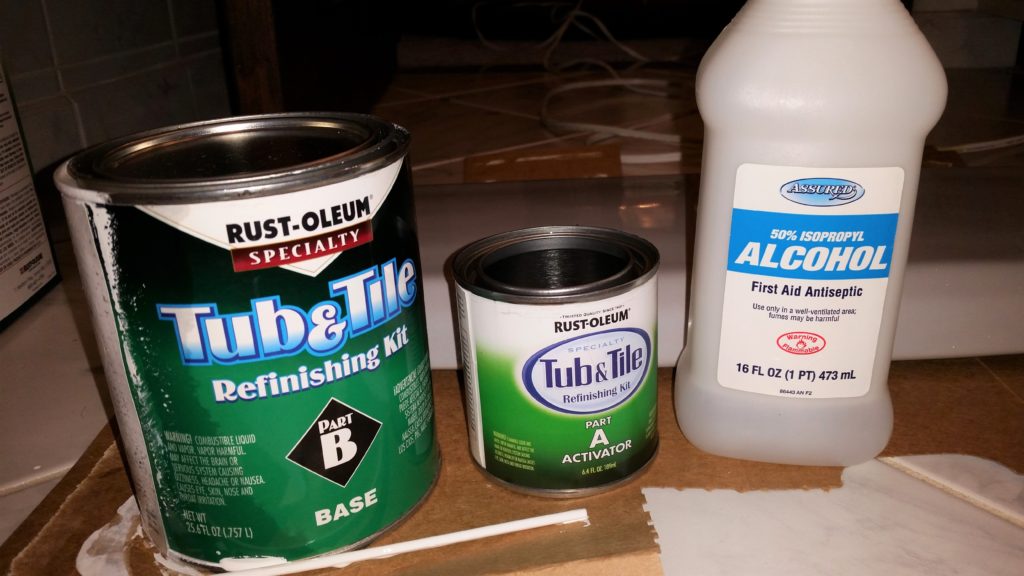
I first checked my local Home Depot and Lowe’s but both only carried a brand of tub coating that got terrible reviews. I bought Rustoleum Tub and Tile Refinisher (2 kits) on Amazon and it was at my house in 2 days.
This is a high quality tub and tile paint. Rubbing alcohol can be used to clean up drips.
Other supplies I used included:
Fine grit sandpaper
Mask, rubber gloves
Calcium Lime and Rust (CLR) cleaner
Bleach-based cleaner
Alcohol
Caulk remover tool or razor blade
Mini paint roller for smooth surfaces
Blue painter’s tape
Tack cloth
Screw driver
Drill
How to Paint a Tub (or any other ugly bathroom surface)
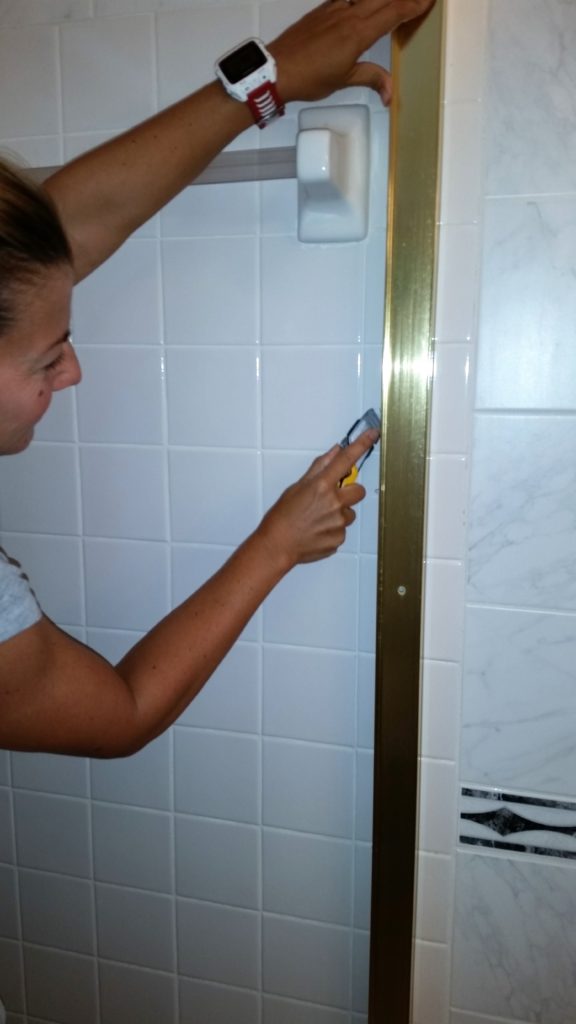
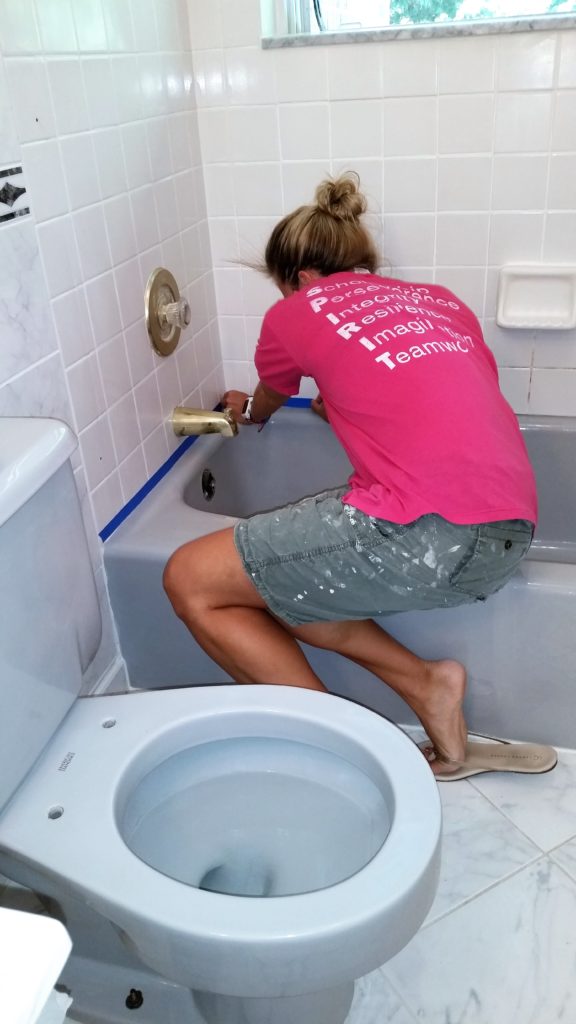
First, I removed the gold shower doors and track. I planned on putting up a shower curtain afterwards. After they were unscrewed, I had to remove excess silicone from the tub lip and tile with a razor blade. I also went back later and filled the holes where the track had been screwed into the tile with white caulk. I also removed all the caulk between the tile and the tub and unscrewed the little brass drain doo-hickey. I didn’t bother removing the toilet handle deciding to make it white since most toilet handles these days are the same color as the toilet anyway. The toilet already had a new-ish white seat on it so I removed that.
A utility knife can be used to remove the caulk or silicone between the shower doors rails and the tile.
With the doors out of the way, I gave the area in and around the tub and toilet a really thorough cleaning with a bleach based cleaner in a lame attempt to remove lots of mildew and other nasty stuff.
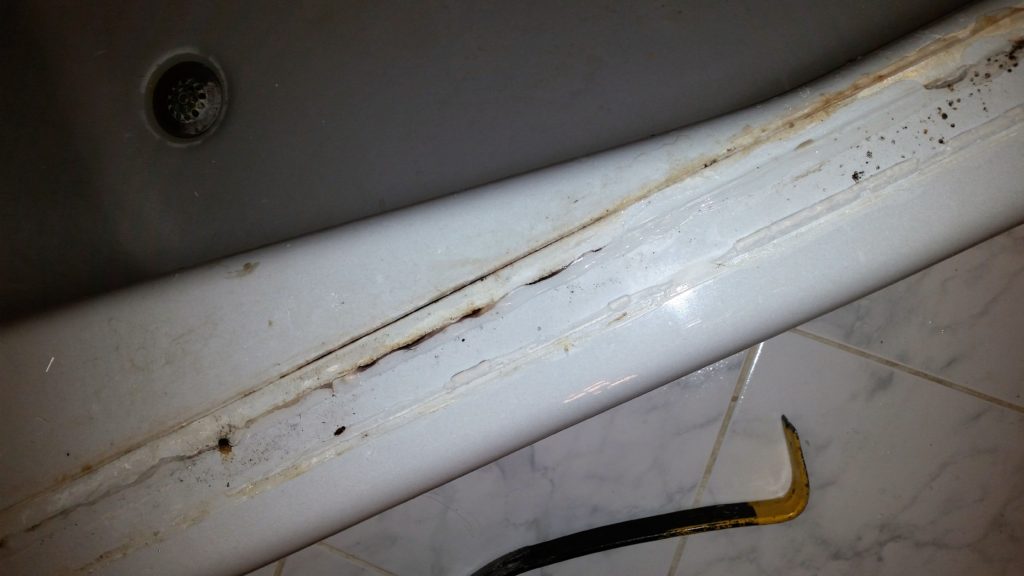
This is the gross crud that may be under a 30 year old shower door. Eww.
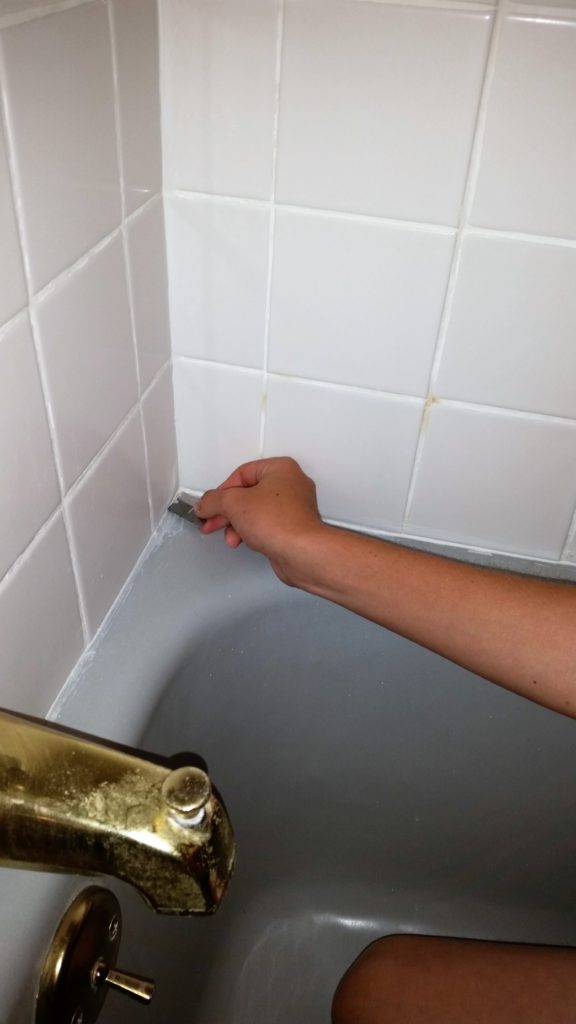
This left me better able to see any other remnants of caulk or silicone that had to be removed around the entire tub.
Scrape off old caulk with a razor blade. The paint won’t stick to caulk or silicone.
Still there is a set of about 6 tiles with brownish yellow grout that I just could not get cleaned that will get new grout once I do other tiling, but these didn’t concern me too much since I didn’t want to paint the tile, only the tub and toilet.
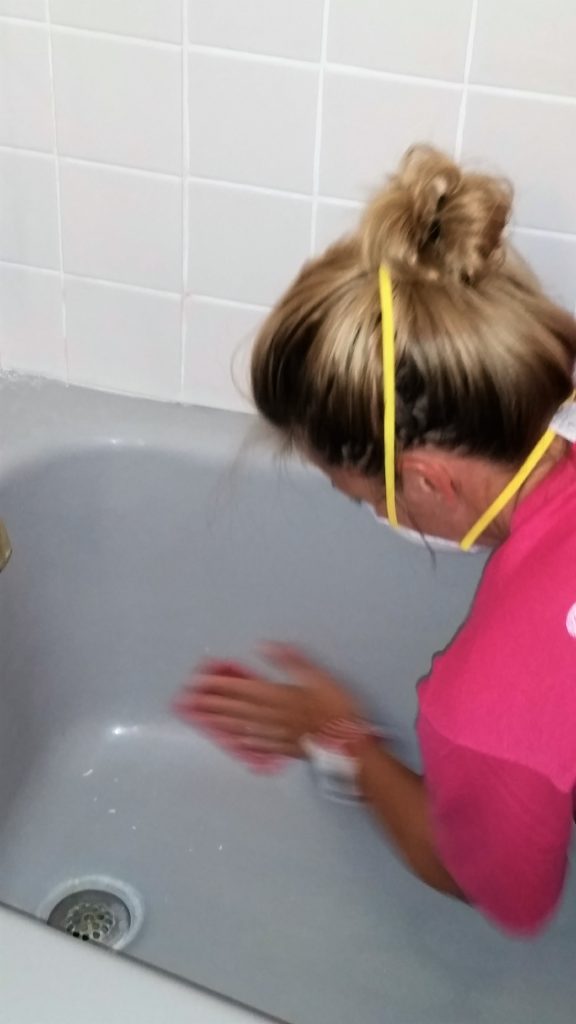
Next, I cleaned the tub and toilet with CLR. This was especially important because we have well water which generally has more minerals in it than city water and can leave residue on your tub. Regardless of your water source, do this step anyway. Your tub can’t be too clean for this process. Note, CLR, when used in a small space has fumes so wear a mask, open a window and turn on your bath fan for ventilation.
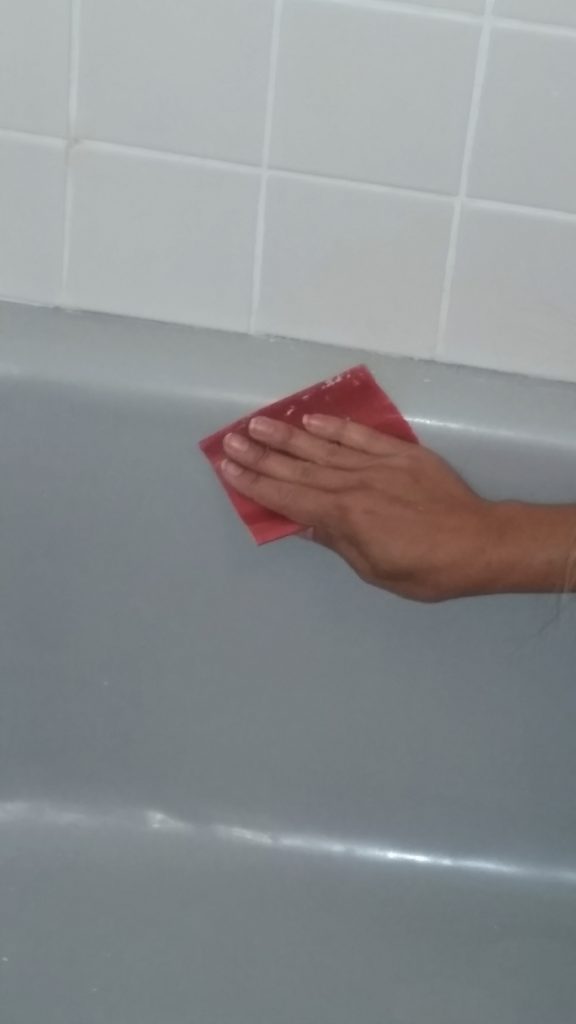
After everything was clean, I sanded the tub and toilet with very fine grit sandpaper. I used a 400 grit. Then I rinsed with water, dried it, sanded and rinsed again.
Sand the entire surface with a fine grit sandpaper to remove leftover scum and to slightly score the surface so it better accepts the paint.
…and sand some more… keep sanding….
Once everything is totally dry and dust free you are ready to paint. It’ll be important to assess where you are in the process before you commit to painting. The special paint is an epoxy that comes in 2 parts. Once it’s mixed it must be used in 6 hours, after that it thickens to the point where it’s unusable. I opted to come back the next day ready to paint.
I began day 2 by taking a tack cloth and running it over every surface to be painted to pick up any lint, dust, hair, and small particles that somehow magically appeared overnight. The surface must be perfect to accept the paint. I taped off the adjacent areas that weren’t going to get paint with blue painters tape.
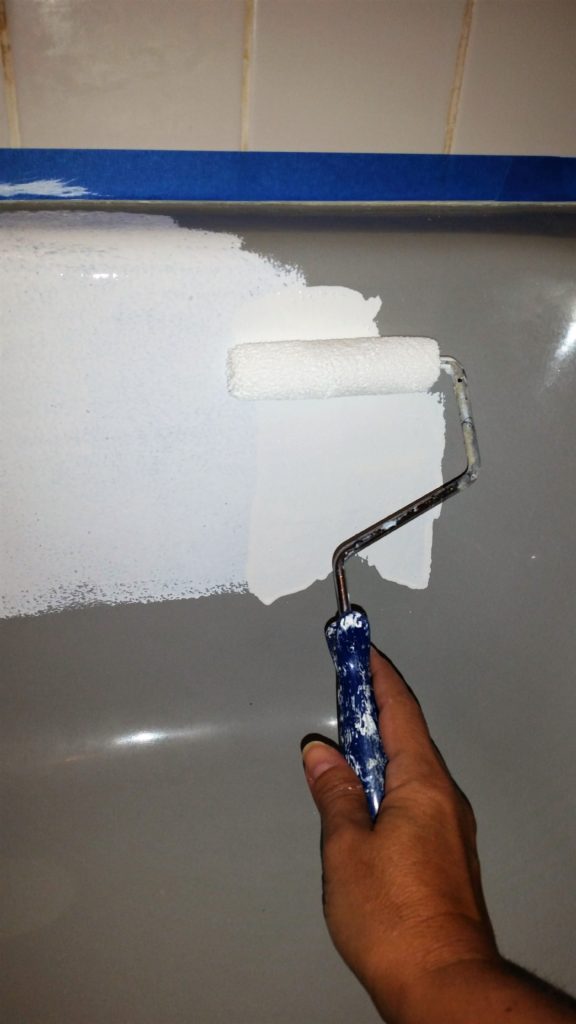
I followed Rustoleum’s directions and poured the contents of one container into the other and mixed them. The odors from this paint are noxious! Definitely wear a mask, open windows and put a fan or two on. No matter what you do it will permeate the whole house and linger for days, it’s that strong. I filled a disposable pan with some paint, soaked a fine nap roller made for smooth surfaces and started rolling. As advertised, the paint has unique self leveling properties… to a point. It is runny and will drip if you use too much so it’s better to use many thin coats rather than glob it on. Nobody wants a drippy tub. This stuff dries pretty quickly so if you find yourself overlapping an area you already did 5 minutes ago it may get tacky and not re-level so be careful of that.
Just roll the paint right on in thin coats.
I also noticed in areas where there once was silicone holding the door on it still didn’t adhere to even after scraping the silicone off, cleaning and sanding. In hindsight perhaps maybe using acetone might remove this residue, who knows? But since I had already started it was too late. I used the small foam brush in the corners where the tile met the tub and where the toilet met the floor. I removed the lid from the toilet tank so that I could cover the entire thing and also the tank itself. Now here’s where you might be wondering what I did inside the bowl which was also gray. I suppose I could have been all thorough-like and taken the toilet bowl water out in cupfuls then soaked up the last bits in rags, but nope, I didn’t. I just left it gray. And you might notice if the seat’s up and your looking right at it (sorry boys), but otherwise the eye is fooled into thinking it’s a shadow… at least that’s what I’m telling myself. I was honestly a little paranoid about screwing the inside of it up then having to rip the toilet out altogether, which wouldn’t normally be a big deal but some moron grouted, yes, grouted the toilet to the floor – ugh.
Anyway, 2 coats later and I could still see gray through, so I knew I was definitely doing a third. I decided to wait until the next day for more complete drying. I used what little I had left in my paint pan to cover a nasty looking fiberglass slop sink in my laundry room.
The tub and tile paint works on fiberglass too, like for this utility sink.
This thing was so gross I wouldn’t have cleaned an old paint brush in it let alone laundry delicates (who am I kidding, I wash NOTHING by hand). Anyway, the slop sink looks brand new now. In between days 2 and 3 of this project is where I made my most critical mistake. I learned an old trick a few years ago that if you’re painting project will take you the course of several days then you put your brush or roller in a plastic bag, wrap it up tight and stick it in the fridge and the next time you paint it’s still perfect and fresh, not at all gunky or dried up. It can save you a ton of time cleaning brushes. Whatever you do DO NOT PUT THIS (or any epoxy, shellac or varnish based paint) in your fridge. Certain foods are very susceptible to odors and flavors that may escape the wrapped brush or roller and totally ruin your food. I learned this the hard way. I had an English Muffin the next morning with a little epoxy-butter. Yech. Butter itself isn’t healthy but chlorofluorocarbon laced butter is most certainly even worse for you.
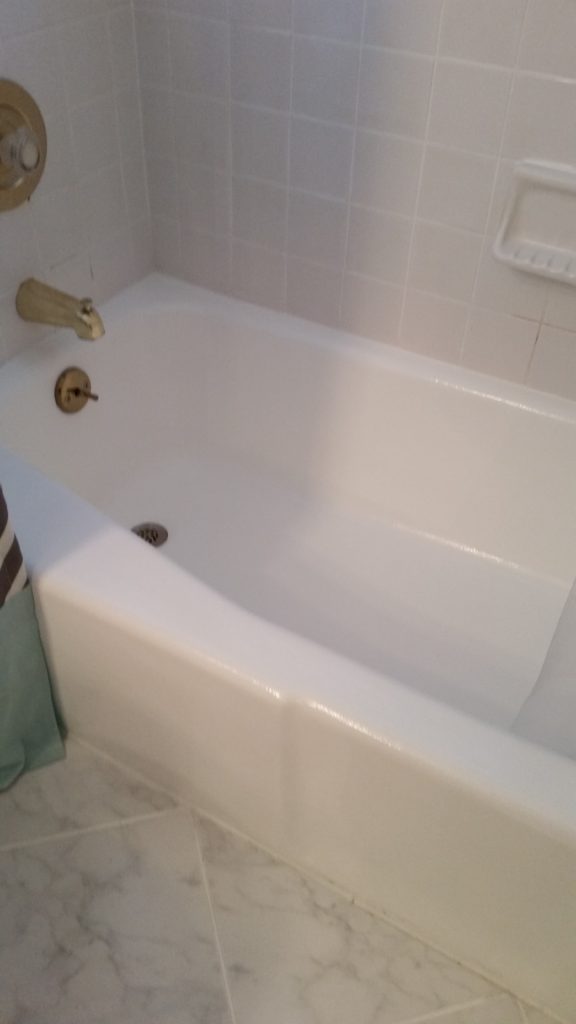
On day 3 of the tub project I mixed the second set of cans together to do coats 3 and 4 on the tub and toilet. (WARNING! Many a YouTube video will make this whole project look like it’s complete in mere hours, not days. Lies…all lies…unless one has nothing better to do that literally sit around and watch paint dry.) Anyway, after the third coat the silicone residue area on the rim of the tub was starting to get covered and accept the paint. With a 4th coat the paint was fully covering this area and for good measure I gave just this area a 5th coat.
The tub (minus ugly gold hardware) looks like new!
You’d never know this toilet used to be grey!
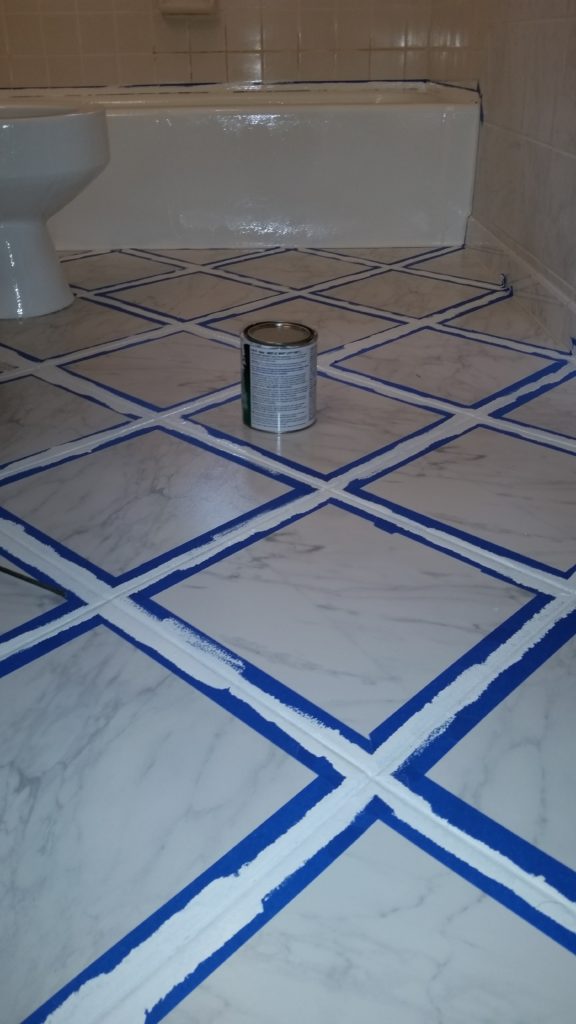
I still had some paint left over so I racked my brain about what else I could epoxy-paint. And then, an epiphany! What is the bane of every awesome looking kitchen or bath that at some point WILL definitely go down the tubes and look like crap? Yep, the grout. I dunno what’s in that grout sealer they sell but I am convinced it’s a racket. Grout never stays clean. So it remains to be seen if this will last or not but I decided to paint the grout in between the bathroom floor tiles. Figured it couldn’t be any worse than the dingy dirty gray-brown that currently flanked the bright white and grey tiles. It was a bit tedious taping off each tile, but it seriously turned out better than I expected.
Use painters tape against any edge that you don’t want to get paint on while completely coating the grout in epoxy paint.
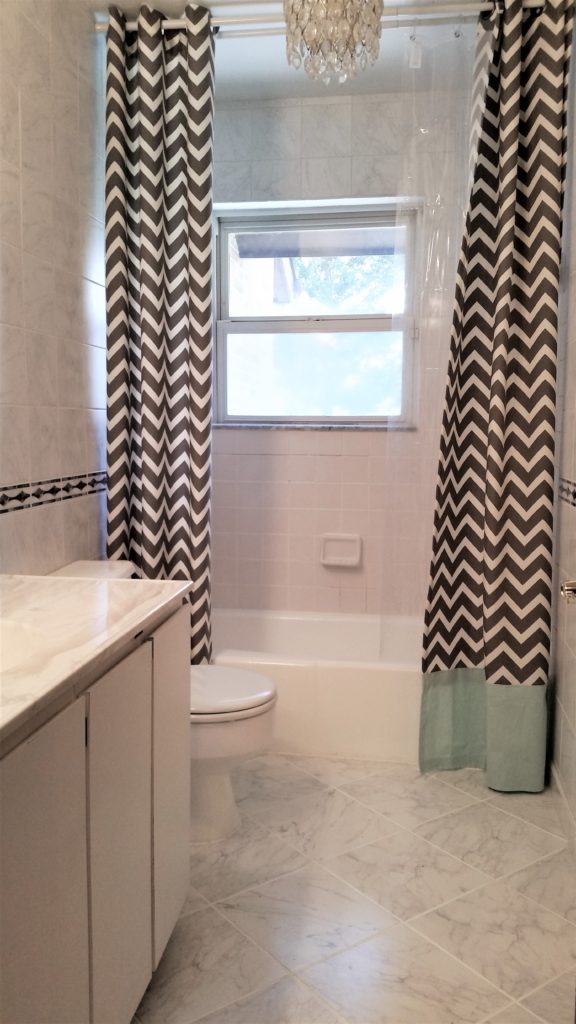
I did 2 coats. All of the tub and tile paint has to cure for at least 72 hours before it can get wet and sustain foot traffic. I waited that long before I put back the toilet lid, the drain thingy, then I hung 2 tension rods at the ceiling one for a liner and one for my extra-long shower curtain. Hanging your shower curtain at the ceiling makes the room look taller! And yes, I know, I know the chevron print shower curtain is soooooooo 2016, but I had it leftover from my last house. I’ll change it when I update the rest of the bathroom.
This bathroom is far from complete, but painting the tub, toilet and grout helped it a ton!
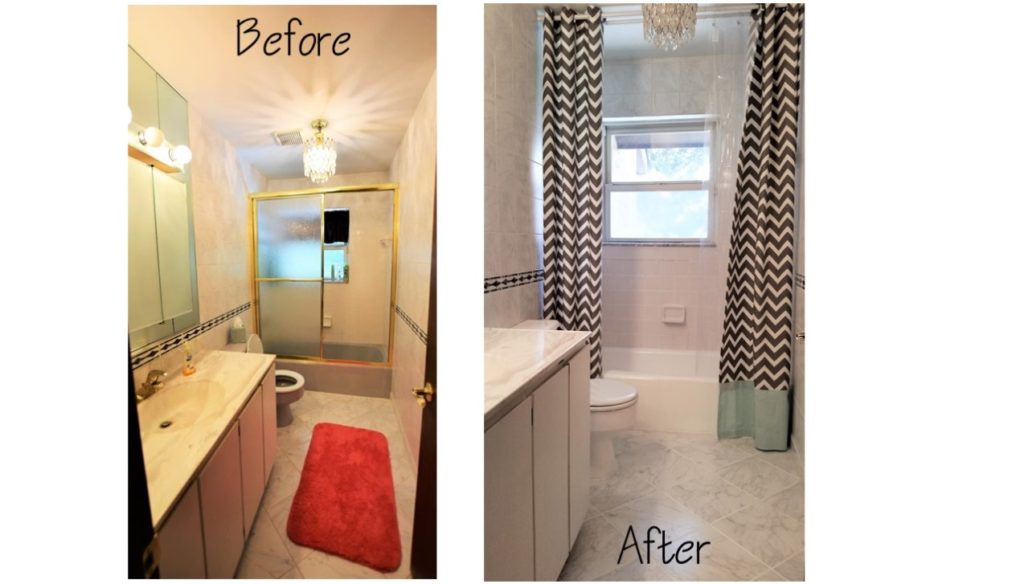
Results
It’s been almost 5 months since I painted the tub, toilet, laundry sink and tile grout and it all still looks great! Admittedly the finish isn’t as smooth as a regular tub, it’s a little dimpled, sort of like an orange peel, but it looks 100% better than having a dated bathroom ensemble. In the near future I’ll rip out the huge mirrored cabinet, fill the empty wall spaces left with remaining tile, and switch out the vanity and fixtures for something more current. So I’d not consider this photo a true “after” shot, but rather an interim. Now that we’re deep into the kitchen remodel and basement demo, it should only take me …. meh…. 3 years or so to get back to this project. Who’s hanging in there with me?
Ok, I had a serious moment (truthfully, it was a long moment… like several days long) of panic last week. I had heard that subscribers weren’t getting emails of my blog posts, so I set about trying to rectify this issue and found that all of the blog’s subscribers had vanished! Yikes! I noticed a few other website issues too. After lots of time on the phone and in chat with the help desk from my hosting company (who, um, weren’t so helpful), and then more time tinkering myself, I finally figured out how to fix it. Phew, HUGE sigh of relief! So my fingers are crossed that all of my subscribers are reading this via the link sent to their email. I “think” we’re back in business!
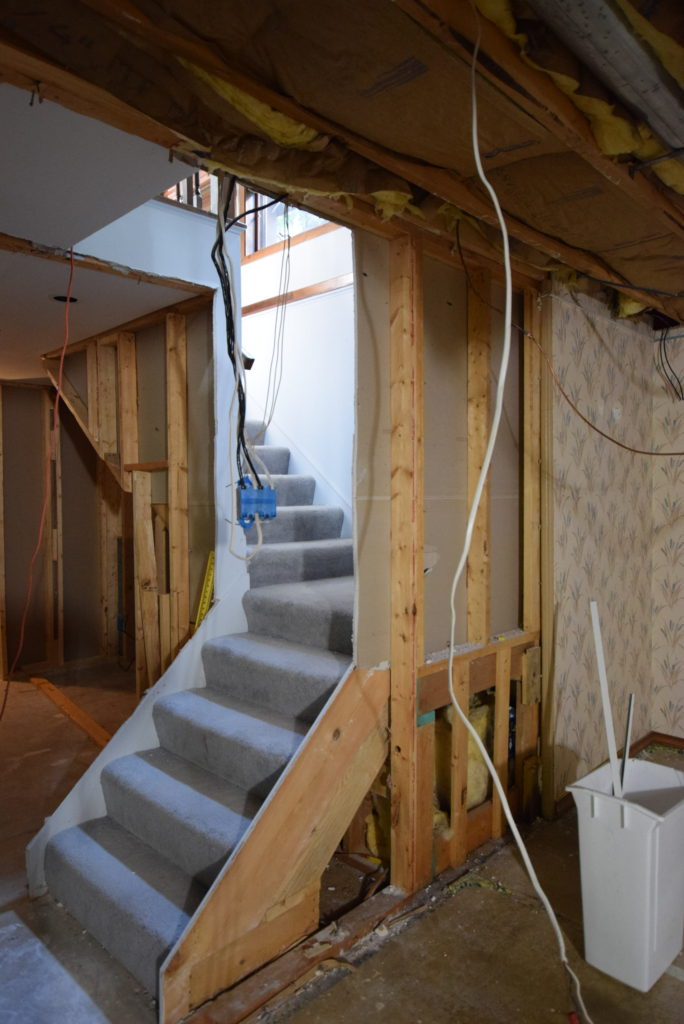
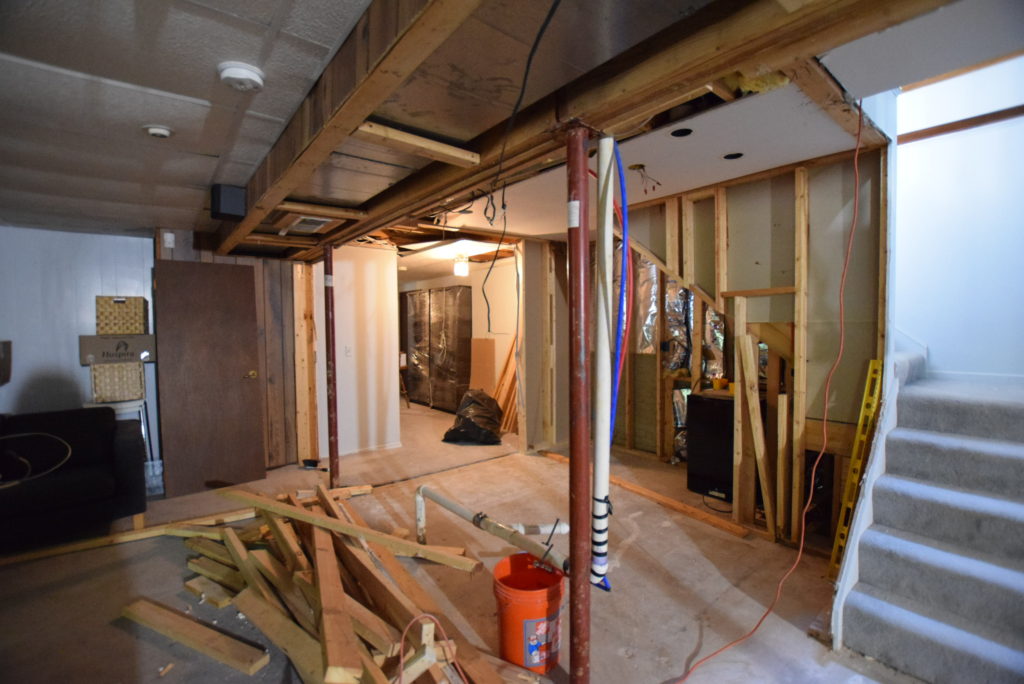
Anyway, I wanted to update you all on the progress here at my house renovation. I would technically not consider anything we’ve done so far as “renovation.” Let’s be honest, it’s all still demo. This will continue to be the case for a while. It feels never-ending. It’s definitely not as fast nor as fun as ‘ol Chip Gaines makes it look on Fixer Upper! Every weekend we continue to tear out old paneling, mirrors, drywall, carpet and drop ceiling in the basement. We are also trying desperately to track all the electrical and make sense of what had been done previously. The entire drop ceiling is a mess of wires that we aim to nicely package in one existing soffit so we don’t have to do a drop ceiling again, cause let’s face it, drop ceilings in an already low basement are no bueno.
Ultimately, given the current state of the basement, we’d probably have been better off if the basement hadn’t been finished in the first place. When the home was inspected we saw that the ceiling of the basement was insulated (which isn’t required) so we thought it was a real plus. Well, now we have to rip it all out. Why? Because it’s made a nice cushion-y bed/ graveyard for mice. As we pull out walls and ceiling and insulation we’ve come across 44 mice (all dead) so far and a TON of mouse poop. We’ve also found some black mold on the western wall sheetrock so even though we weren’t planning on ripping that drywall out, now we must. I’ve put out a few more traps in case there are any surviving mice and once demo is complete will probably have a pest control company come in to close up any possible points of entry. In the mean time we’ll keep the dead-mouse-tracker going and continue to be skeeved out.
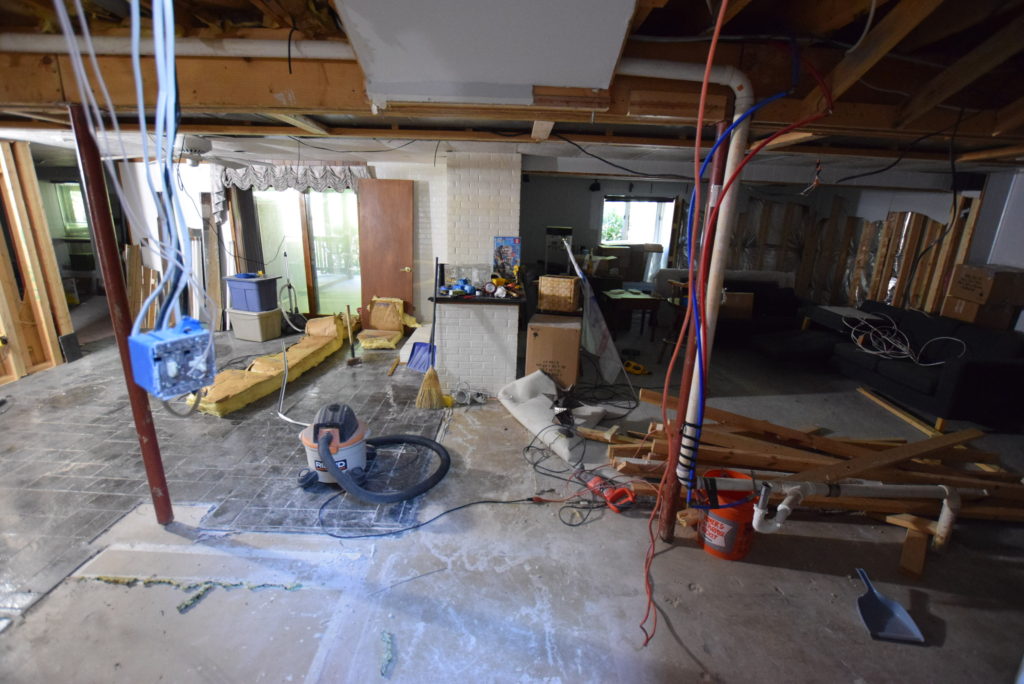
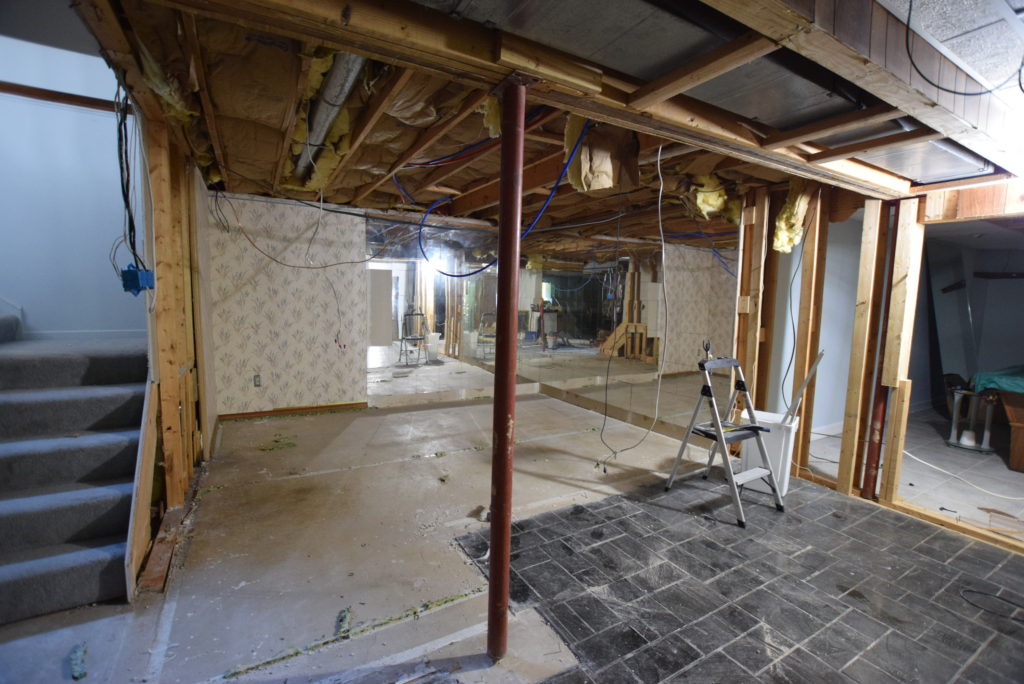
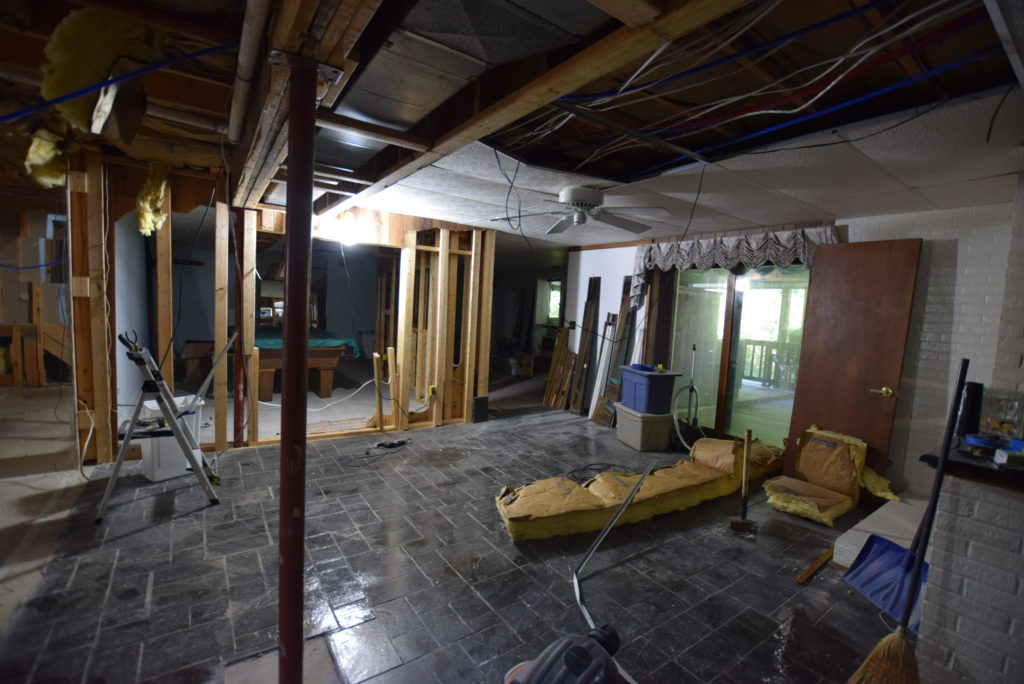
This basement demo has been riddled with issues, but already it looks so much better. It’s much more open and airy. It feels like a larger and more usable space. Here’s a few progress pics. And if anyone has a surefire way to rid a house of mice once and for all I’m all ears. And yes, I plan on dropping about a grand at the container store to finally get the Pinterest perfect pantry complete with pretty mouse-proof glass containers for all of my flour, cereal, pasta, et cetera. For the peace of mind that I am certainly eating mouse poop free Cheerios, I think it’s worth it.
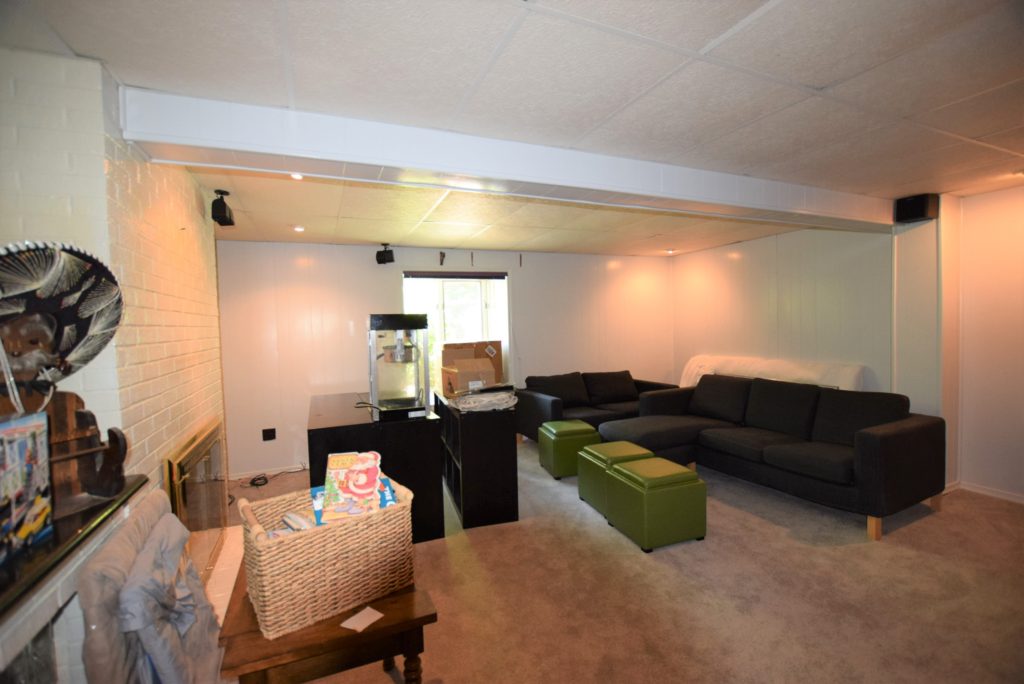
In the last post I took you through the main level of our big renovation adventure, “before edition”. Today I’d like to take you through the downstairs. Well, actually, I don’t want to, because it’s a bit embarrassing. It’s the basement level of our 5200 sq foot house and the basement is just as long and rambling as the upstairs. Right now it’s filled with moving boxes and furnishings scattered aimlessly. Our justification for this helter-skelter appearance is, “Why bother to take a ton of effort in establishing this space as livable rooms since so much of it will get renovated?” Maybe this is lazy, but we’re saying it’s practical. So hold on to your hats for this messy tour.
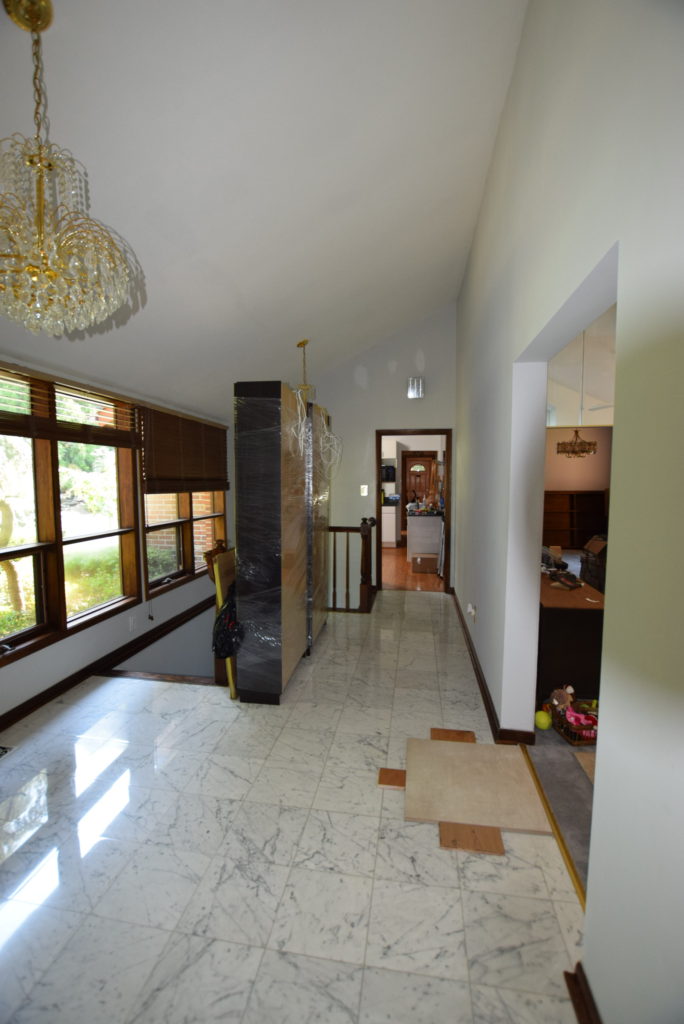
The 2 really great things about this basement are that a) one side is completely at ground level, so we have full sized windows and doors, rather than those mini basement windows and b) the basement stretches the full length of the house. You can enter this level right from the foyer, which is a little odd. Hopefully we can make the basement feel more like the lower level of the home than a basement so this setup won’t seem so bizarre.
Basement Before Tour
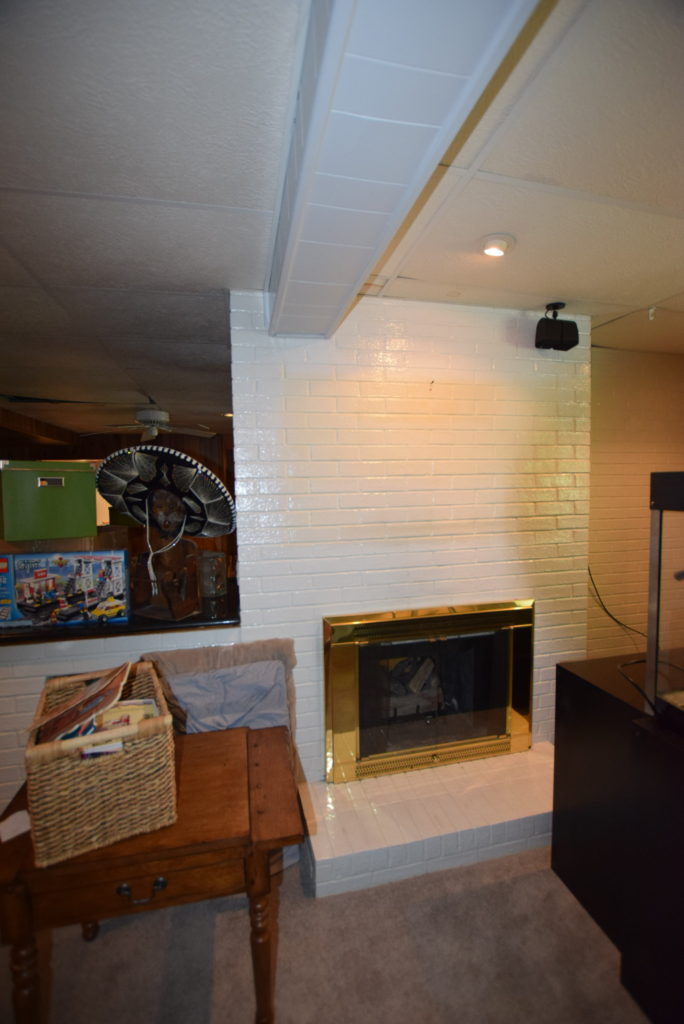
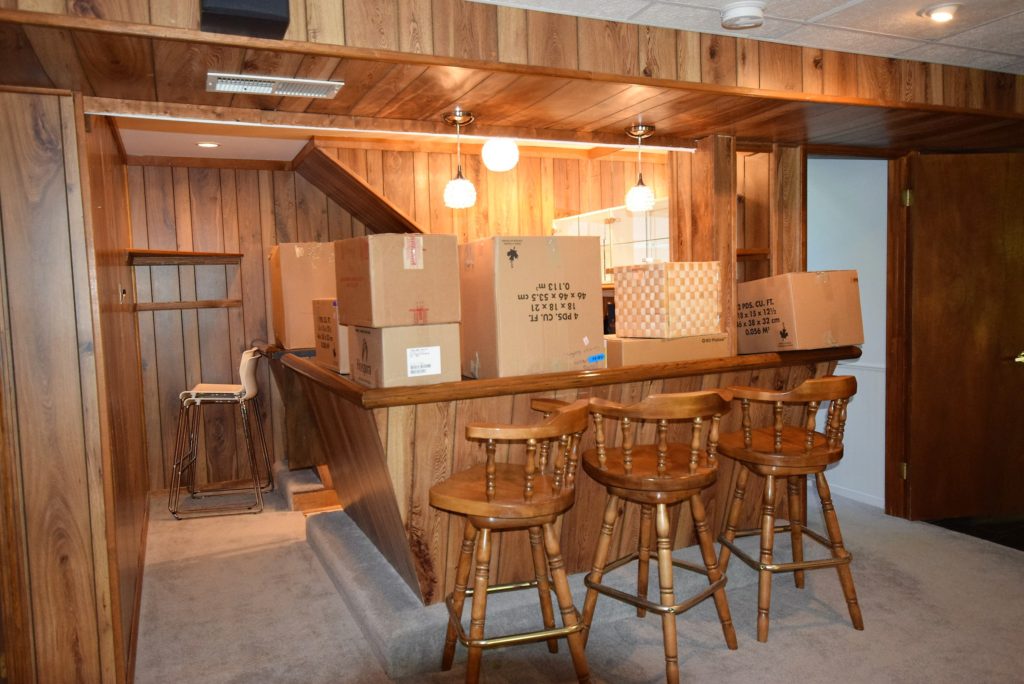
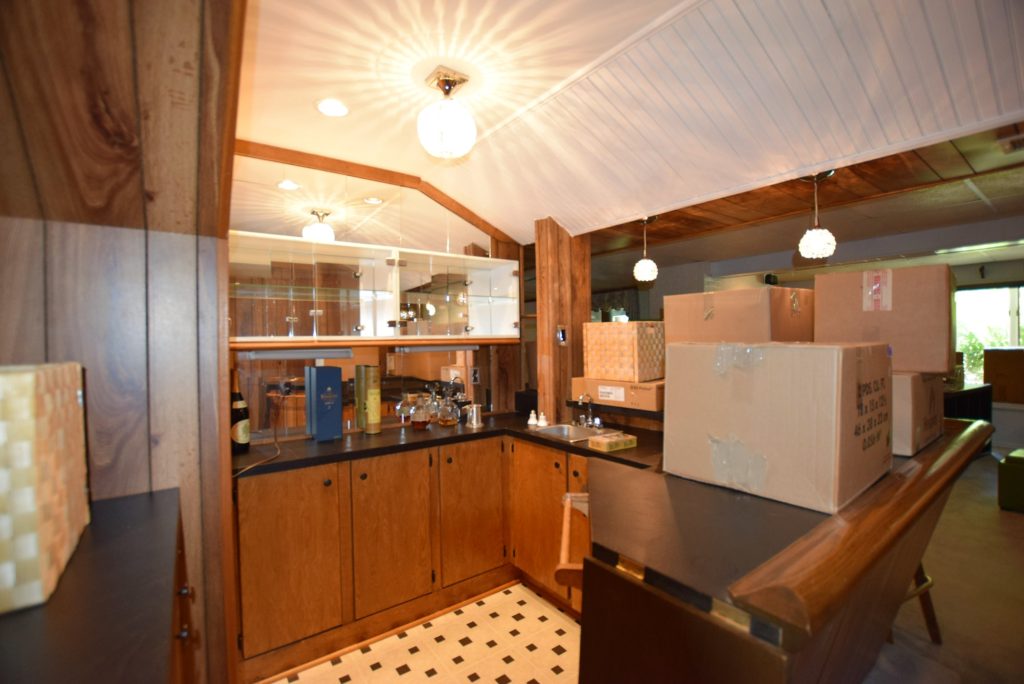
The stairs lead to the main living space which also shares space with a built in bar. There is an interesting 3-sided box window (like a bay window but with 90 degree angles) that has a small seat area with awesome vinyl tile on the top. This room also has a 2 sided fireplace and like most of the basement, a drop ceiling. The bar area looks straight out of the 70’s with wood paneling, linoleum flooring and lots of mirrors. The bar’s saving grace are the pendant light fixtures which are actually kinda cute. Mind you, they neither go with the wood paneling nor are they my taste nor will they coordinate with the future style of the home, but they are sweet little fixtures.
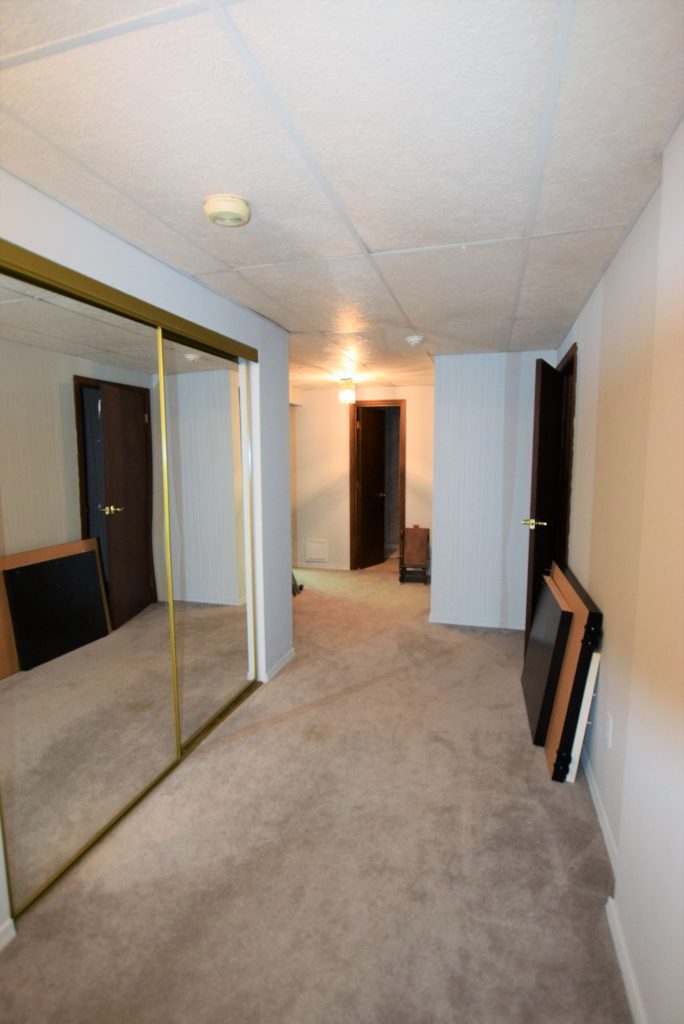
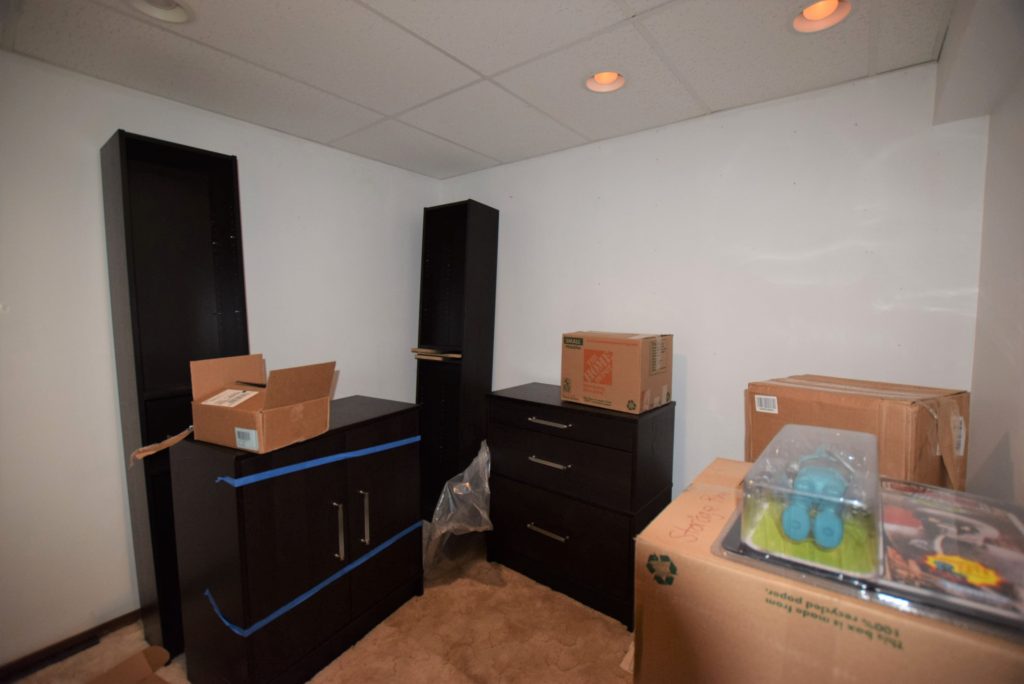
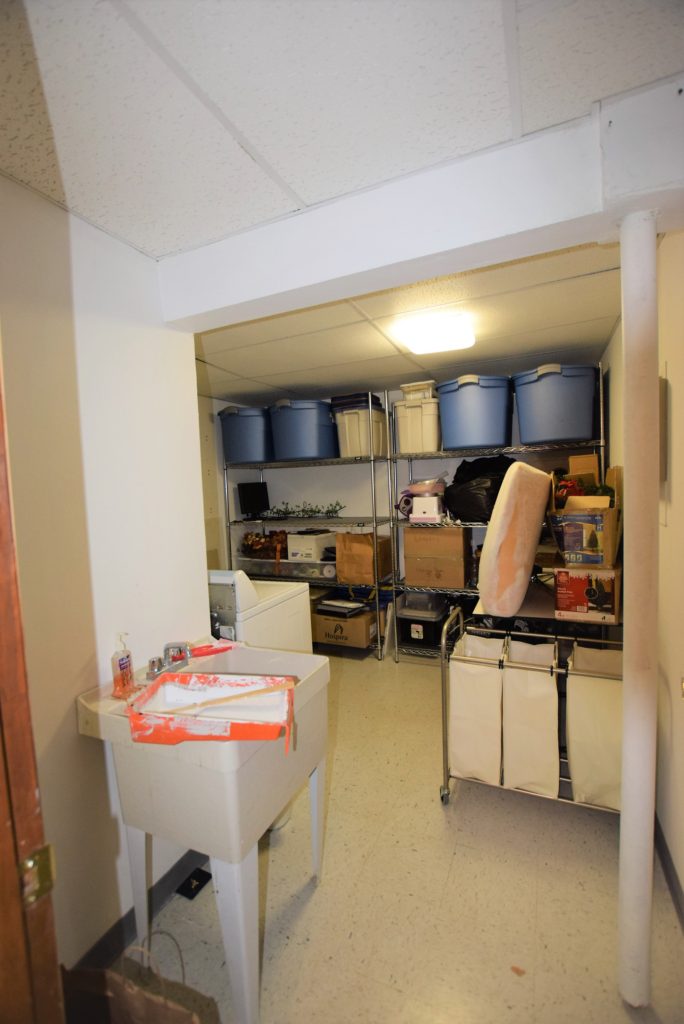
Around the corner from the bar is a wide hallway which houses the utility room hidden behind sliding mirrored doors. There is a very small room on the right that was at one point a home office. I know I won’t be able to use it as my home office because there are no windows. The current laundry room is also off the hallway and doubles as a storage room. The utility sink got a quick facelift this week with leftover Rustoleum Tub and Tile paint (more in a future post) and the washer and dryer will eventually be moved upstairs to the mudroom.
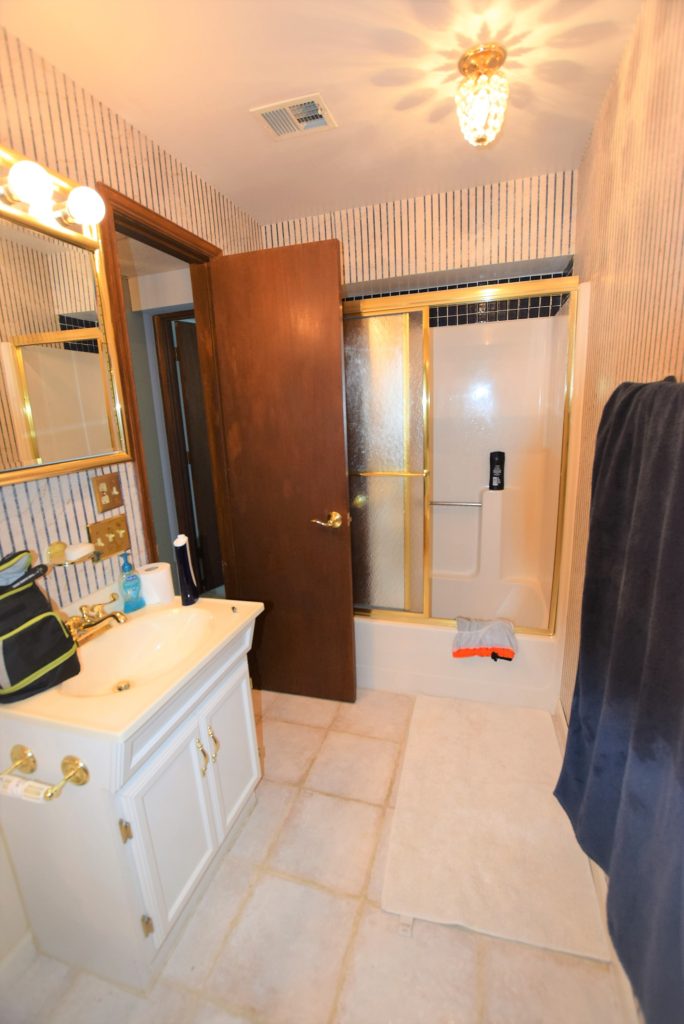
There is a small bathroom at the end of the hall. Oh, how I wish it was closer to the exterior door to service the pool! We can at least work on updating the finishes and fixtures. We’ll also look for a way to rearrange the shower since there is a large HVAC soffit running right over the shower head. This shower is for short people only!
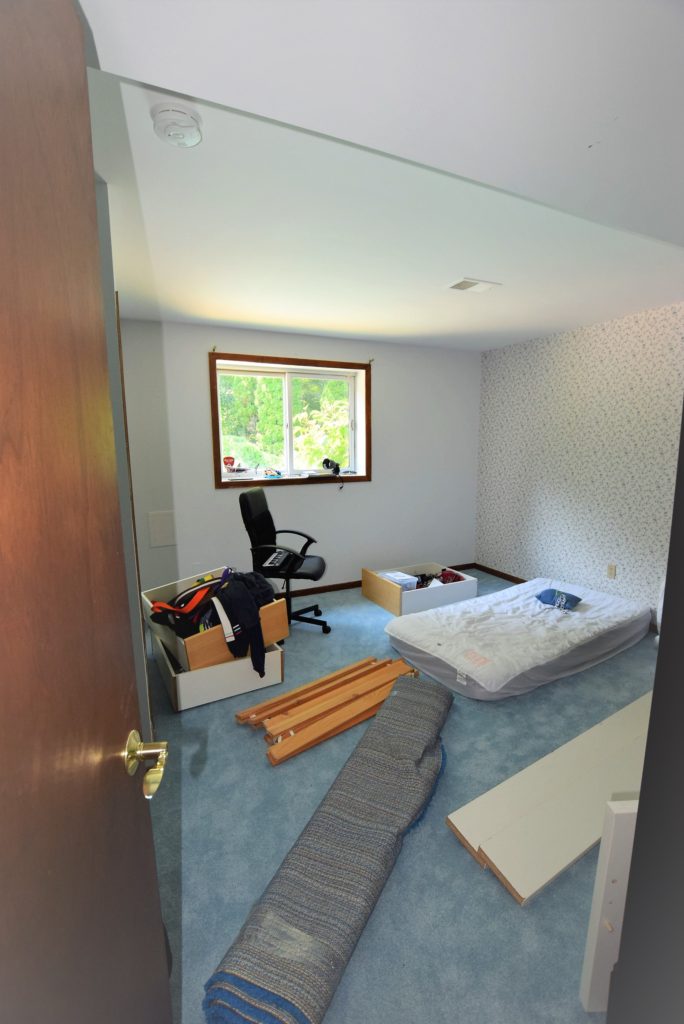
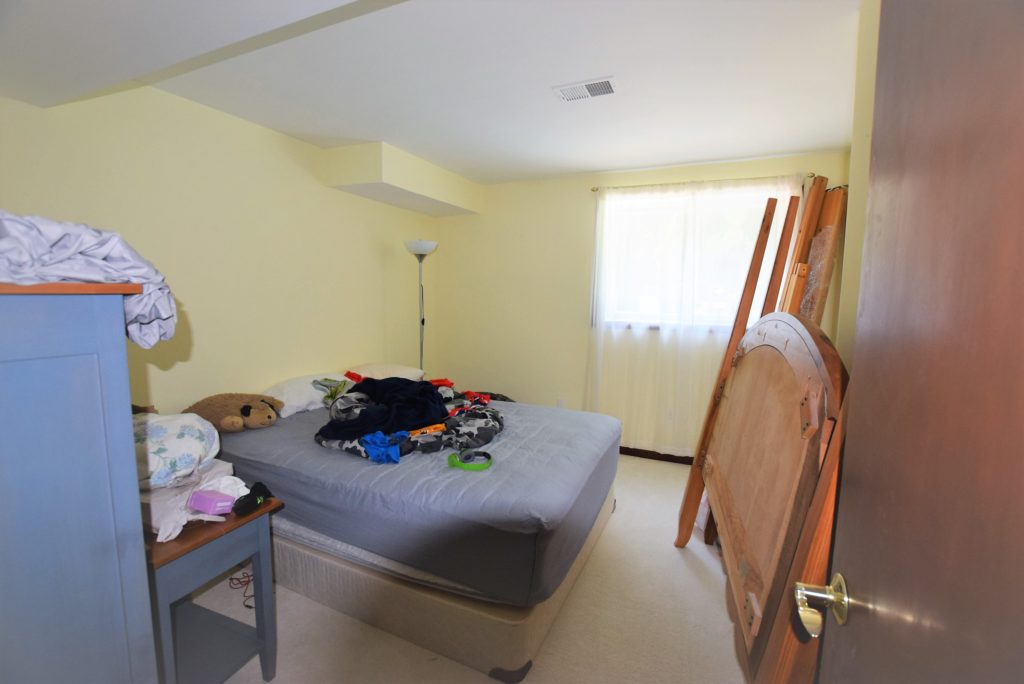
Two bedrooms at this end of the home have flowered wallpaper, mirrored closet doors and carpet. However, to their credit, they each have a full-size window overlooking the pool and patio and a real drywall ceiling. I can’t believe I am getting excited by drywall ceilings.
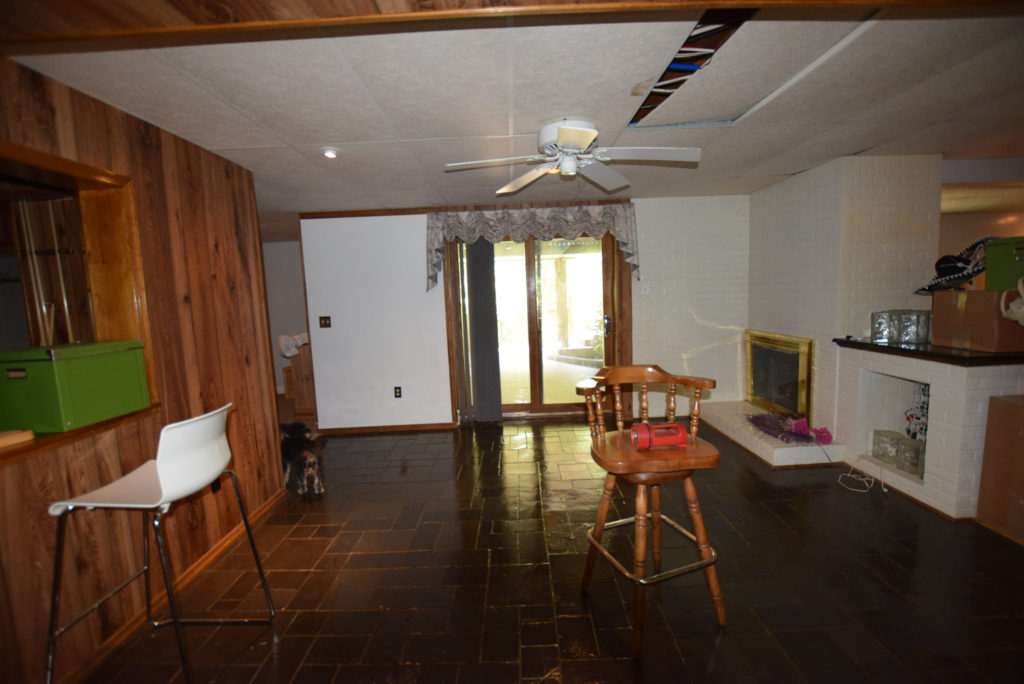
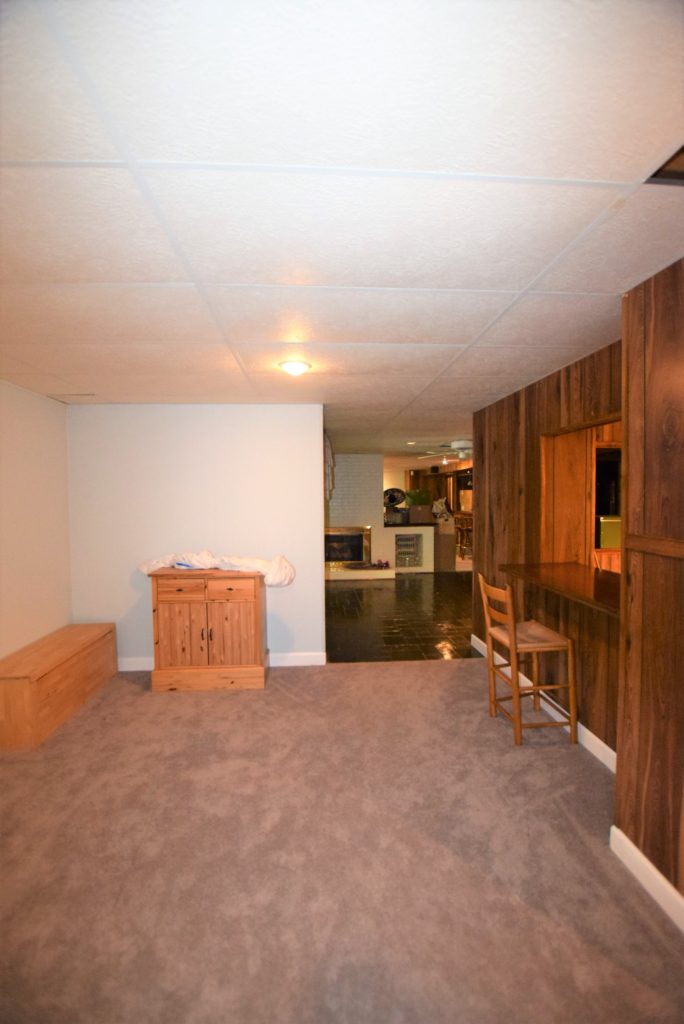
An awkward large foyer-ish space with sliding doors that lead outside to the back yard is on the opposite side of the steps leading upstairs. Even with the large doors this portion of the basement is still very dark because the adjacent exterior is covered by a deck. Adding to the darkness is a deep grey slate floor, which doesn’t sound that bad, right? Buuuuut, it’s bad. It’s bad because the slate is coated in some sort of high gloss impervious sheen. I don’t know why anyone would do this to an otherwise perfectly good slate, but it is what it is, and therefore it will change. Note the chair underneath the askew ceiling tile is where we found another leak in the house.
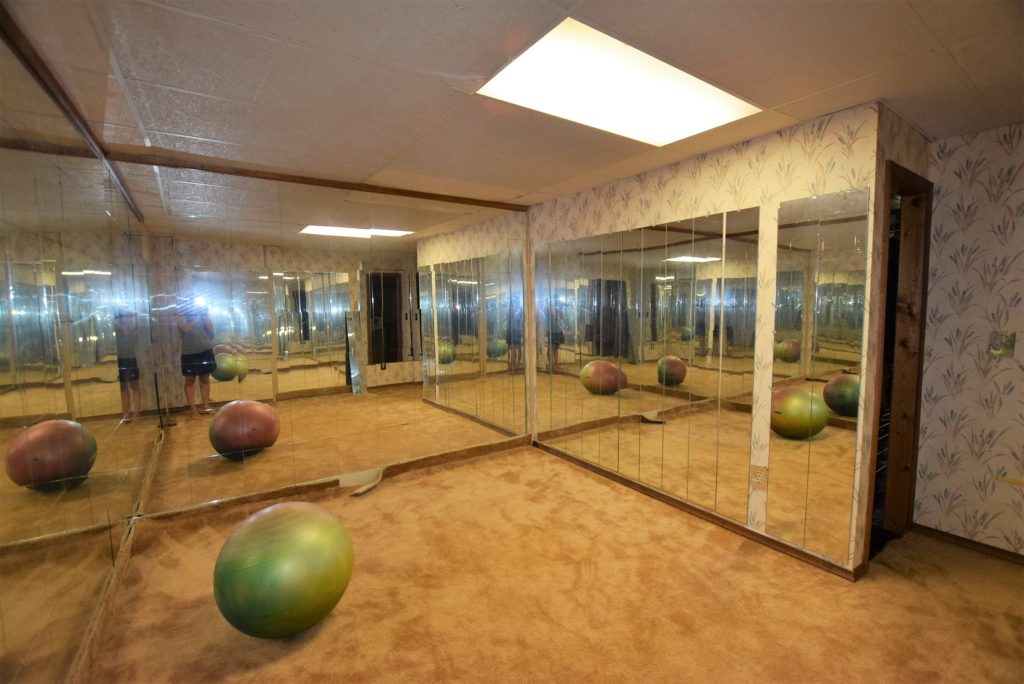
The small gym is located just behind the foyer area. It is covered from top to bottom in mirrors. Big mirrors, little mirrors, rectangles, squares and cracked. I don’t know how anyone worked out in there without getting vertigo from all the mirrored surfaces and mirror seams that weren’t lined up perfectly. It also has awesome fluorescent lighting so of course you’ll look great as you gaze into those mirrors. We would like to have a home gym but we may borrow some space from the shiny slate area and we will certainly redo the mirrored walls.
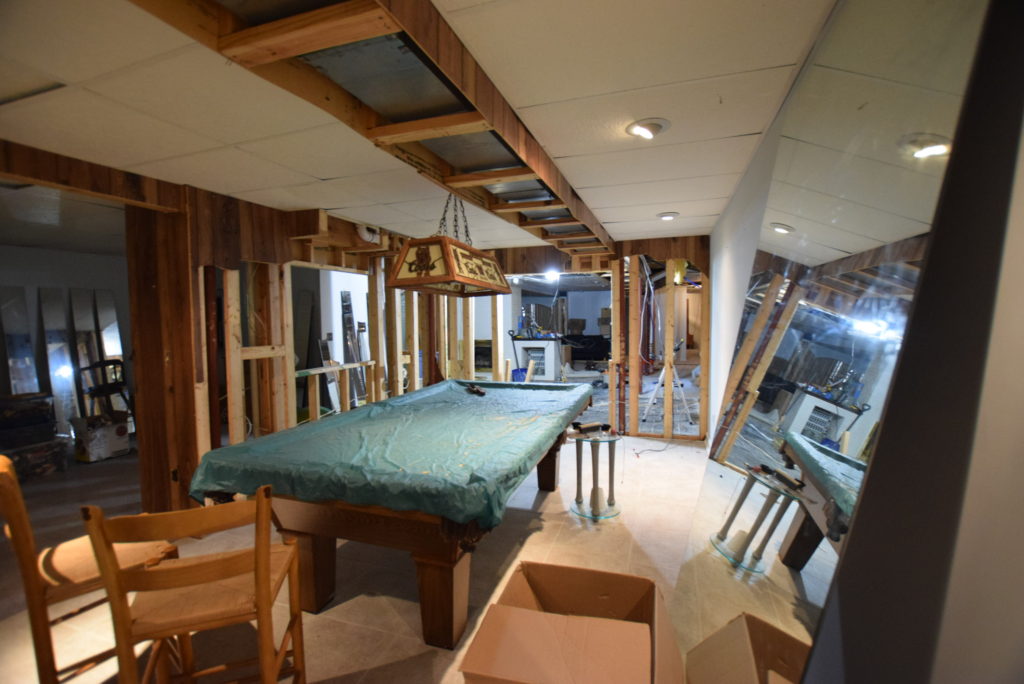
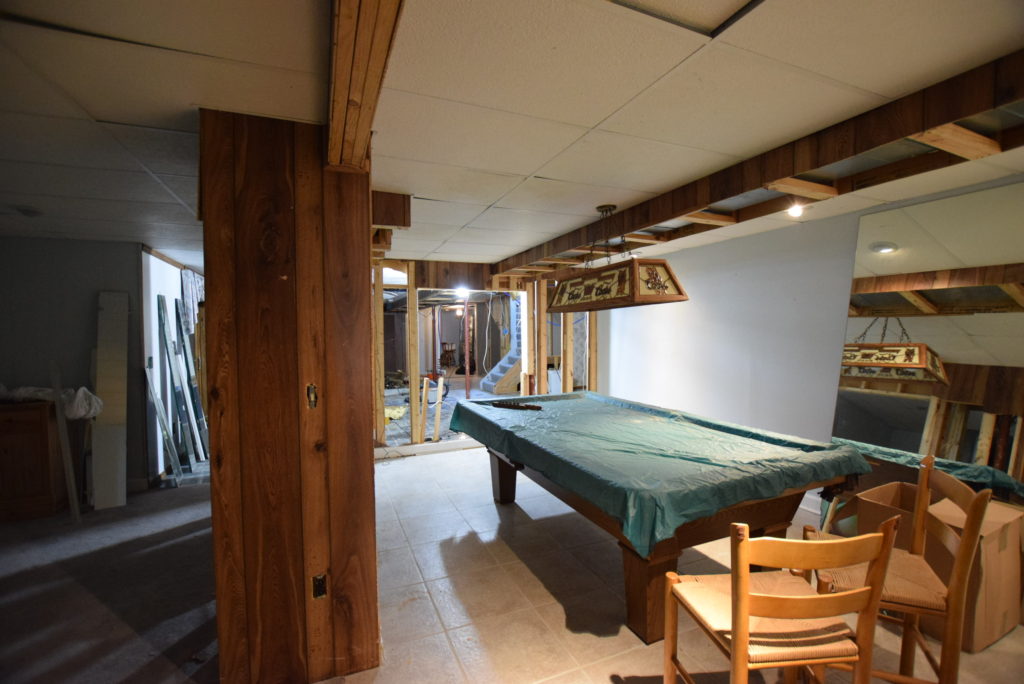
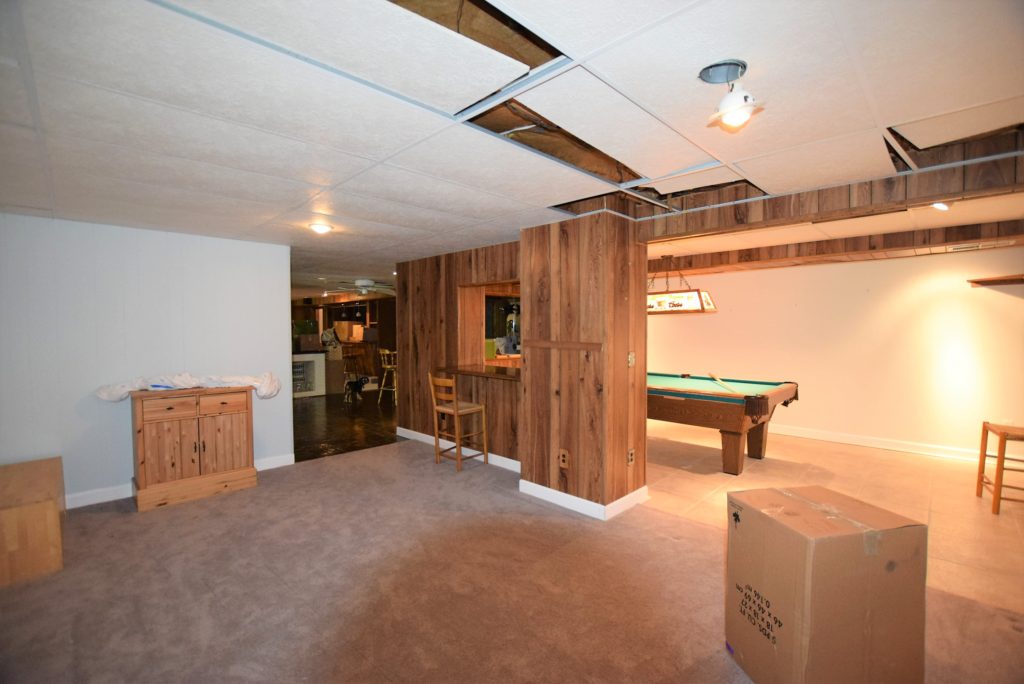
To the left of the basement foyer are 2 final rooms, one with a window that looks out to the defunct hot tub. We’re not sure what this room will be used for just yet, but are considering adding a bigger window or more doors to let additional light in. Just adjacent to this room is a nicely tiled room with some strange wood paneled pillars and half walls. This room is home to the pool table and the coordinating Coors beer pool table light. This area will remain a pool and game room but will see some upgrades in wall-covering, ceilings, and lighting.
Phew! I think that about covers it for the basement area. Check back next week or a picture tour of the home’s property which is the REAL reason we bought this house.