The short answer is, yes. We inherited a 1980’s pool table complete with all of it’s old ugly faux-wood formica trim and worn out kelly green felt when we bought this house almost 3 years ago. It SCREAMED dated, just like the rest of the place. However, for us non-pro billiard table owners, it seemed to be in pretty decent shape otherwise. And truth be told it would probably cost a ton just to get someone to disassemble it and haul it out of here. So I decided to fix it up. And well, since I have a ton of other things I need to spend money on in this house I decided it needed to be a budget friendly, mostly DIY fix.
My fugly (but free) 80’s pool table
What I really wanted was a table that looked more like this gorgeous number from Pottery Barn. And I thought I could pull it off for a fraction of it’s $7500 price tag.
Sweet PB pool table of my dreams
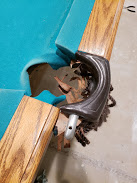
So going in I knew I needed to re-felt the table. The old felt was worn and was nearly bald in spots. While I have read some blogs on DIY’ing this process, I “felt” (sorry couldn’t help myself) that re-felting was something I was going to have a pro do. I contacted a local billiard store and set that up. In the meantime, it meant that I had to disassemble the table and get ready for the re-felting appointment. I removed the faux wood trim that skirts the side lip of the table (it was flimsily tacked on with finishing nails) and it was so old and brittle that it actually crumbled as I pried it off. Eventually I threw out these pieces and replaced them with some select pine boards 1 x 4s that I bought at Home Depot. I removed the bolts from underneath the table that allowed me to pull out the rails and bumpers. In addition to being held in by bolts, these pieces are held to one another by the pockets which have sturdy pins on each end.
Pocket pins hold rails together
I despised the look of the fringe pockets on our table and ordered a new set of slightly less ugly leather pockets on Amazon (most of the good-looking modern pool tables have rails with integrated pockets – the only options for replacing the older style is either fringe or leather). Hey pool table repair companies, there’s market space available for those that provide attractive replacement pool table pockets – wiiiiide open.
All rails and bumpers and side skirts removed.
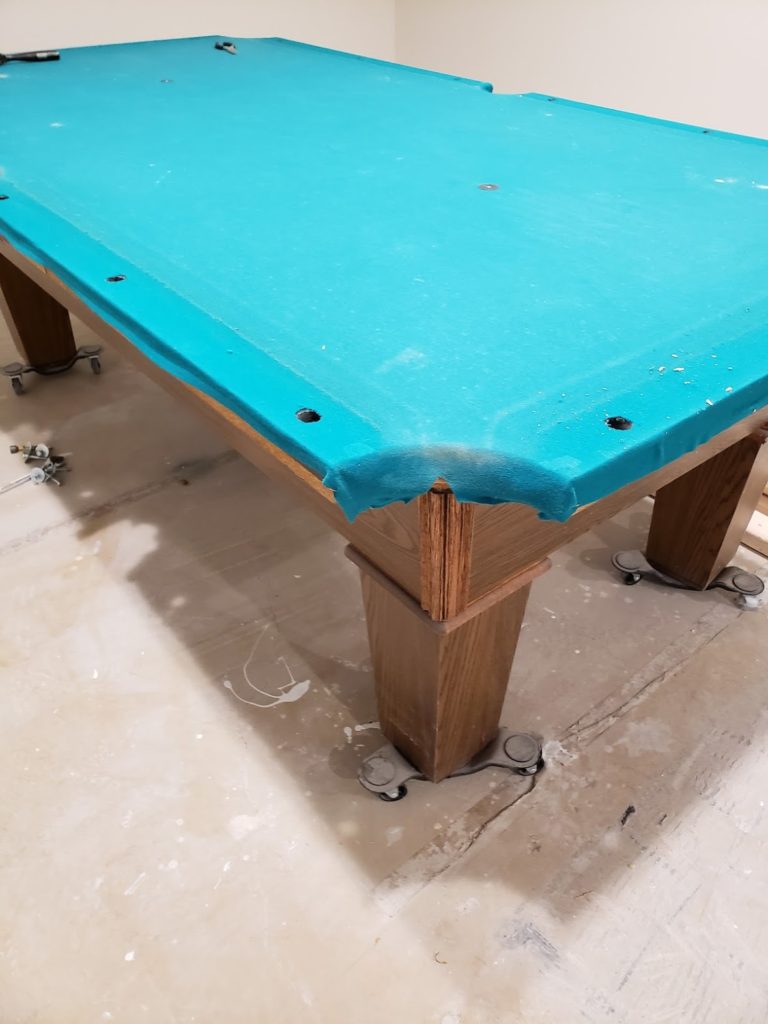
Once I had the rails and pockets off, I used a deglosser called Liquid Sandpaper to prepare the wood for refinishing. I then primed it with Zinsser B-I-N Primer. This is a super polymer-based primer (great for covering knots in wood or stains). I used it because I wasn’t sure how well paint would adhere and be resilient to wear and tear on something like a pool table rail that gets frequent cue hits and arms resting on it. I then took great care using a foam roller and several coats of a satin finish black paint, I think it was leftover paint from some of my interior door and window trim.
Base repainted black. Looking better already!
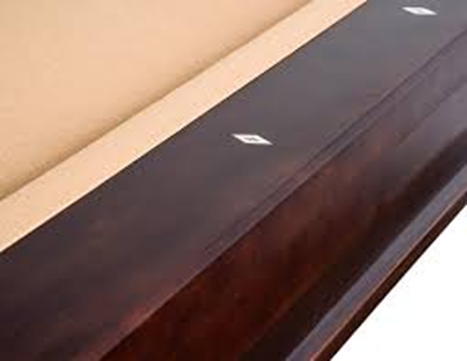
The most challenging part of the painting process was having to take care using many q-tips dipped in acetone to remove the paint on the little inlay pearl rail sight markers that I carelessly painted over.
Pearl inlay rail sights – try to paint around these.
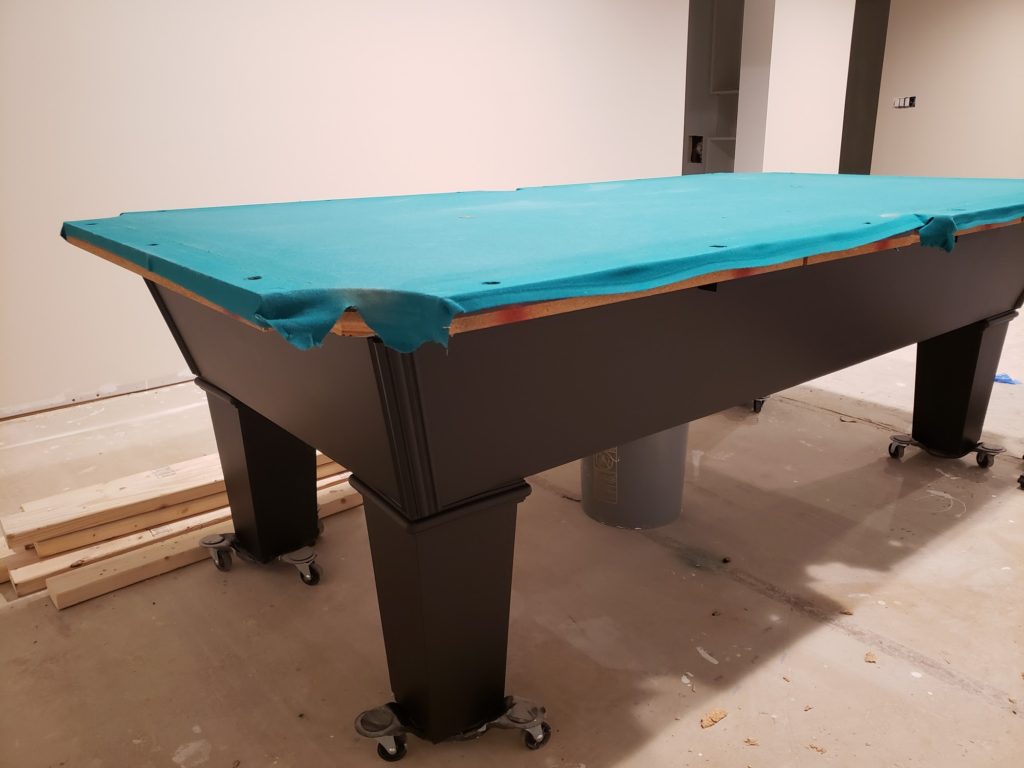
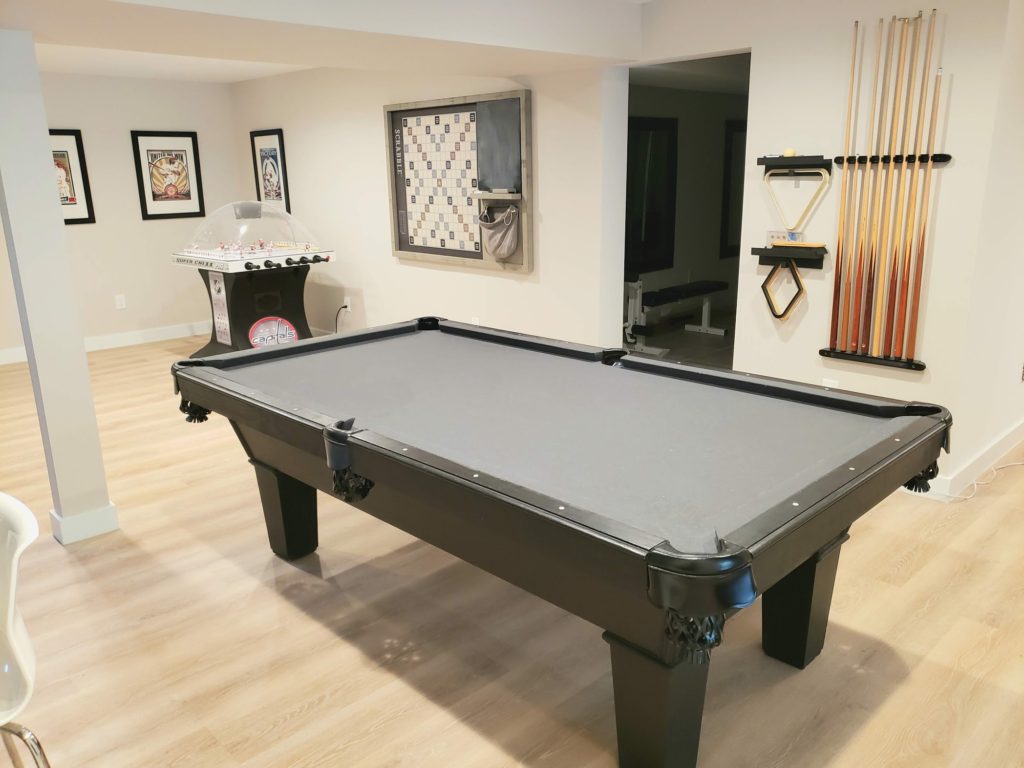
Once painting was complete the pool table was ready to be re-felted. The billiard technician came to my home with all his tools and the dark grey felt that I had selected. After watching him do the re-felting process, I think I probably could have done this part too. He removed the old felt, used a spray adhesive straight on the slate and laid the new felt out, wrapped it over the edges and stapled it to the wood underneath. However, it’s probably best that he did do this because when he removed the felt from the rails he noticed a problem. The rubber bumpers attached to the rails was brittle and rotten. There was no sense in re-felting over bad rubber resulting in a table that performs poorly, so I decided to go ahead and have him replace the bumpers too. The billiard technicians also leveled the table in its final resting place in the room, then they put it all back together including the new pockets, new bumpers, rails and even the painted and primed pine boards I used for side skirts. We completed the area with an inexpensive black cue rack mounted to the wall.
Refinished Pool table
All totaled, refurbishing this full size pool table cost under $800 including the re-felting, re-bumpering, primer, paint, wood trim, leather pockets and cue rack. While that’s not cheap, it’s certainly cheaper than buying a brand new regulation size table which can easily set you back about $3500 on the lower end or in the $7 to 10K range for the modern looking ones at Pottery Barn or Crate and Barrel.
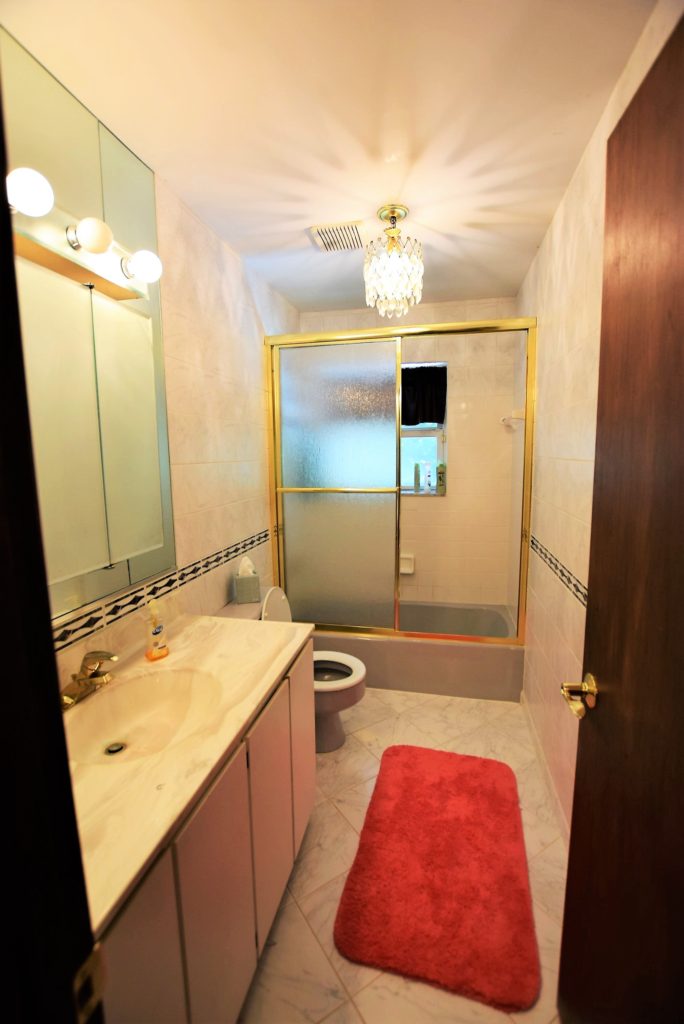
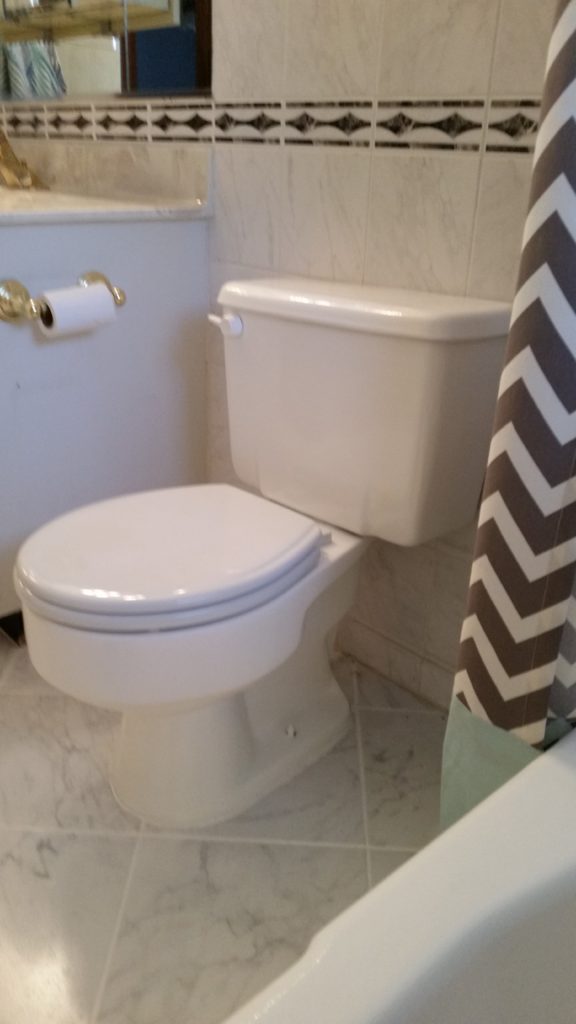
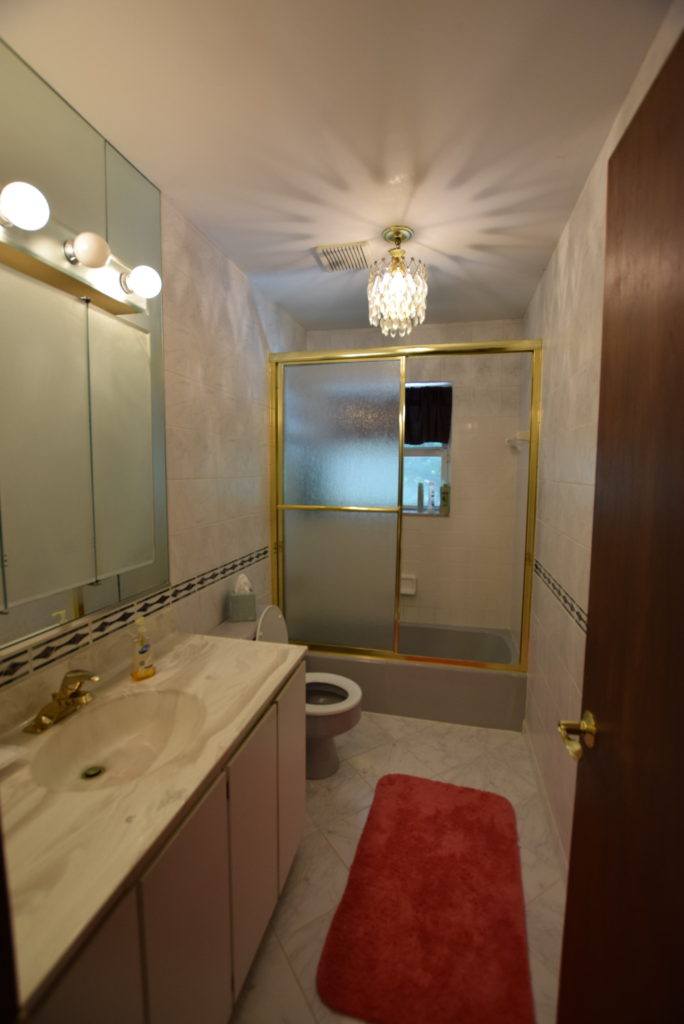
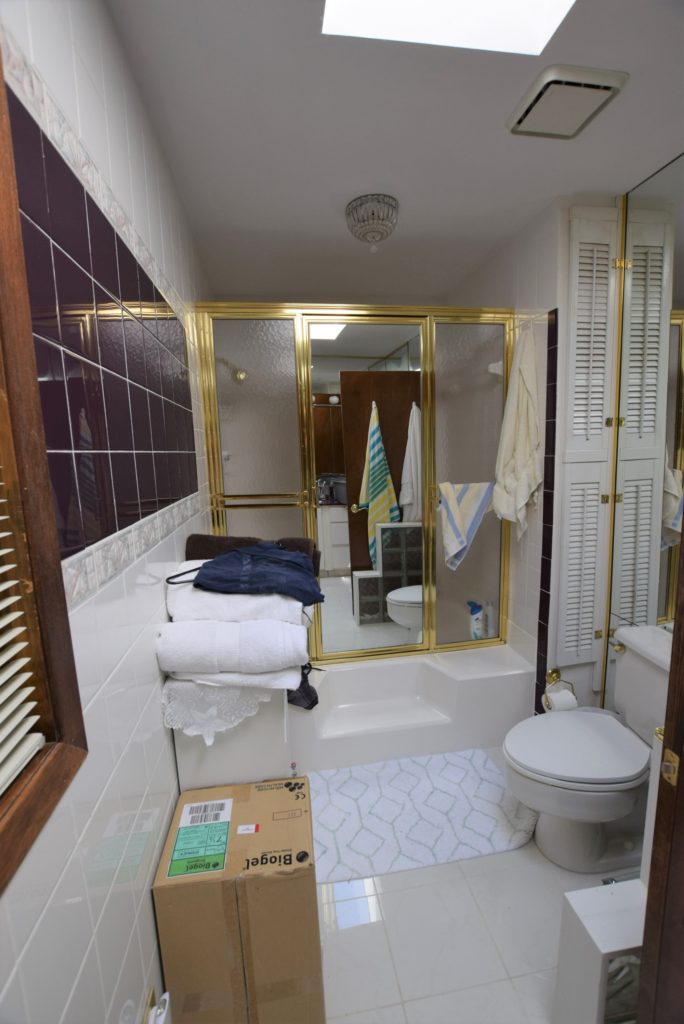
I’ve talked a lot about all the upcoming projects at my new (to me) old house but do you know where I actually started? The nicest bathroom in the house. Ok, nicest is being generous. It is the least ugly. And by least ugly, I mean Carrera look alike ceramic tile from floor to ceiling (varying sizes with a mid-wall border), white builder grade tile in the tub/shower, gold trimmed safety glass sliding shower door, crystal chandeliers (not the good kind), off white circa 1985 laminate vanity with cultured marble top, gold faucets, and a grey tub and toilet. I thought I could work with the tile, especially because I was not relishing the idea of demoing then re-drywalling the entire bathroom, but the rest was gonna have to go. First up – a makeover was in order for that tub and toilet. You really don’t see many colored toilets or tubs in new homes, they are almost always white or occasionally off-white. Even though our grey tub wasn’t as offensive as a mustard yellow, avocado green or, gasp, a burgundy tub, any color other than white just screams “dated!”
Before bathroom with grey toilet and tub and fancy gold shower door!
The Plan
Since I had no plans to totally gut this bathroom Plan A was to try and coat the tub in one of those specially formulated epoxy based paints for tub and tile. If it failed, then Plan B would be to rip out the tub and toilet. I’d heard good things from others who had done this project and read mixed reviews online but still felt it was worth a shot to potentially save over a thousand dollars and the sweat equity involved in replacing the tub and toilet.
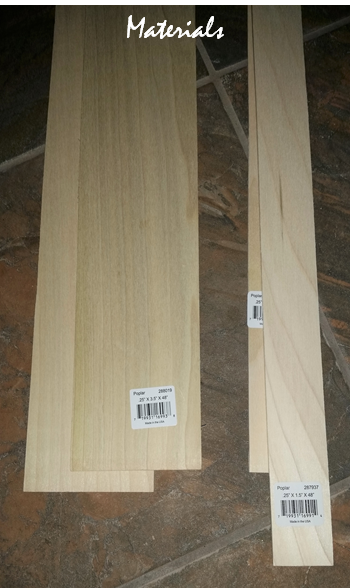
Materials
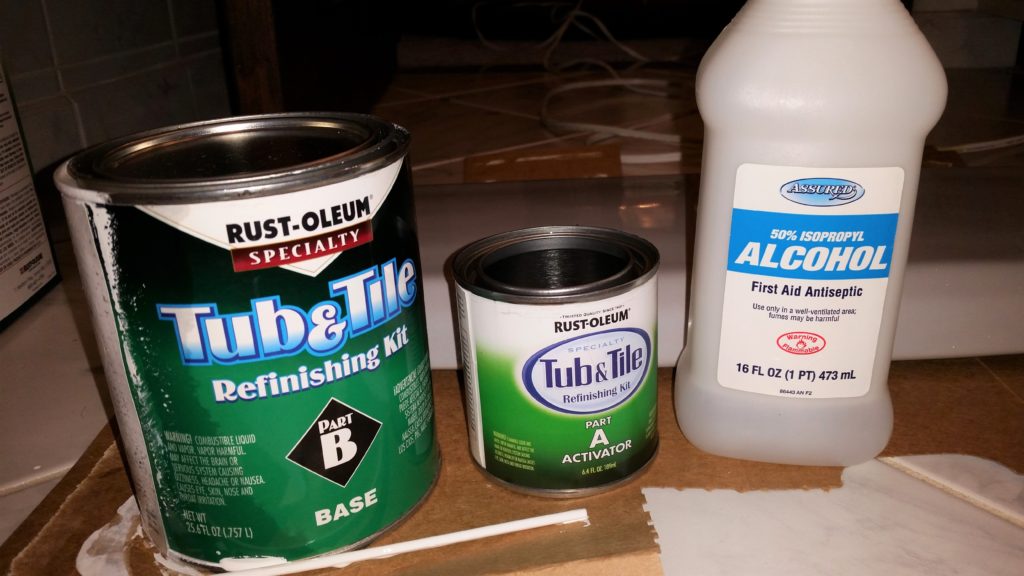
I first checked my local Home Depot and Lowe’s but both only carried a brand of tub coating that got terrible reviews. I bought Rustoleum Tub and Tile Refinisher (2 kits) on Amazon and it was at my house in 2 days.
This is a high quality tub and tile paint. Rubbing alcohol can be used to clean up drips.
Other supplies I used included:
Fine grit sandpaper
Mask, rubber gloves
Calcium Lime and Rust (CLR) cleaner
Bleach-based cleaner
Alcohol
Caulk remover tool or razor blade
Mini paint roller for smooth surfaces
Blue painter’s tape
Tack cloth
Screw driver
Drill
How to Paint a Tub (or any other ugly bathroom surface)
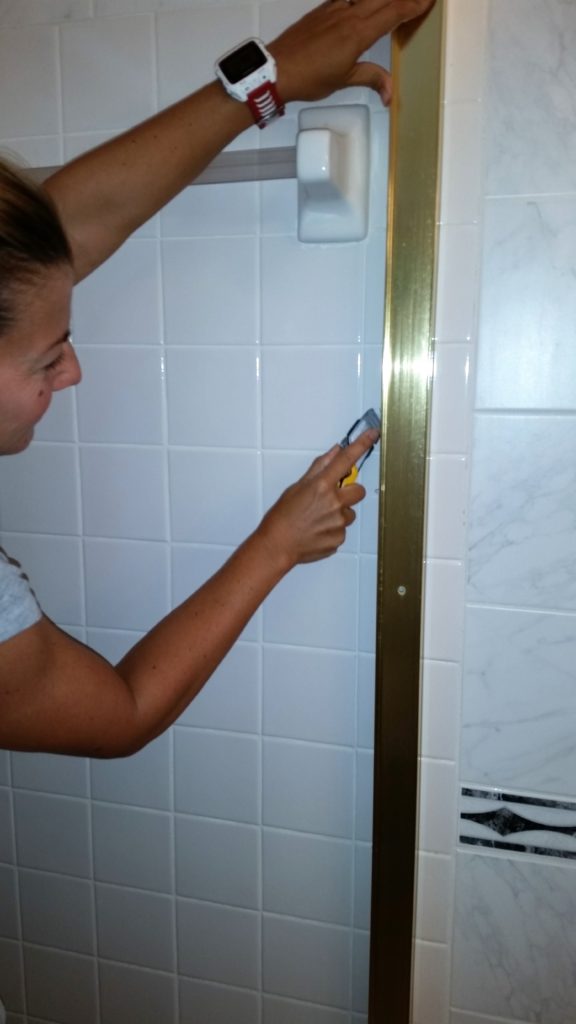
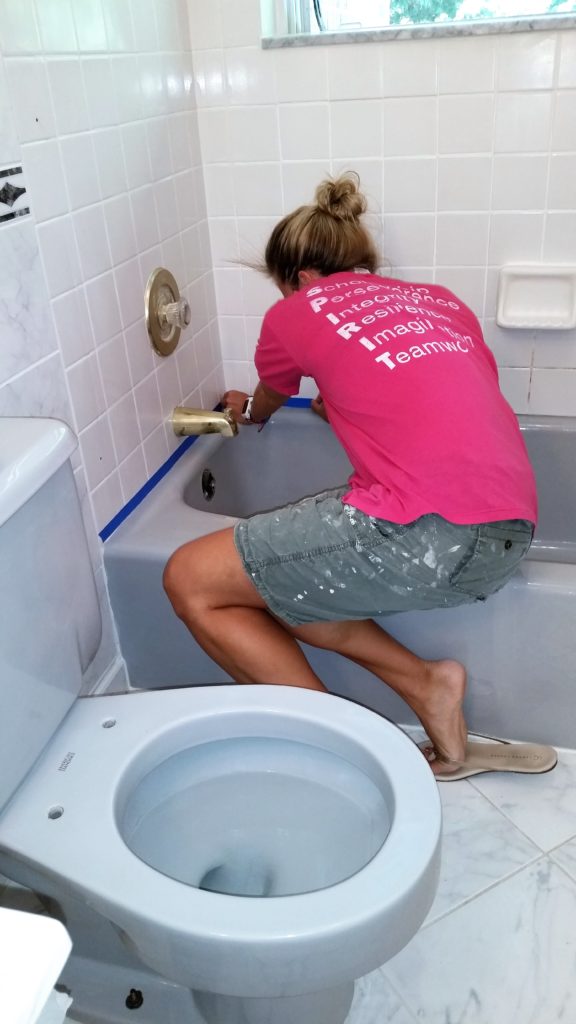
First, I removed the gold shower doors and track. I planned on putting up a shower curtain afterwards. After they were unscrewed, I had to remove excess silicone from the tub lip and tile with a razor blade. I also went back later and filled the holes where the track had been screwed into the tile with white caulk. I also removed all the caulk between the tile and the tub and unscrewed the little brass drain doo-hickey. I didn’t bother removing the toilet handle deciding to make it white since most toilet handles these days are the same color as the toilet anyway. The toilet already had a new-ish white seat on it so I removed that.
A utility knife can be used to remove the caulk or silicone between the shower doors rails and the tile.
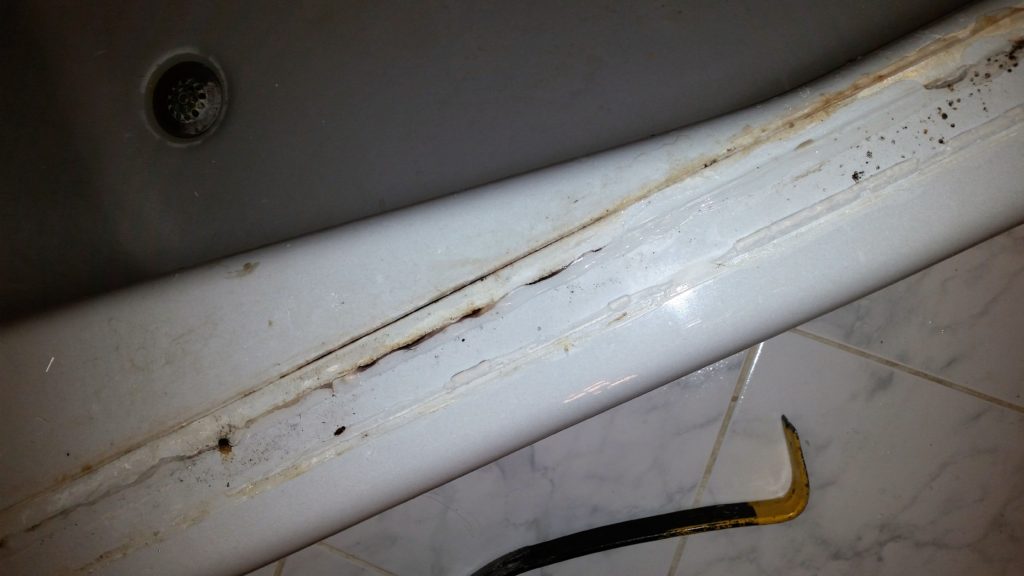
With the doors out of the way, I gave the area in and around the tub and toilet a really thorough cleaning with a bleach based cleaner in a lame attempt to remove lots of mildew and other nasty stuff.
This is the gross crud that may be under a 30 year old shower door. Eww.
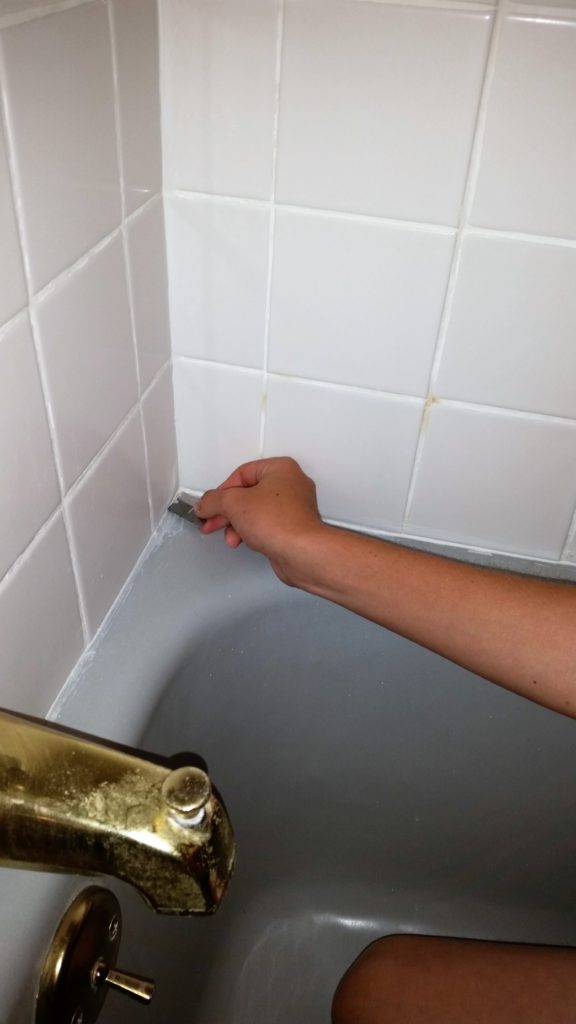
This left me better able to see any other remnants of caulk or silicone that had to be removed around the entire tub.
Scrape off old caulk with a razor blade. The paint won’t stick to caulk or silicone.
Still there is a set of about 6 tiles with brownish yellow grout that I just could not get cleaned that will get new grout once I do other tiling, but these didn’t concern me too much since I didn’t want to paint the tile, only the tub and toilet.
Next, I cleaned the tub and toilet with CLR. This was especially important because we have well water which generally has more minerals in it than city water and can leave residue on your tub. Regardless of your water source, do this step anyway. Your tub can’t be too clean for this process. Note, CLR, when used in a small space has fumes so wear a mask, open a window and turn on your bath fan for ventilation.
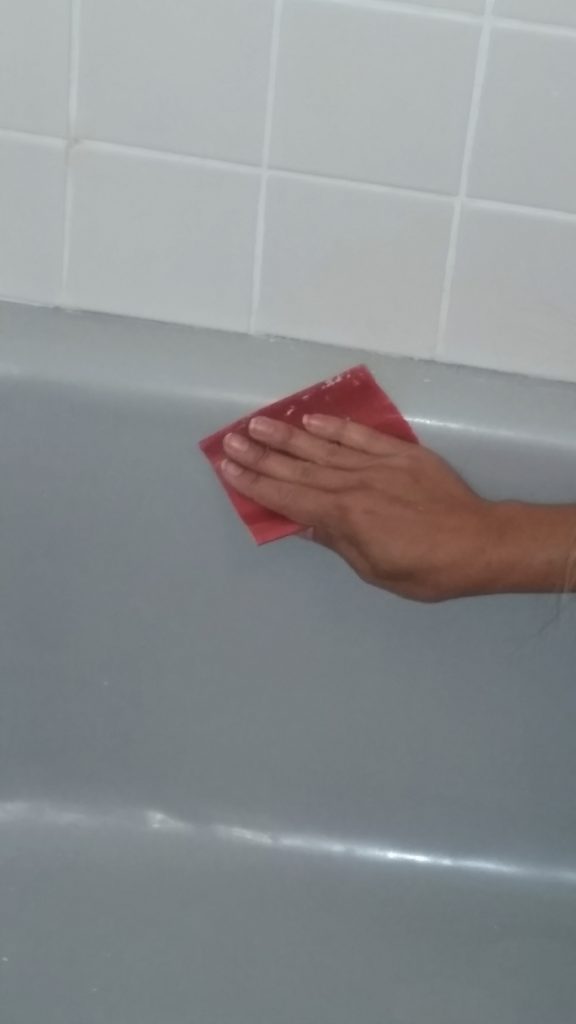
After everything was clean, I sanded the tub and toilet with very fine grit sandpaper. I used a 400 grit. Then I rinsed with water, dried it, sanded and rinsed again.
Sand the entire surface with a fine grit sandpaper to remove leftover scum and to slightly score the surface so it better accepts the paint.
…and sand some more… keep sanding….
Once everything is totally dry and dust free you are ready to paint. It’ll be important to assess where you are in the process before you commit to painting. The special paint is an epoxy that comes in 2 parts. Once it’s mixed it must be used in 6 hours, after that it thickens to the point where it’s unusable. I opted to come back the next day ready to paint.
I began day 2 by taking a tack cloth and running it over every surface to be painted to pick up any lint, dust, hair, and small particles that somehow magically appeared overnight. The surface must be perfect to accept the paint. I taped off the adjacent areas that weren’t going to get paint with blue painters tape.
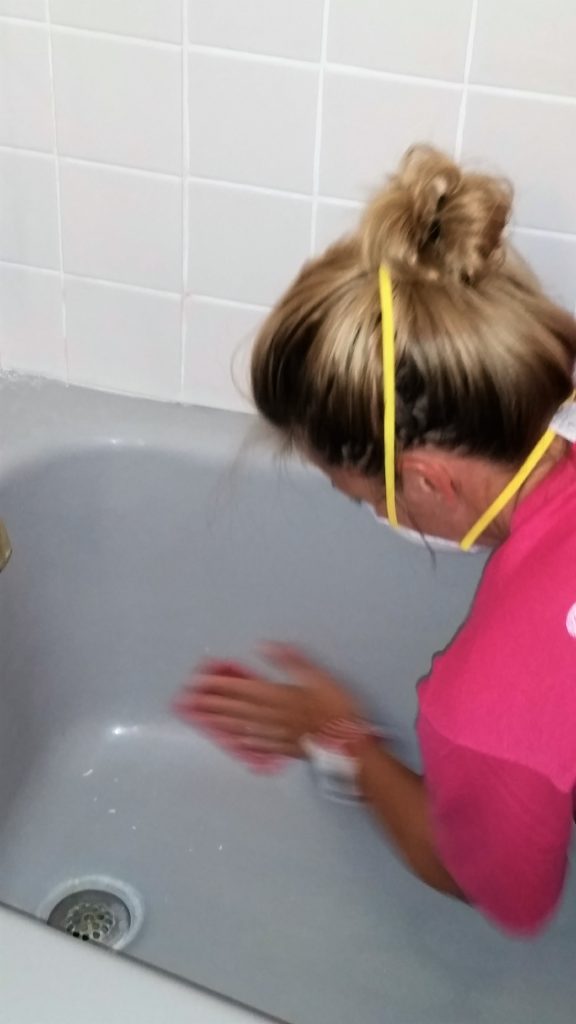
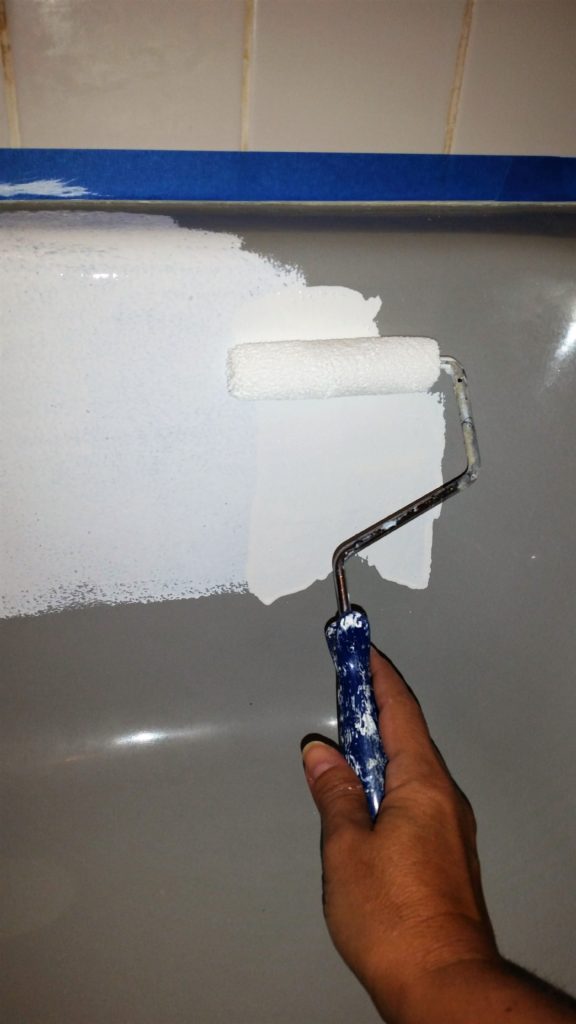
I followed Rustoleum’s directions and poured the contents of one container into the other and mixed them. The odors from this paint are noxious! Definitely wear a mask, open windows and put a fan or two on. No matter what you do it will permeate the whole house and linger for days, it’s that strong. I filled a disposable pan with some paint, soaked a fine nap roller made for smooth surfaces and started rolling. As advertised, the paint has unique self leveling properties… to a point. It is runny and will drip if you use too much so it’s better to use many thin coats rather than glob it on. Nobody wants a drippy tub. This stuff dries pretty quickly so if you find yourself overlapping an area you already did 5 minutes ago it may get tacky and not re-level so be careful of that.
Just roll the paint right on in thin coats.
I also noticed in areas where there once was silicone holding the door on it still didn’t adhere to even after scraping the silicone off, cleaning and sanding. In hindsight perhaps maybe using acetone might remove this residue, who knows? But since I had already started it was too late. I used the small foam brush in the corners where the tile met the tub and where the toilet met the floor. I removed the lid from the toilet tank so that I could cover the entire thing and also the tank itself. Now here’s where you might be wondering what I did inside the bowl which was also gray. I suppose I could have been all thorough-like and taken the toilet bowl water out in cupfuls then soaked up the last bits in rags, but nope, I didn’t. I just left it gray. And you might notice if the seat’s up and your looking right at it (sorry boys), but otherwise the eye is fooled into thinking it’s a shadow… at least that’s what I’m telling myself. I was honestly a little paranoid about screwing the inside of it up then having to rip the toilet out altogether, which wouldn’t normally be a big deal but some moron grouted, yes, grouted the toilet to the floor – ugh.
Anyway, 2 coats later and I could still see gray through, so I knew I was definitely doing a third. I decided to wait until the next day for more complete drying. I used what little I had left in my paint pan to cover a nasty looking fiberglass slop sink in my laundry room.
The tub and tile paint works on fiberglass too, like for this utility sink.
This thing was so gross I wouldn’t have cleaned an old paint brush in it let alone laundry delicates (who am I kidding, I wash NOTHING by hand). Anyway, the slop sink looks brand new now. In between days 2 and 3 of this project is where I made my most critical mistake. I learned an old trick a few years ago that if you’re painting project will take you the course of several days then you put your brush or roller in a plastic bag, wrap it up tight and stick it in the fridge and the next time you paint it’s still perfect and fresh, not at all gunky or dried up. It can save you a ton of time cleaning brushes. Whatever you do DO NOT PUT THIS (or any epoxy, shellac or varnish based paint) in your fridge. Certain foods are very susceptible to odors and flavors that may escape the wrapped brush or roller and totally ruin your food. I learned this the hard way. I had an English Muffin the next morning with a little epoxy-butter. Yech. Butter itself isn’t healthy but chlorofluorocarbon laced butter is most certainly even worse for you.
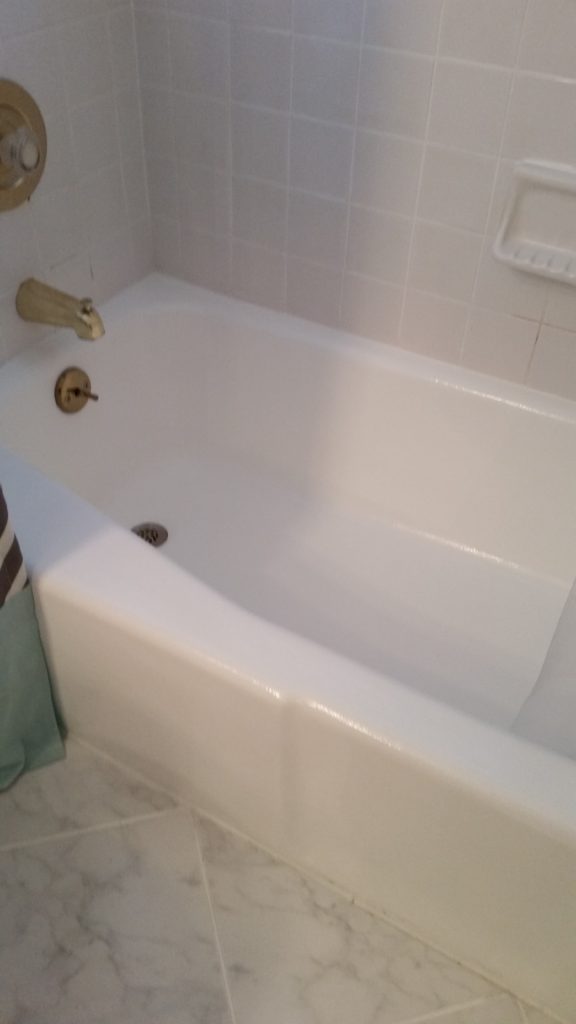
On day 3 of the tub project I mixed the second set of cans together to do coats 3 and 4 on the tub and toilet. (WARNING! Many a YouTube video will make this whole project look like it’s complete in mere hours, not days. Lies…all lies…unless one has nothing better to do that literally sit around and watch paint dry.) Anyway, after the third coat the silicone residue area on the rim of the tub was starting to get covered and accept the paint. With a 4th coat the paint was fully covering this area and for good measure I gave just this area a 5th coat.
The tub (minus ugly gold hardware) looks like new!
You’d never know this toilet used to be grey!
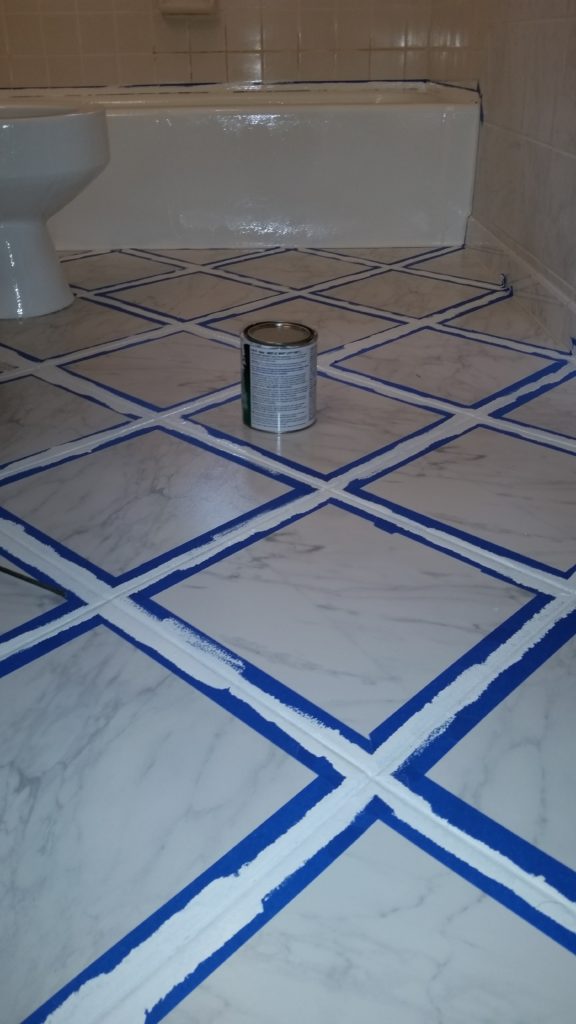
I still had some paint left over so I racked my brain about what else I could epoxy-paint. And then, an epiphany! What is the bane of every awesome looking kitchen or bath that at some point WILL definitely go down the tubes and look like crap? Yep, the grout. I dunno what’s in that grout sealer they sell but I am convinced it’s a racket. Grout never stays clean. So it remains to be seen if this will last or not but I decided to paint the grout in between the bathroom floor tiles. Figured it couldn’t be any worse than the dingy dirty gray-brown that currently flanked the bright white and grey tiles. It was a bit tedious taping off each tile, but it seriously turned out better than I expected.
Use painters tape against any edge that you don’t want to get paint on while completely coating the grout in epoxy paint.
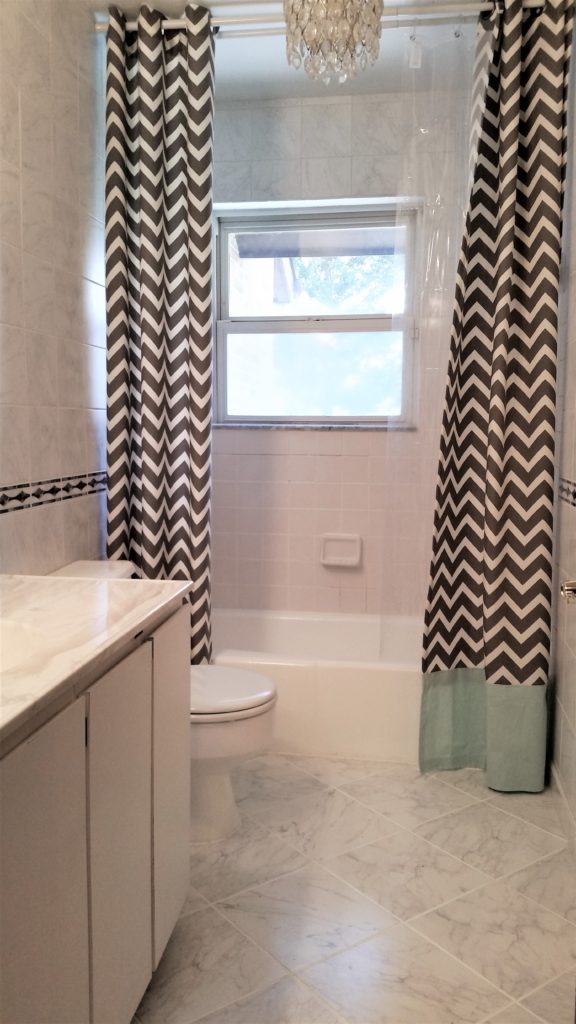
I did 2 coats. All of the tub and tile paint has to cure for at least 72 hours before it can get wet and sustain foot traffic. I waited that long before I put back the toilet lid, the drain thingy, then I hung 2 tension rods at the ceiling one for a liner and one for my extra-long shower curtain. Hanging your shower curtain at the ceiling makes the room look taller! And yes, I know, I know the chevron print shower curtain is soooooooo 2016, but I had it leftover from my last house. I’ll change it when I update the rest of the bathroom.
This bathroom is far from complete, but painting the tub, toilet and grout helped it a ton!
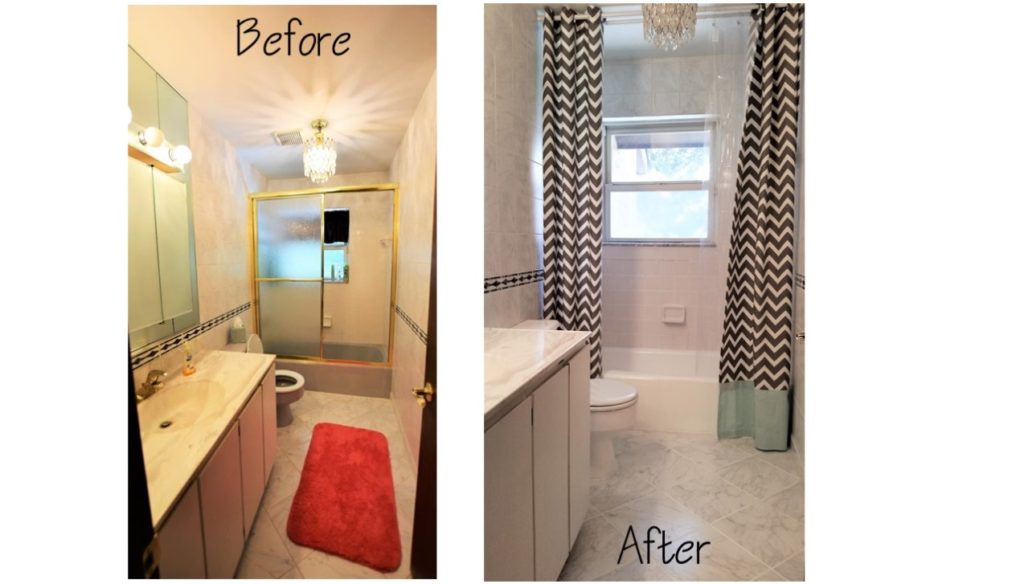
Results
It’s been almost 5 months since I painted the tub, toilet, laundry sink and tile grout and it all still looks great! Admittedly the finish isn’t as smooth as a regular tub, it’s a little dimpled, sort of like an orange peel, but it looks 100% better than having a dated bathroom ensemble. In the near future I’ll rip out the huge mirrored cabinet, fill the empty wall spaces left with remaining tile, and switch out the vanity and fixtures for something more current. So I’d not consider this photo a true “after” shot, but rather an interim. Now that we’re deep into the kitchen remodel and basement demo, it should only take me …. meh…. 3 years or so to get back to this project. Who’s hanging in there with me?
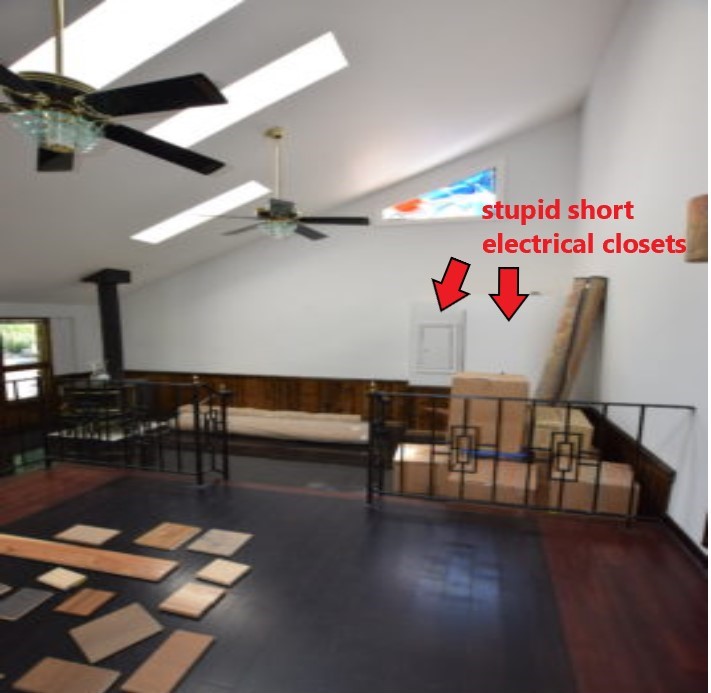
Still a whirlwind here at my new home the construction site. Over the past weeks we had electricians moving several electrical panels from various places across the home to the garage. While this wasn’t an absolute necessity, we believe that it will pay off in the long run for two reasons. First, it will allow all wiring to be run in the basement in one new soffit right alongside the HVAC ducts. Previously the wires were a spaghetti mess above the drop ceiling in the basement, but since the basement ceiling is currently pulled out it made sense fix it properly now. Second, it means we can remove both non-code compliant electrical “closets” that had been fashioned to hide the previous panels in the family room. While they technically did their job at hiding the panels, they were not aesthetically pleasing to look at and seriously messed with the flow and looks of the rooms.
Other new developments include our receipt of a proposal to remove both loadbearing and non-loadbearing walls so we can rework the floorplan on the home’s main level. More to come on that soon! In the interim more deconstruction continues in the basement including continued removal of wood paneling, drop ceiling and carpet. Dead mouse count is up to 56! In addition to the removal of the walls, we’ve consulted with a plumber to talk about how to untangle the spaghetti of Pex plumbing that used to be in the basement drop ceiling, removal of the old wet bar drain, and how to ready the new kitchen area for plumbing including a gas line for the range (I’m hoping there is budget for a big professional grade range).
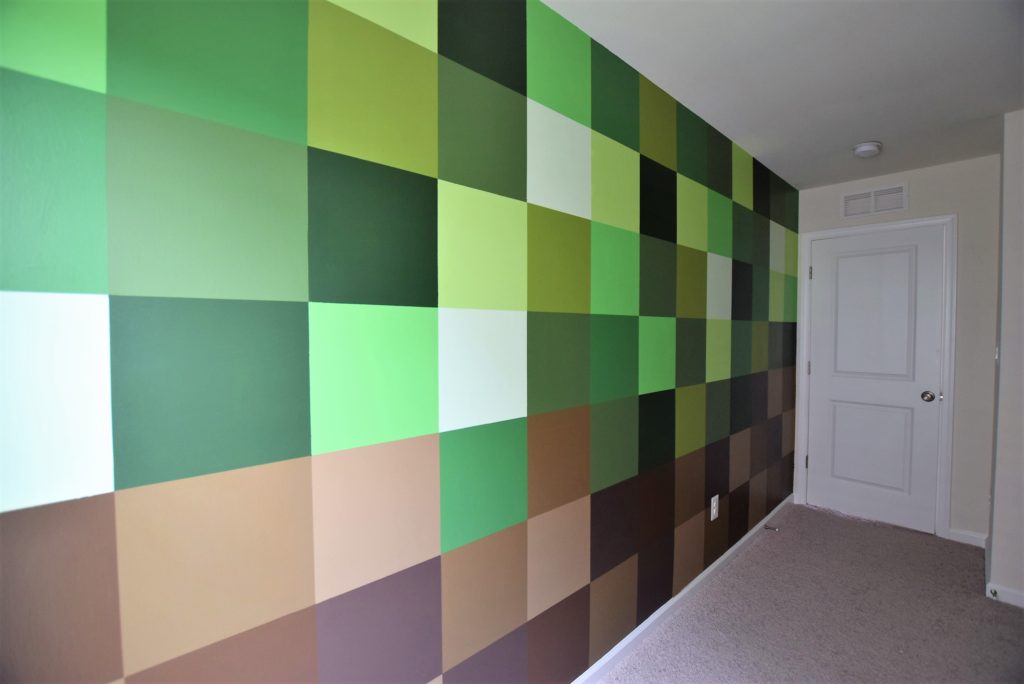
DIY Minecraft Mural
I really wish we were further along than we currently are. Renovation always seems to be so much simpler and quicker in your mind than what reality dictates. HGTV makes it look so easy! I could maybe get a bit more done on our home reno if I wasn’t so busy with design projects for my business, but this is a problem I can’t complain about! Here’s a recent project that I wanted to share. I recently did a custom geometric mural painting for a client’s new home. Their son is a huge Minecraft fanatic. Rather than pick one paint color for his bedroom, I proposed 12 colors! That’s right, TWELVE, that take the shape of that tell-tale Minecraft cube pattern. All 12 colors were in the shades of green and brown and when finished have the look of Minecraft dirt and grass. The great thing about this geometric mural is that it could be done in a variety of colors depending on what your child likes most about the game. Shades of grey for rock, grey and black and spots of red for spider, shades of blue for water, you get the idea. It’s actually pretty easy to recreate with a little patience, skilled use of a level and lots, scratch that, TONS of painter’s tape.
Materials
Here are all the materials I used:
12 quarts of Benjamin Moore paint in the following colors:
554 Easter Hunt
406 Huntingdon Green
417 Feel the Energy
558 Killala Green
553 Richmond Green
546 Courtyard Green
1596 Nightfall
455 Sweet Basil
HC 68 Middlebury Brown
1057 Maple Valley
1055 Algonquian Trail
1029 Coconut Grove
A yardstick, and a tape measure
A long (3-4 foot) level (if your wall is smaller you might be able to get by with a laser level, but I’ve always found they get more inaccurate the longer your wall)
About 6 rolls of painter’s tape
Pencils and erasers
One 1.5” paintbrush per color plus 1 or 2 small detail brushes
Drop cloths, paper towels, rags, etc.
How-to DIY Minecraft Wall
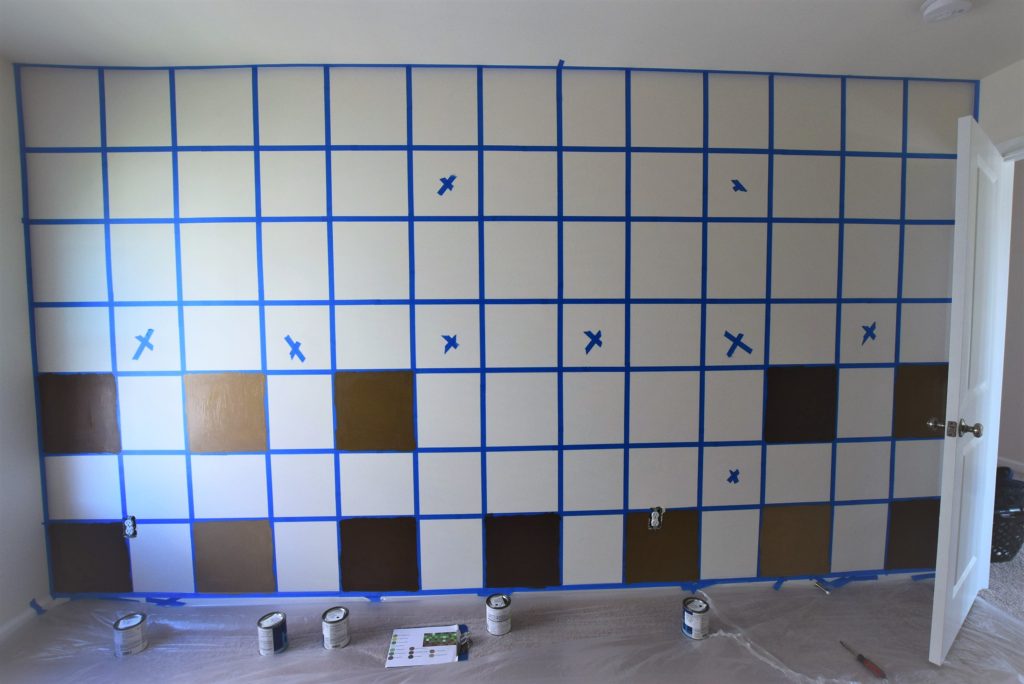
First, I needed to determine how many squares I could fit across and vertically on the wall so that I didn’t end up with partial blocks on any edge. To start with, I knew that I wanted large-ish blocks that were about 12 x 12 inches each. So I took the overall length and height of the wall and divided by different figures until I ended up with something that was evenly divisible in both directions. In this case it meant blocks that were about 13 x 13. Is there likely a mathematical proportional equation that could have figured this out the “right” way, sure probably, but this way just seemed logical in my head, so that’s what I did.
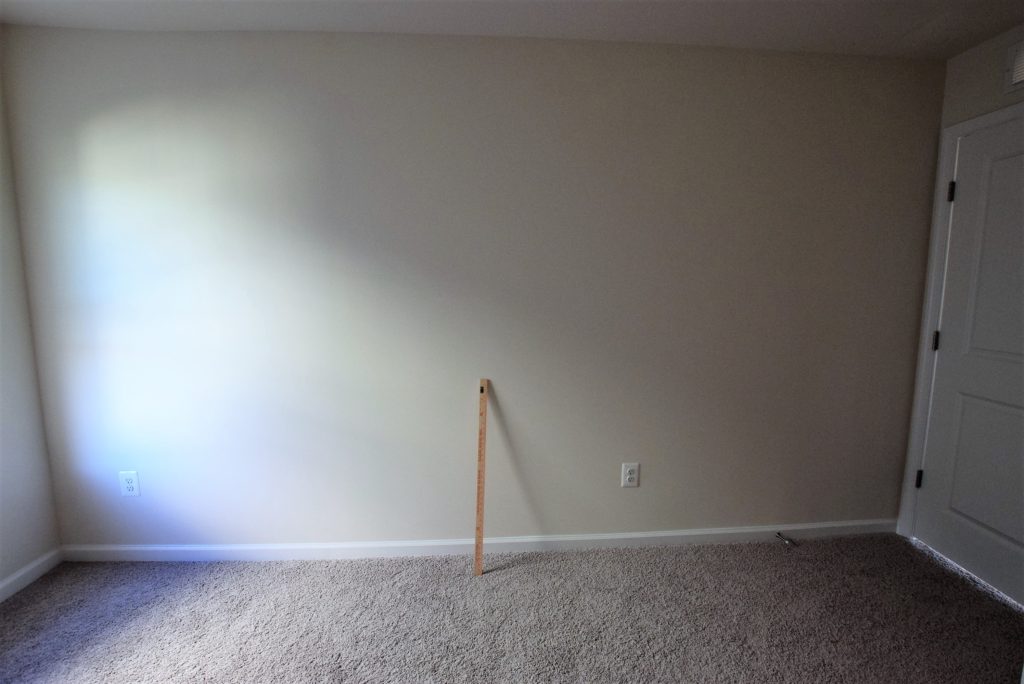
Start with a boring white wall.
Once I knew how large each block would be I took my yardstick and measured every 13 inches along the bottom of the wall and made a small pencil tick mark. I did the same thing going up the left and right sides and along the top. Then, I took my level and made intermediate horizontal tick marks 1/3 up the wall and 2/3 up the wall. Next, I used the level to connect the dots to make a perfectly straight grid pattern both horizontally and vertically. Everyone knows homes’ walls are never perfectly straight, so every now and then I’d step back to make sure it looked about right.
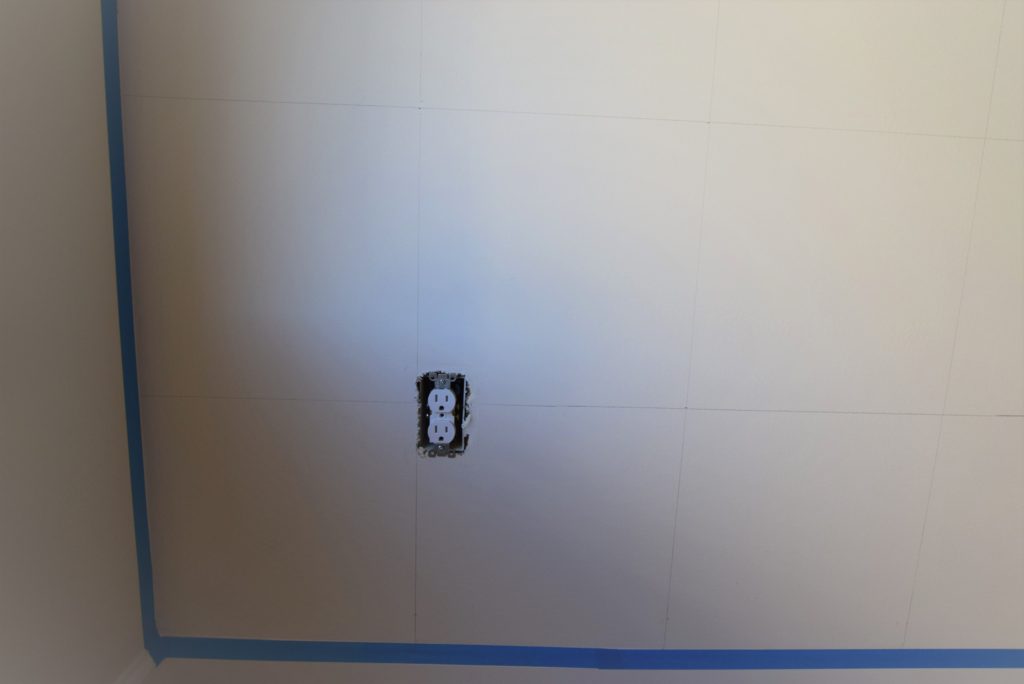
Carefully measure, level, and mark with pencil lines
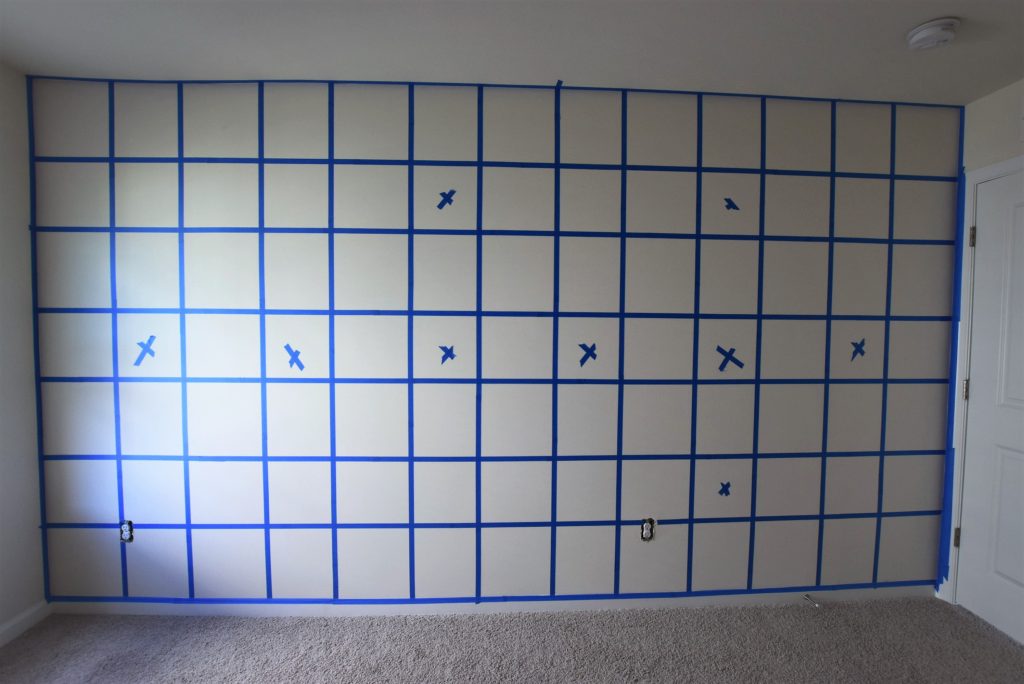
Next, it was time to tape. I began with taping on the ceiling, baseboards and the adjoining walls first since those pieces of tape will stay put for the entire project. Then I began taping on the left edge of each vertical line and on the top edge of each horizontal line. Because of where you have to tape, at any given point you can only paint a quarter of the wall’s squares. Starting off because the squares looked so similar (everything white with blue painter’s tape) I placed some blue tape “x’s” on the squares I should NOT paint so I could keep track. In the current formation I painted every other bottom square, every other square on the 3rd row, 5th row, and so on. I didn’t use a specific pattern for where to put what colors, but had a few rules I followed to keep it looking like true Minecraft. I kept the bottom 2 rows completely brown. The third row from the baseboard was a mix of brown and green and the rest of the cubes above that third row were green. I never put the same exact color directly adjacent to itself. The same color diagonally was acceptable.
Tape off the squares and mark a few so you know which ones NOT to paint.
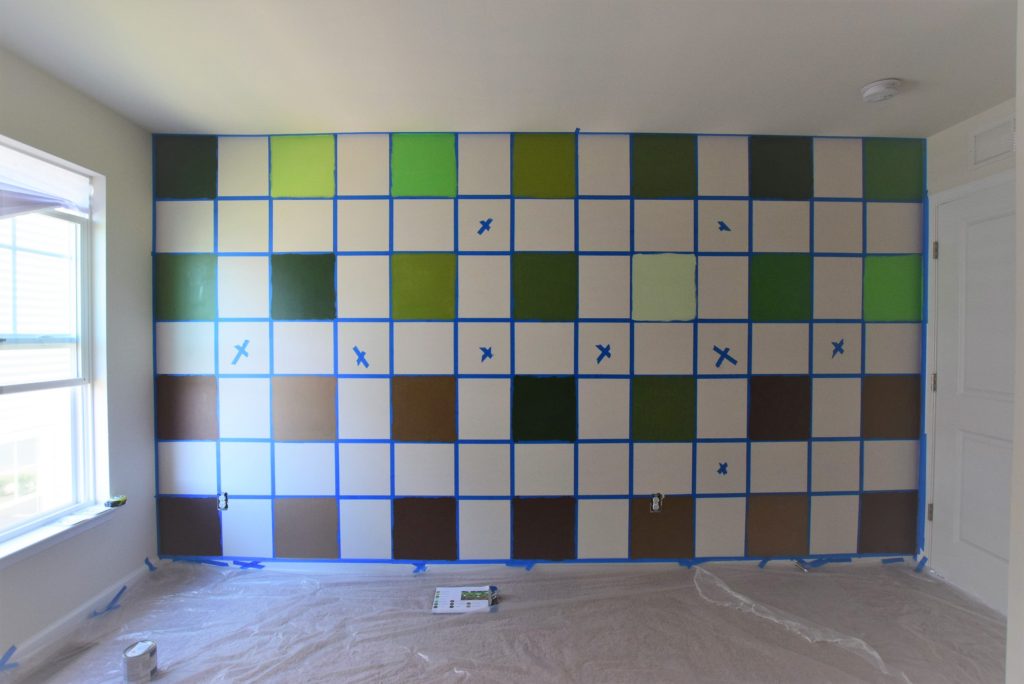
Add 2 coats
After my first coat was dry I went back and gave a 2nd coat to those squares then removed the tape. I used a brush to do all of this painting for a few reasons. Brushes, while they required a slower and more methodical stroke, minimized bleeding under the tape. Also, utilizing 12 different mini rollers and pans could get expensive and unwieldy. Every time I finished with a brush, I’d return it to its own plastic bag to keep the paint moist. Hint: If you have a painting project that will take more than 1 day place your brush or roller in a plastic bag, seal it, then put it in the fridge overnight. Only do this with latex paints. Other more odious products can ruin food. Believe me, I know firsthand.
Paint as many as you can before needing to remove tape and re-tape
Once the first set of cubes was completely dry, I re-taped on the opposite edges and painted the isolated squares with 2 coats, then removed tape, let dry, and re-taped. I repeated this process until all squares were completely painted. Inevitably there were some areas where either the paint bled under tape or the tape overlapped too much leaving white to shine through. I had to go back and touch up these areas with a small detail brush. Finally, I removed all the border tape along the ceiling and baseboards, and voila, Minecraft wall accomplished! This project took about 2.5 days to complete. It helps to be able to ventilate the room with fresh air provided it’s not humid or raining outside and a fan to help speed up the drying time between tapings.
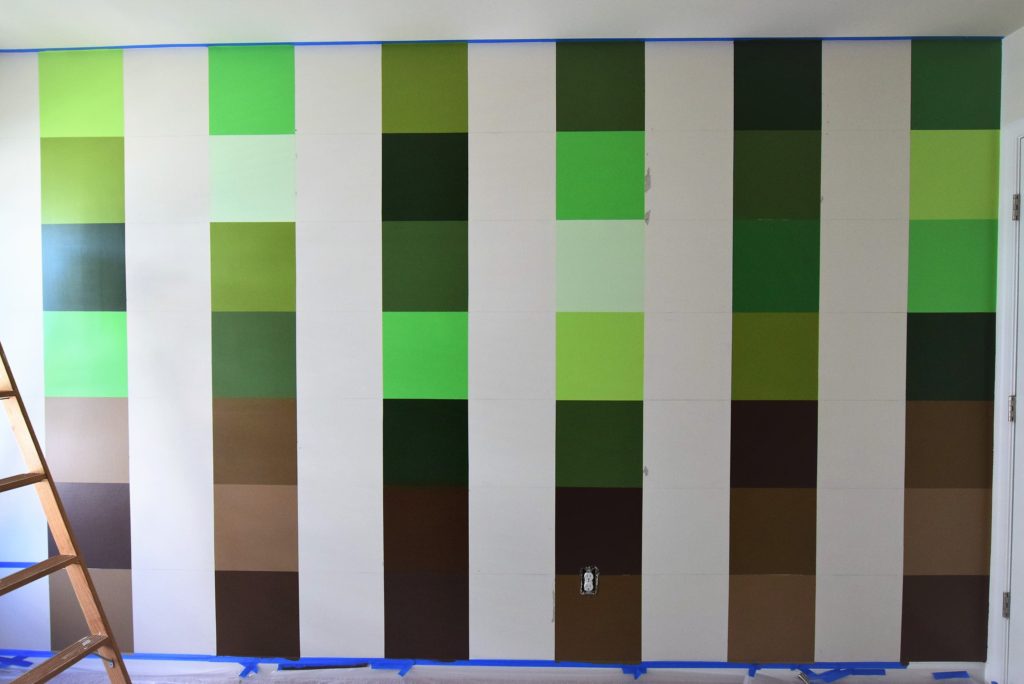
Remove tape and then re-tape in next area.
Getting closer – be patient! Ensure that same colors aren’t adjacent.
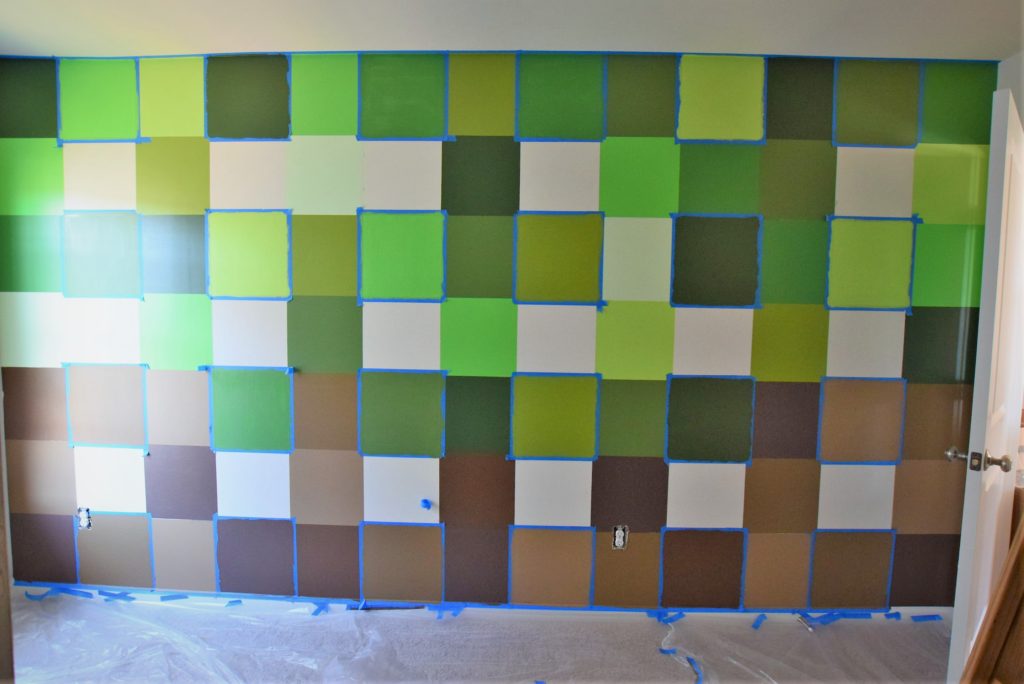
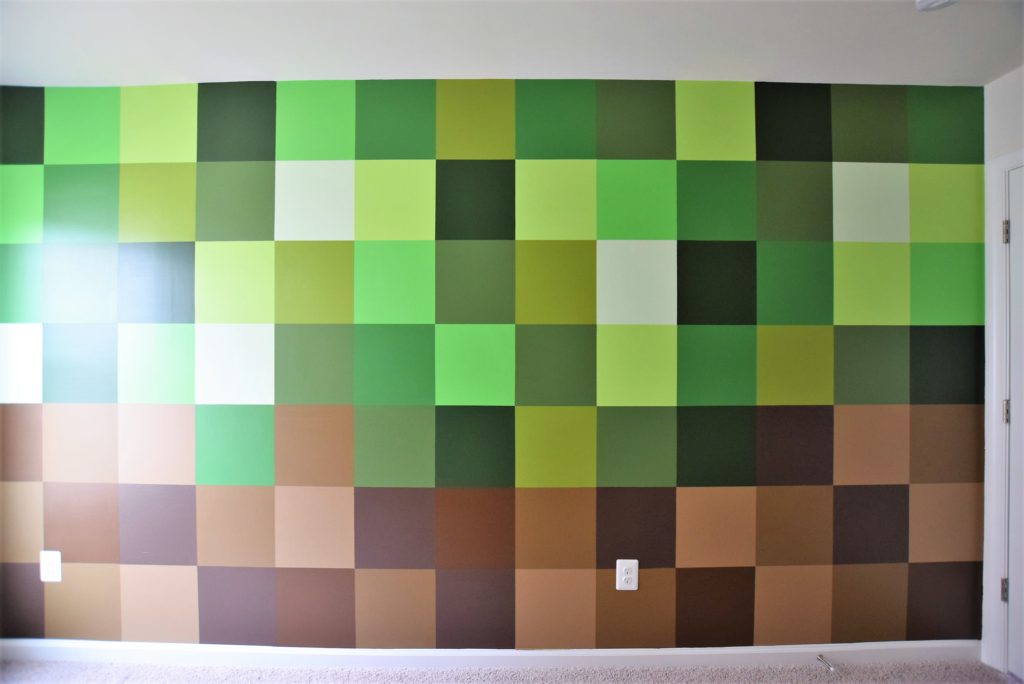
My Minecraft fan hadn’t fully moved in yet, but once his room is complete I hope to be able to share the entire look here! Here is the finished wall:
The finished product – adds dimension and interest.
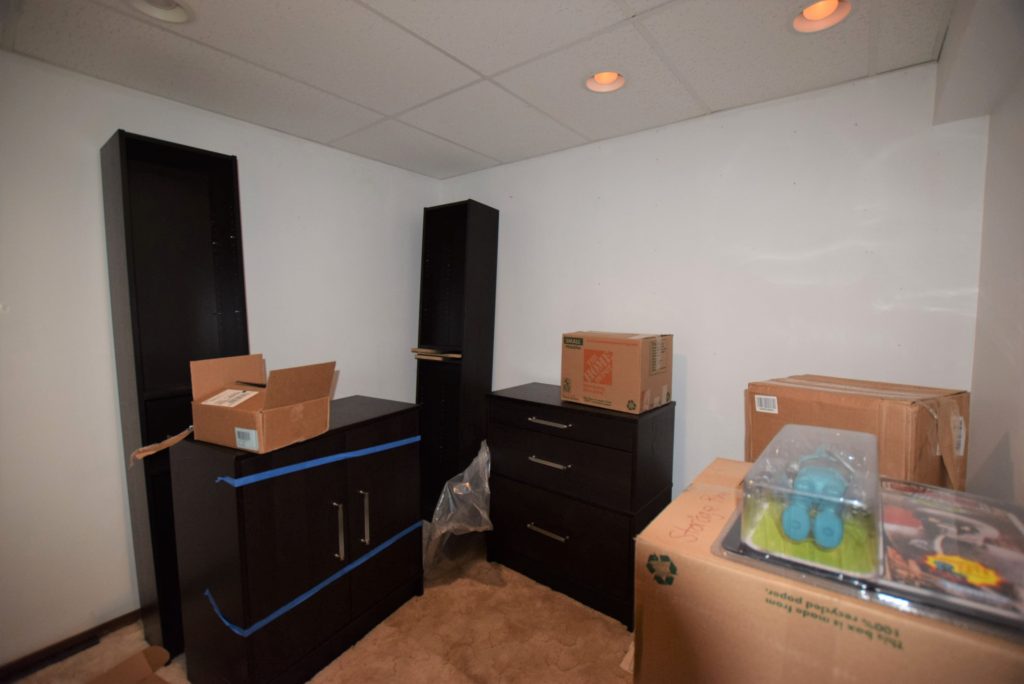
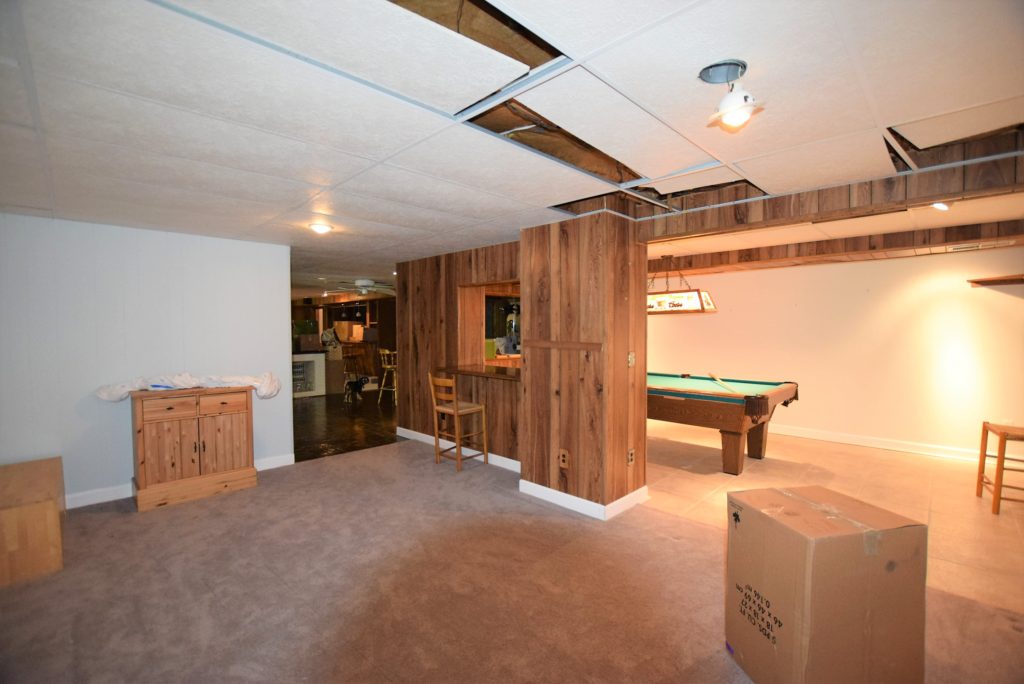
In the last post I took you through the main level of our big renovation adventure, “before edition”. Today I’d like to take you through the downstairs. Well, actually, I don’t want to, because it’s a bit embarrassing. It’s the basement level of our 5200 sq foot house and the basement is just as long and rambling as the upstairs. Right now it’s filled with moving boxes and furnishings scattered aimlessly. Our justification for this helter-skelter appearance is, “Why bother to take a ton of effort in establishing this space as livable rooms since so much of it will get renovated?” Maybe this is lazy, but we’re saying it’s practical. So hold on to your hats for this messy tour.
The 2 really great things about this basement are that a) one side is completely at ground level, so we have full sized windows and doors, rather than those mini basement windows and b) the basement stretches the full length of the house. You can enter this level right from the foyer, which is a little odd. Hopefully we can make the basement feel more like the lower level of the home than a basement so this setup won’t seem so bizarre.
Basement Before Tour
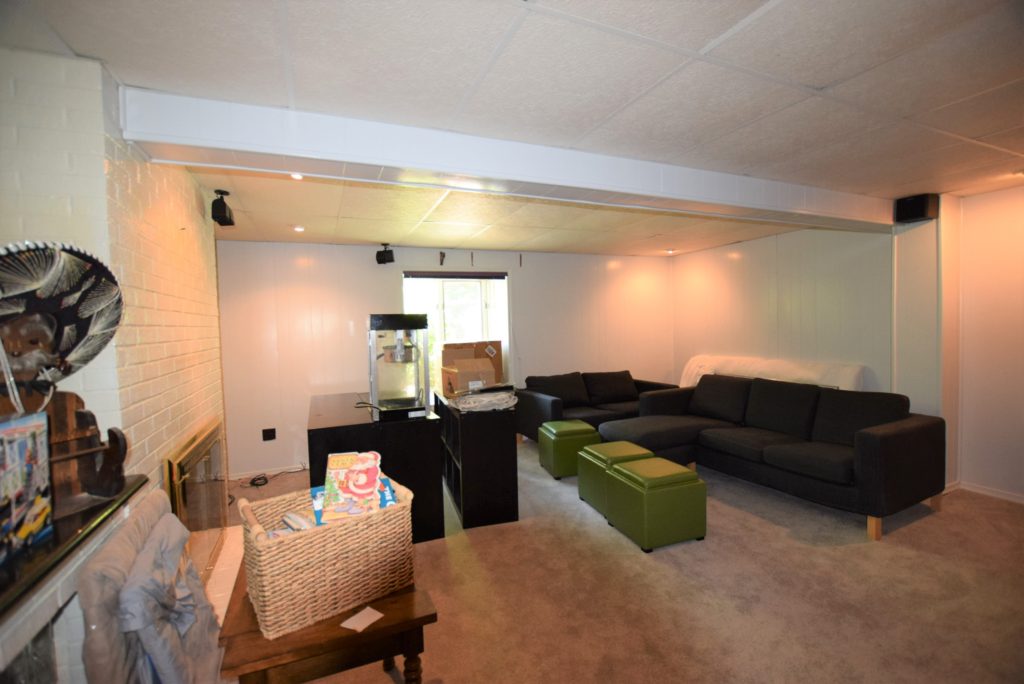
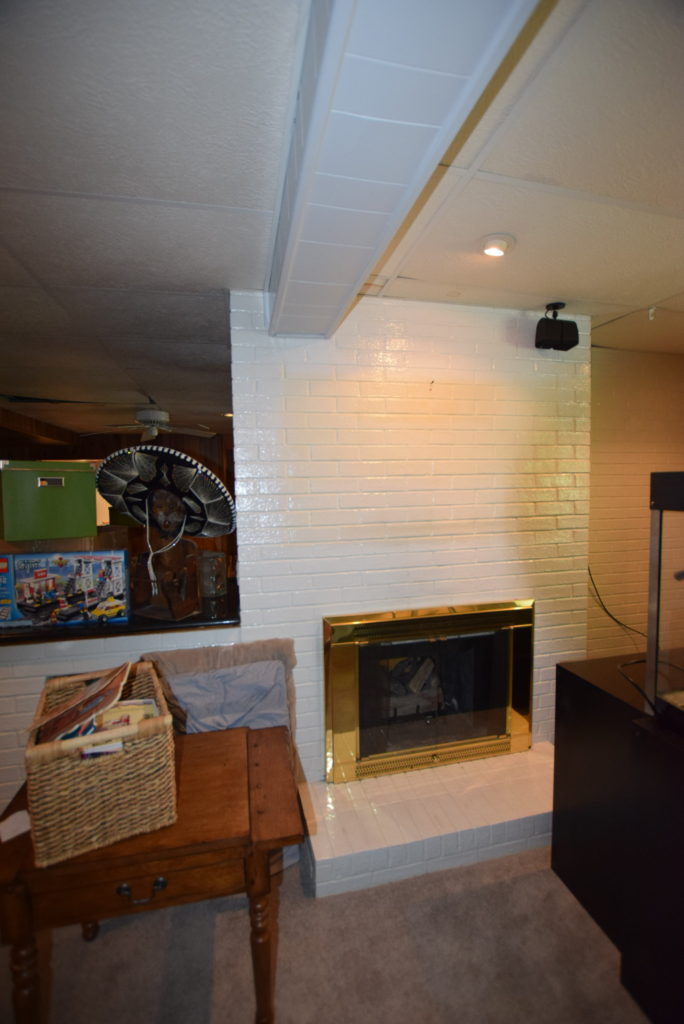
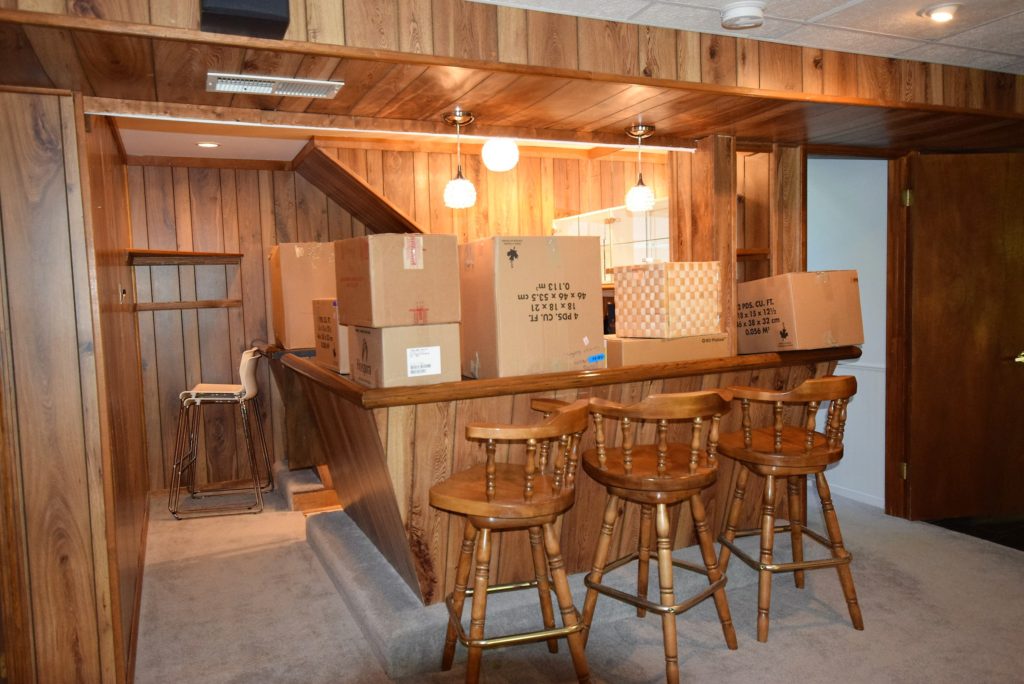
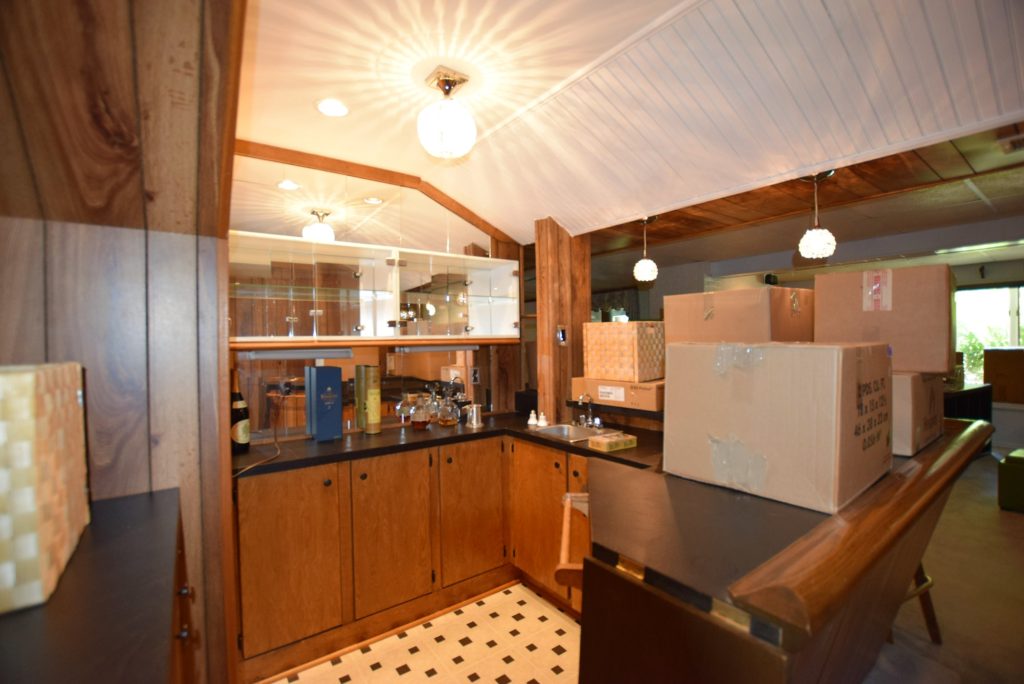
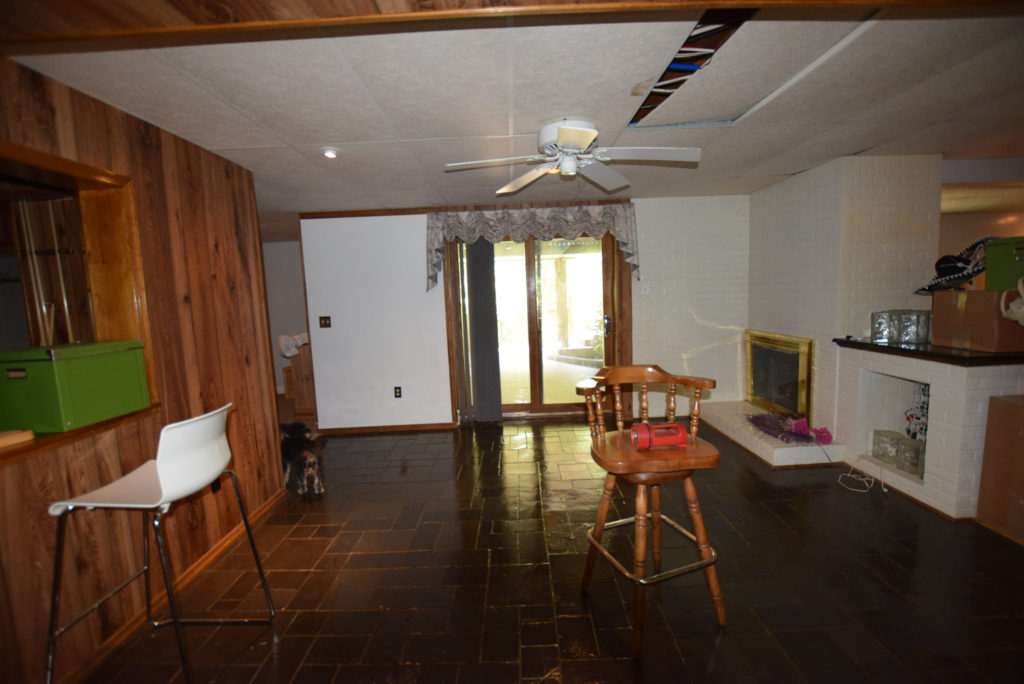
The stairs lead to the main living space which also shares space with a built in bar. There is an interesting 3-sided box window (like a bay window but with 90 degree angles) that has a small seat area with awesome vinyl tile on the top. This room also has a 2 sided fireplace and like most of the basement, a drop ceiling. The bar area looks straight out of the 70’s with wood paneling, linoleum flooring and lots of mirrors. The bar’s saving grace are the pendant light fixtures which are actually kinda cute. Mind you, they neither go with the wood paneling nor are they my taste nor will they coordinate with the future style of the home, but they are sweet little fixtures.
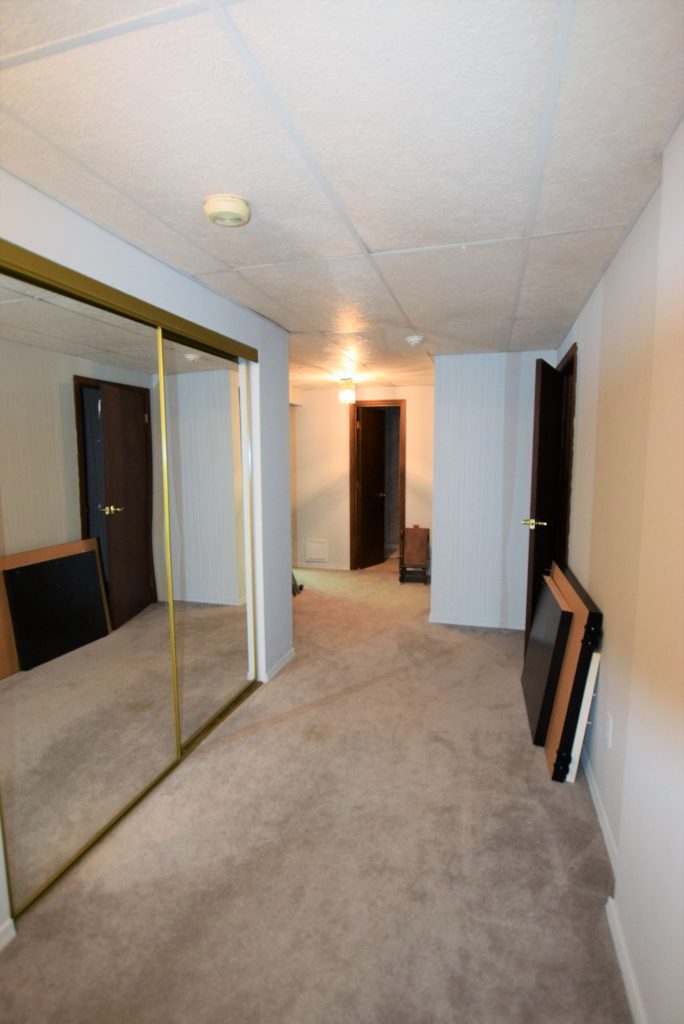
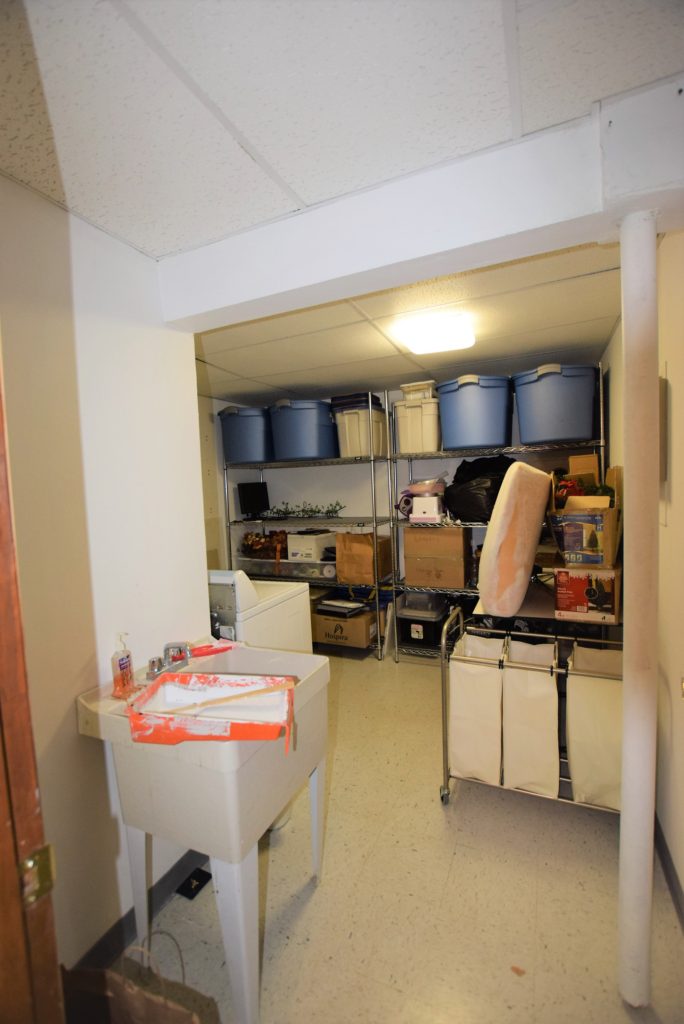
Around the corner from the bar is a wide hallway which houses the utility room hidden behind sliding mirrored doors. There is a very small room on the right that was at one point a home office. I know I won’t be able to use it as my home office because there are no windows. The current laundry room is also off the hallway and doubles as a storage room. The utility sink got a quick facelift this week with leftover Rustoleum Tub and Tile paint (more in a future post) and the washer and dryer will eventually be moved upstairs to the mudroom.
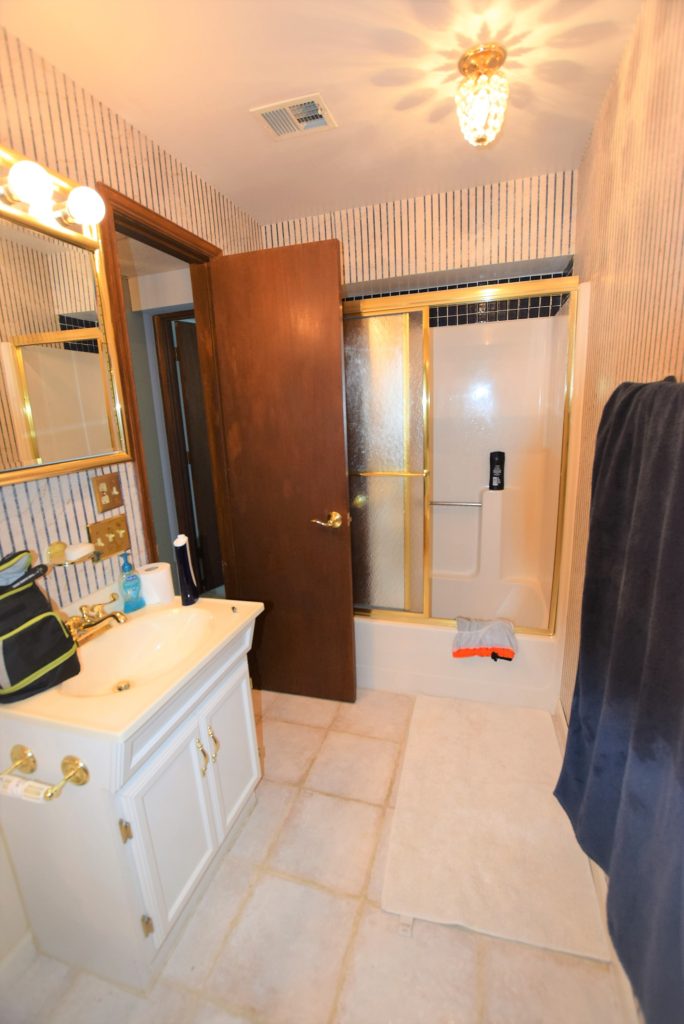
There is a small bathroom at the end of the hall. Oh, how I wish it was closer to the exterior door to service the pool! We can at least work on updating the finishes and fixtures. We’ll also look for a way to rearrange the shower since there is a large HVAC soffit running right over the shower head. This shower is for short people only!
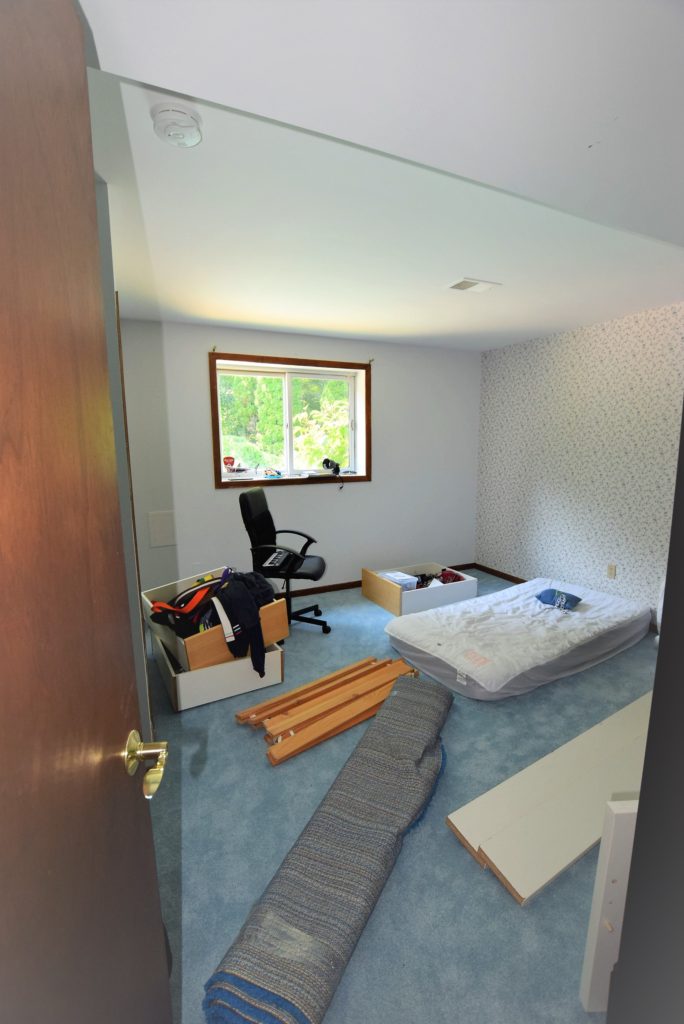
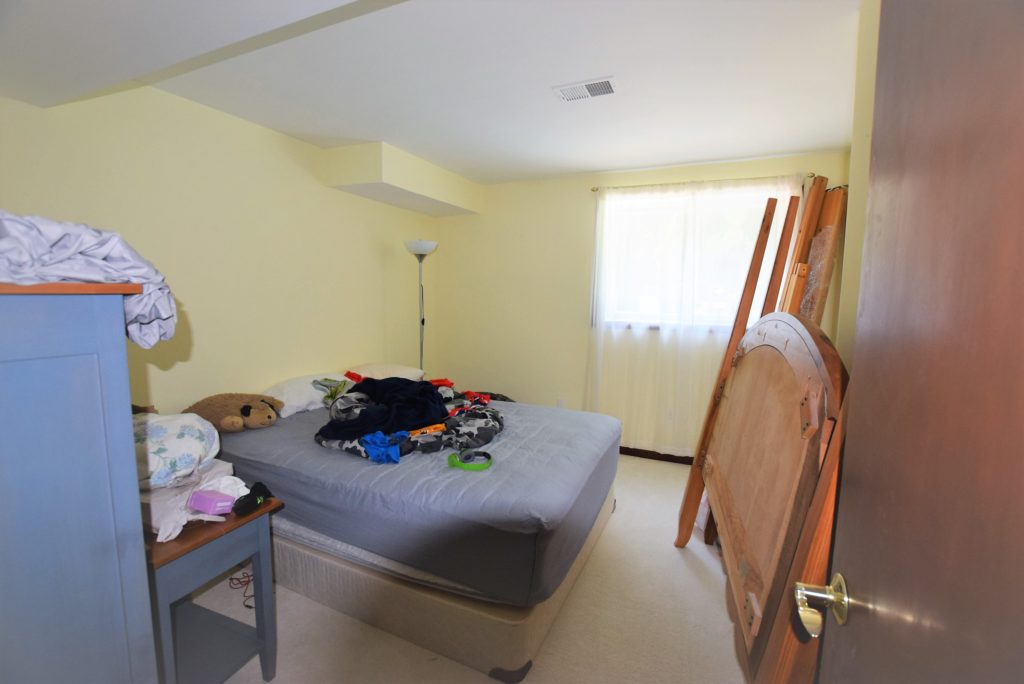
Two bedrooms at this end of the home have flowered wallpaper, mirrored closet doors and carpet. However, to their credit, they each have a full-size window overlooking the pool and patio and a real drywall ceiling. I can’t believe I am getting excited by drywall ceilings.
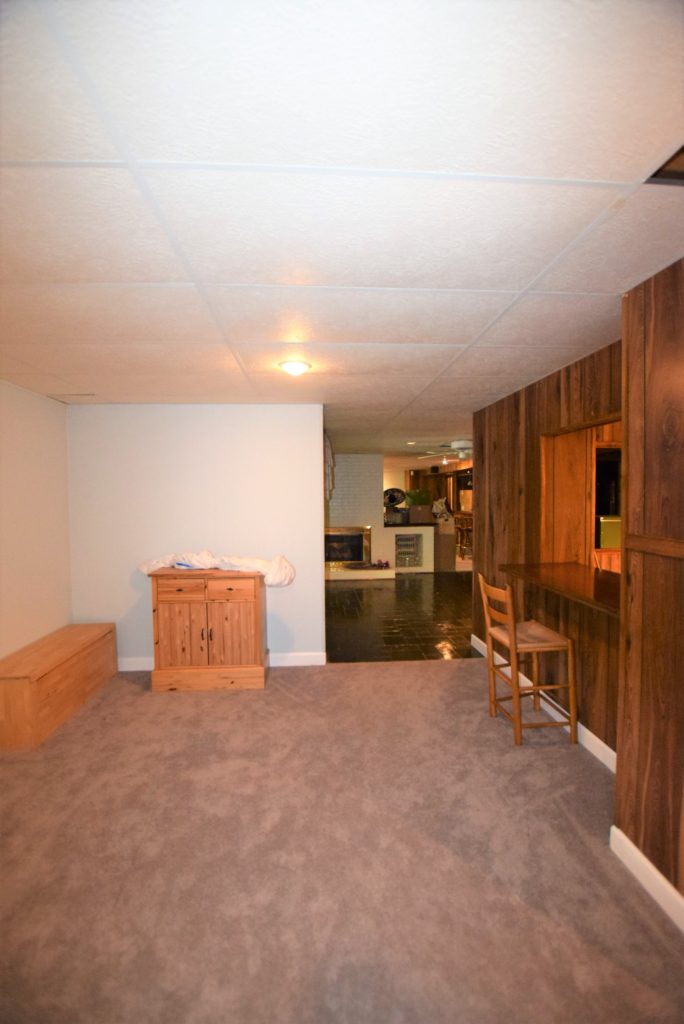
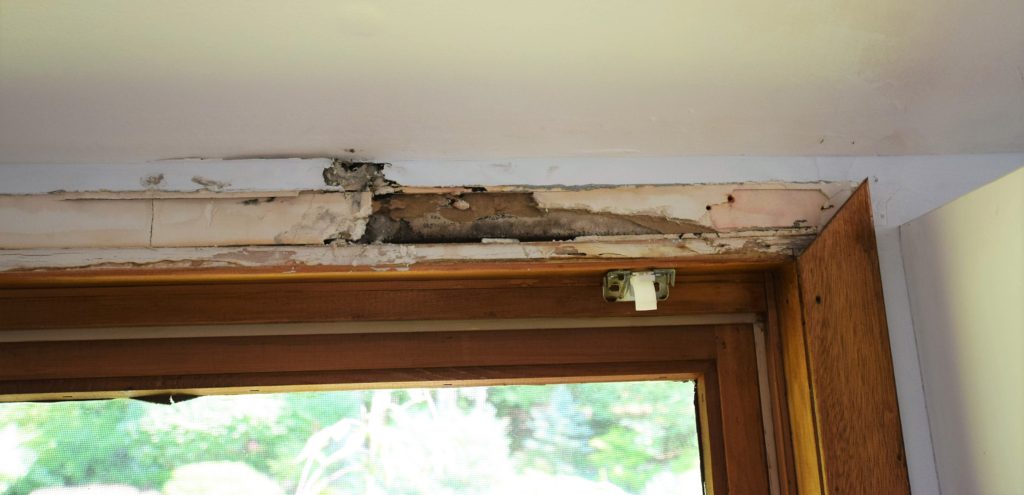
An awkward large foyer-ish space with sliding doors that lead outside to the back yard is on the opposite side of the steps leading upstairs. Even with the large doors this portion of the basement is still very dark because the adjacent exterior is covered by a deck. Adding to the darkness is a deep grey slate floor, which doesn’t sound that bad, right? Buuuuut, it’s bad. It’s bad because the slate is coated in some sort of high gloss impervious sheen. I don’t know why anyone would do this to an otherwise perfectly good slate, but it is what it is, and therefore it will change. Note the chair underneath the askew ceiling tile is where we found another leak in the house.
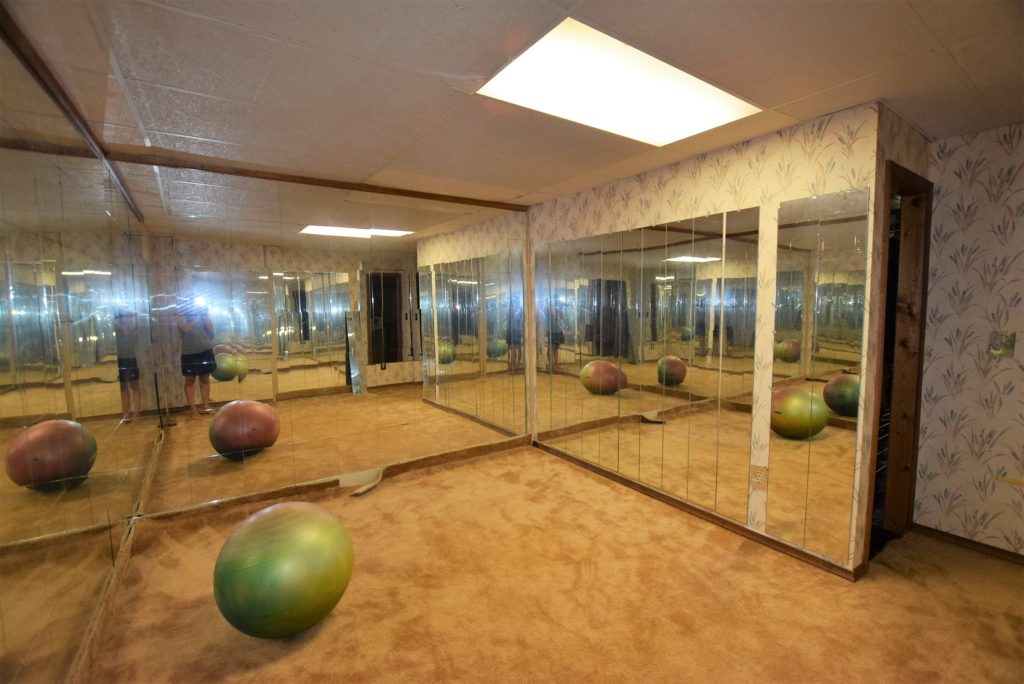
The small gym is located just behind the foyer area. It is covered from top to bottom in mirrors. Big mirrors, little mirrors, rectangles, squares and cracked. I don’t know how anyone worked out in there without getting vertigo from all the mirrored surfaces and mirror seams that weren’t lined up perfectly. It also has awesome fluorescent lighting so of course you’ll look great as you gaze into those mirrors. We would like to have a home gym but we may borrow some space from the shiny slate area and we will certainly redo the mirrored walls.
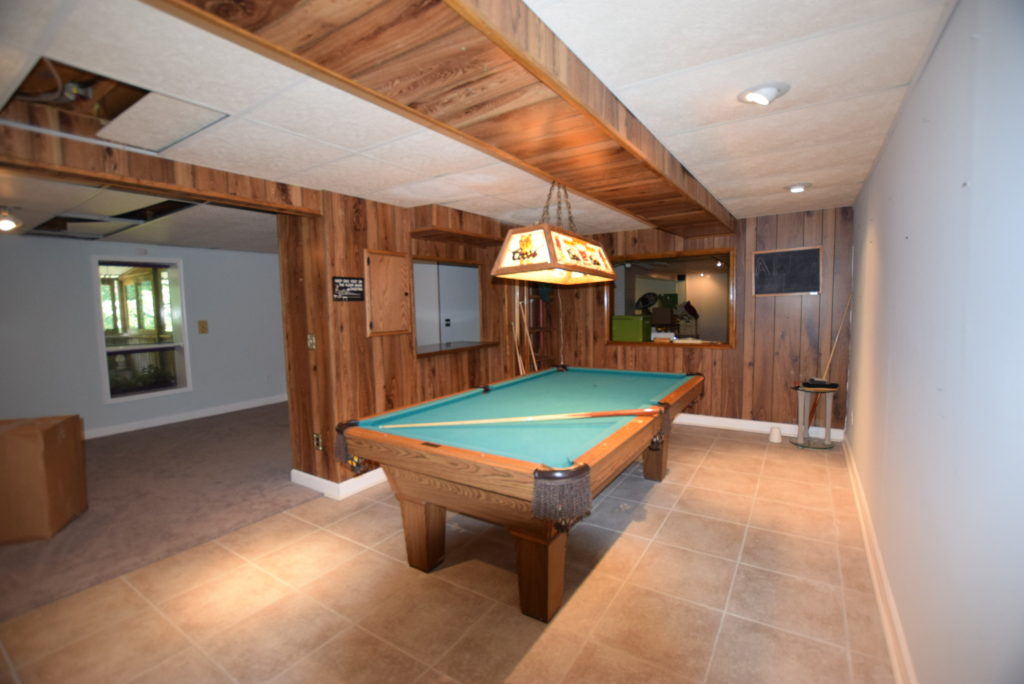
To the left of the basement foyer are 2 final rooms, one with a window that looks out to the defunct hot tub. We’re not sure what this room will be used for just yet, but are considering adding a bigger window or more doors to let additional light in. Just adjacent to this room is a nicely tiled room with some strange wood paneled pillars and half walls. This room is home to the pool table and the coordinating Coors beer pool table light. This area will remain a pool and game room but will see some upgrades in wall-covering, ceilings, and lighting.
Phew! I think that about covers it for the basement area. Check back next week or a picture tour of the home’s property which is the REAL reason we bought this house.
Well, we did it. This is either the stupidest thing we’ve ever done or the most brilliant. I’m talking about our decision to buy a new house. A house that, for us, was pretty expensive, and yet still required work. After 5 days post move in I was convinced that it was a dumb idea. We had already found 3 leaks and evidence of a mouse infestation. I was probably just tired and overwhelmed from all the hassle and chaos of moving and I wasn’t seeing the big picture. The bigger picture is that this house is huge, about 5200 square feet. It has all the things we wanted, a pool, a 3-car garage, was in our kids current school boundary, and most importantly, it had space. Wonderful, glorious space. I could stretch my arms out wide at our last house and touch both my and my neighbor’s home, so this new house on 5 acres, just outside of Washington DC, is a rarity and a real treat. Sure, everything has its cost, and in this case getting what we wanted was going to cost us both monetarily and with the promise of investing time and sweat equity. So now, after being in the house for just over a week, and already starting a few small projects, and in the midst of unpacking I’m feeling better about our decision. Welcome to my major project, my new home!
My hope is to be able to document the renovation on the blog from start to finish. So first, I guess it’d be smart to show you some “before” pics and describe the place. Warning, these pics (namely the interior) show unadulterated moving mess and chaos.
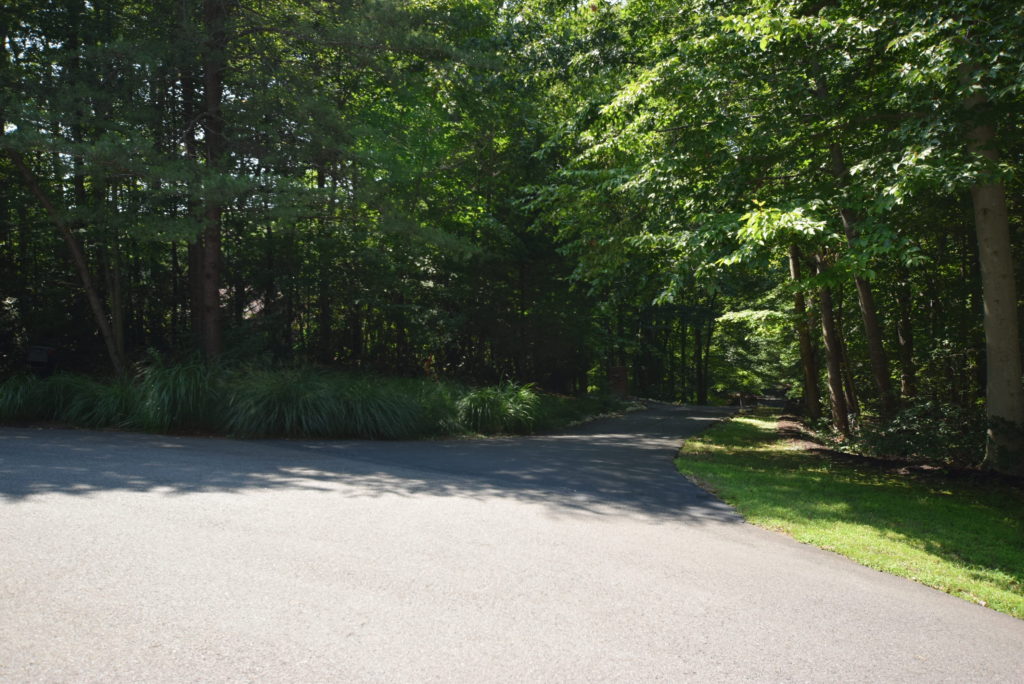
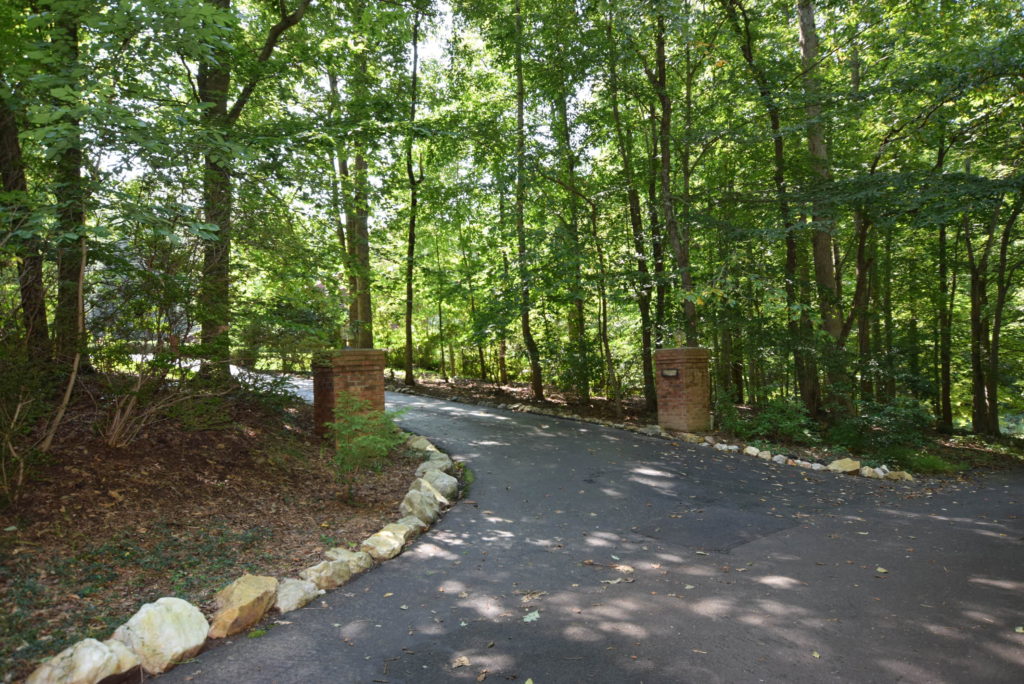
Real estate is all about location, location, location, right? This house is in Fairfax County, VA. Close enough to commute to downtown DC for work every day, some of the best schools in the country, and quintessential suburbia. Except this house is nestled in the woods on one of the few remaining 5+ acre lots in the county. The location is about as close to perfection as we could get.
The lot is at the end of a cul de sac on a private drive. It’s so nestled in the woods that you can’t even see the house from the street.
The house style is a 1980’s contemporary. It’s got a long and rambling floorplan that contains one main living level and a walkout basement level. The current style, both inside and out could most politely be described as “retro”. I’m pretty excited to venture into designing a contemporary home since almost every project in this area is traditional, colonial, or coastal. This will be a great change of pace and a bit of a challenge for me design wise, but I’m up for it!
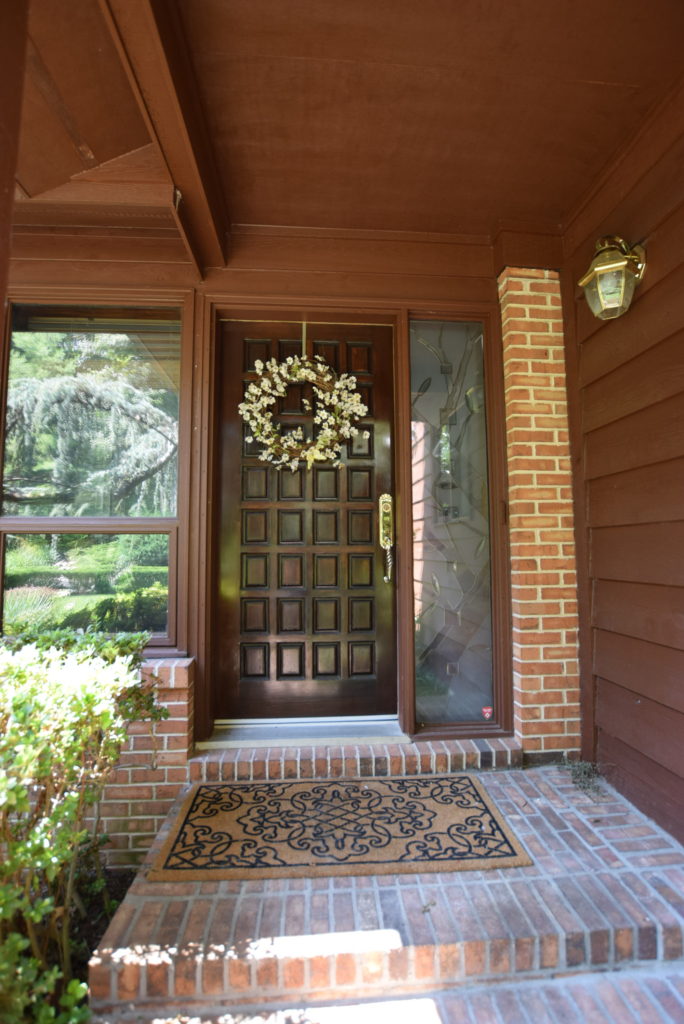
The exterior of the home is brown, lots. of. brown. Brown wood siding, brown brick, brown painted wood decks, brown asphalt shingles. The solid wood front door blends right in because, yep, you guessed it, it’s brown,
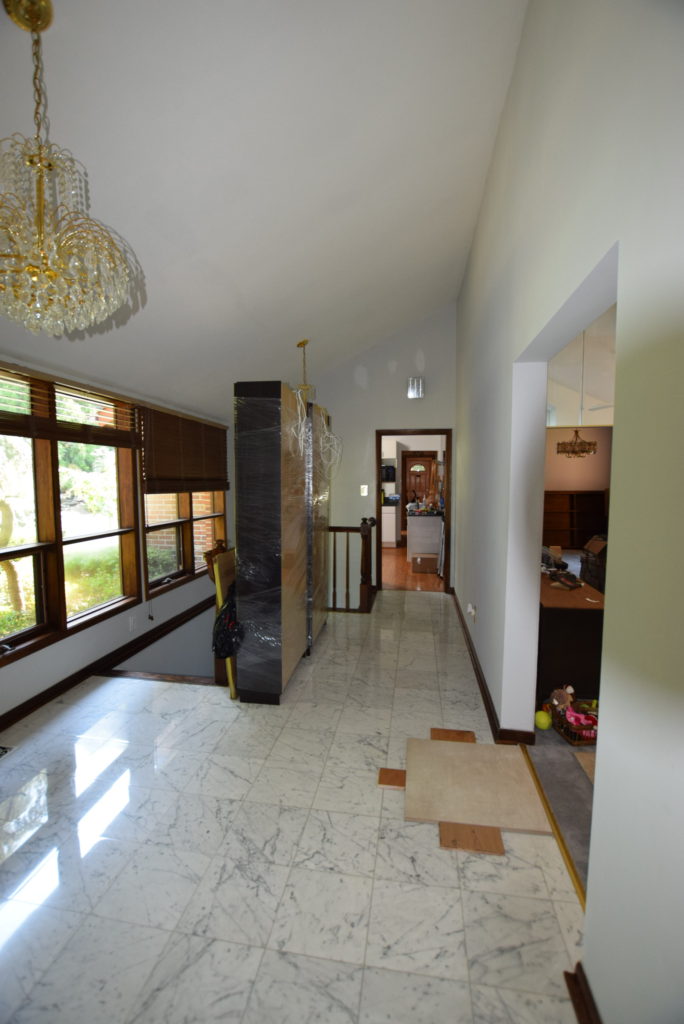
The foyer is large, has lots of good light from the front windows, some crystal and gold chandeliers that aren’t my bag and frankly don’t go with the home. The flooring is a glossy Carrera marble tile, which isn’t bad, but several tiles are cracked. The foyer is the central hub with stairs leading to the basement (and a very traditional style railing), forward to the living room, left to the kitchen and right to the two main floor bedrooms. Yep, new flooring samples are scattered on the floor presently.
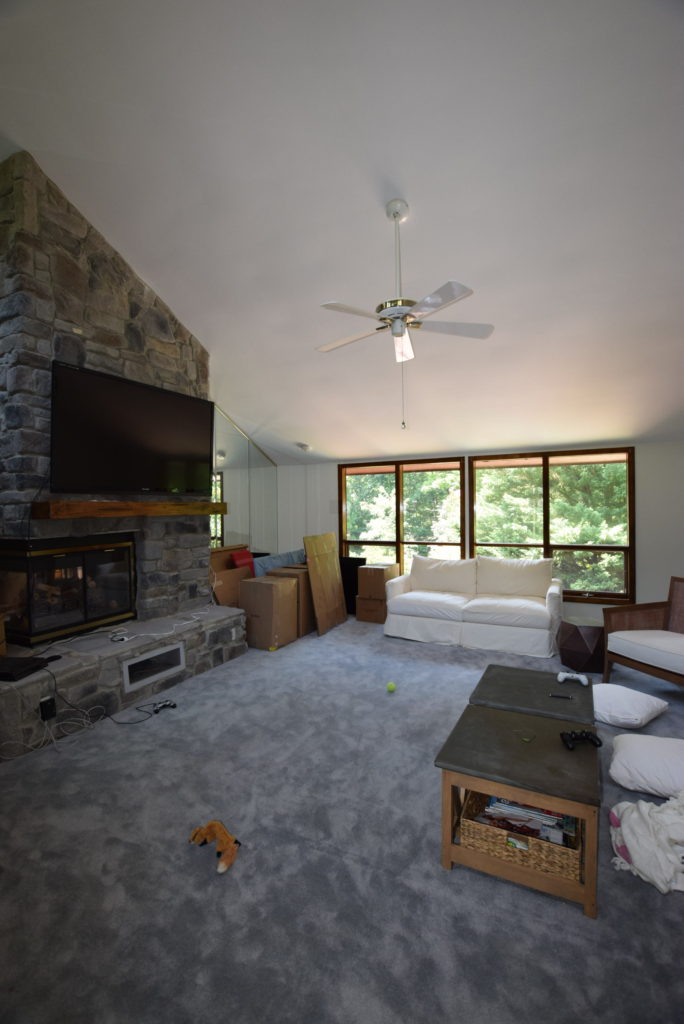
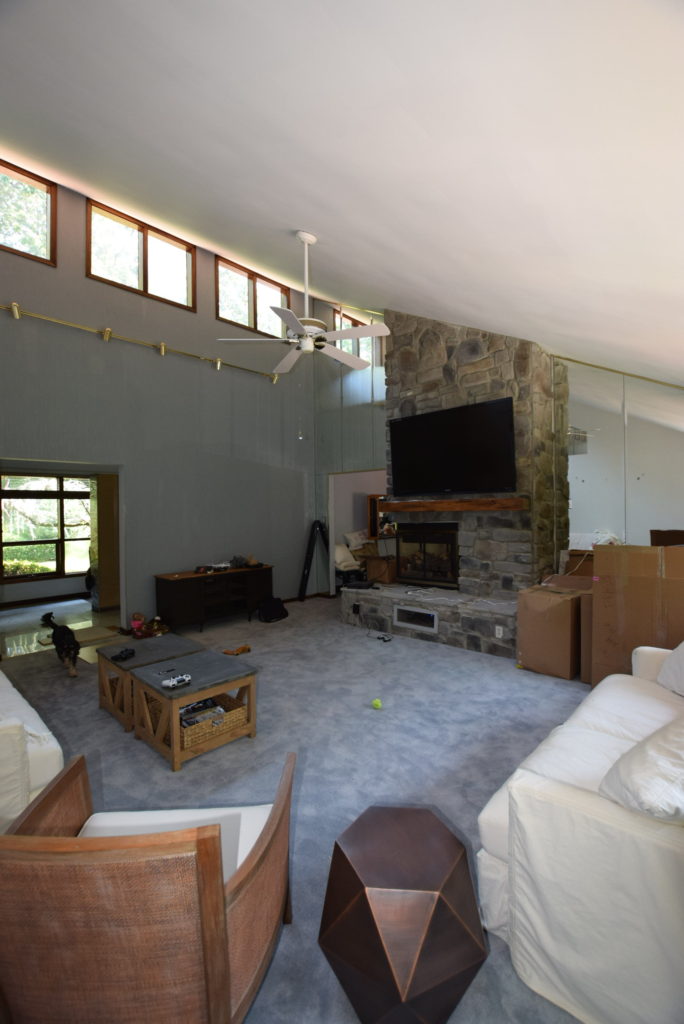
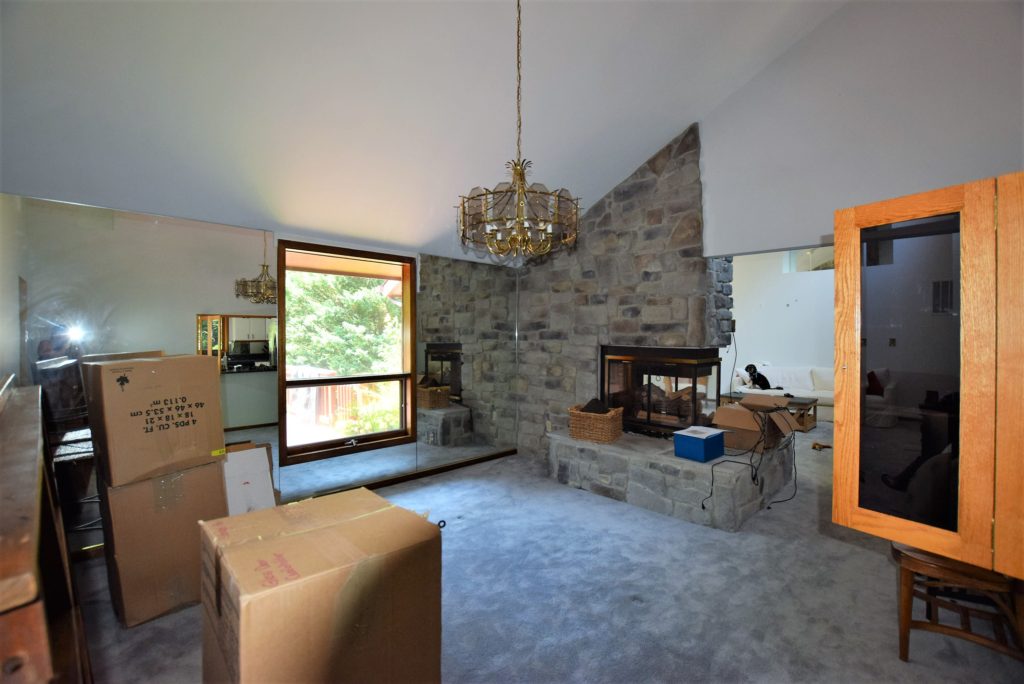
The living room is huge. Everything in it looks huge. Big wood picture windows with casement bottoms, vaulted ceiling to probably about 20 feet high, massive stone fireplace and the first appearance of the omnipresent mirrors. I haven’t counted, but this house is like a funhouse. There are mirrors everywhere you turn. Full wall mirrors, cutout mirrors, tiled mirrors, mirrors on top of mirrors. The living room also boasts the spongiest carpet I have ever felt. My daughter has taken to practicing cartwheels here because it’s just like a gymnastic floor.
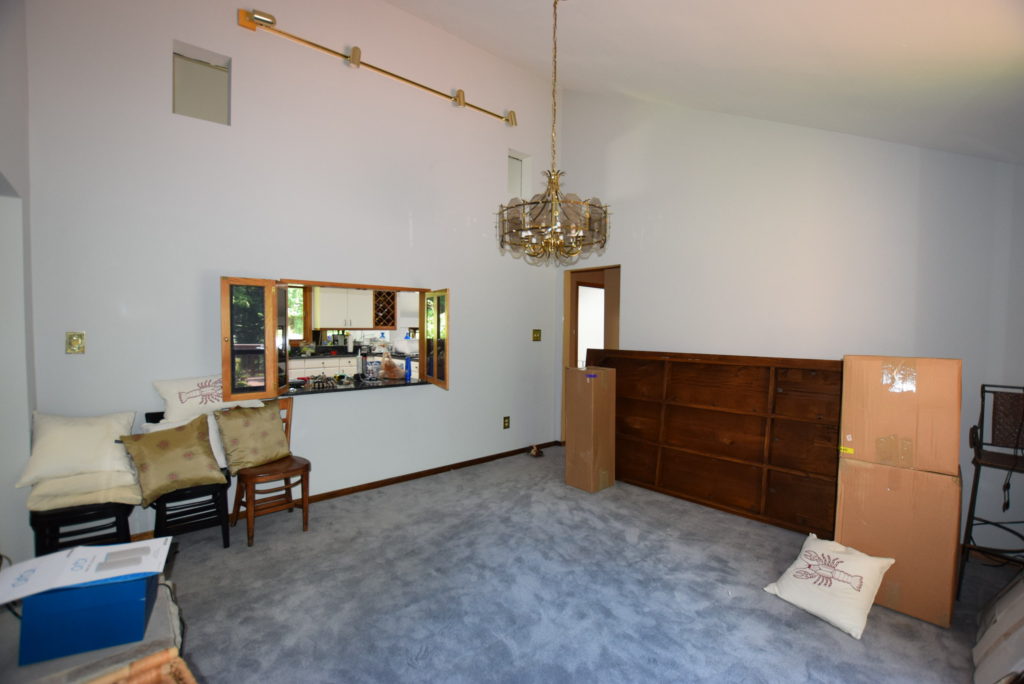
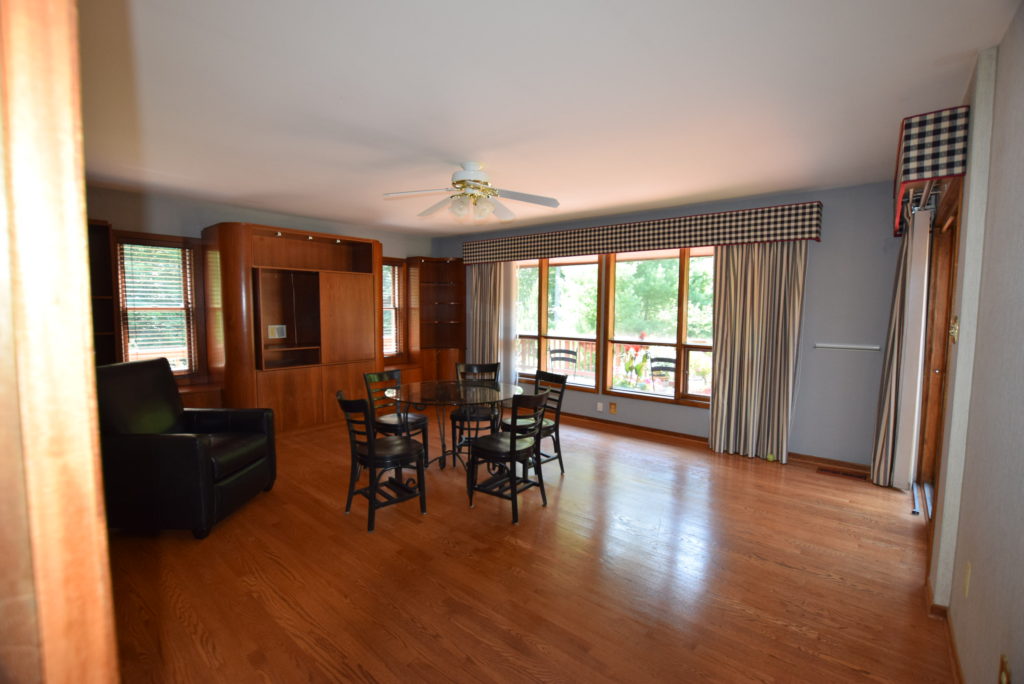
The dining room is connected to the living room and shares the fireplace wall. There is a smaller window overlooking the back yard, flanked by, yes, more mirrors, and a fun little drive through opening to the kitchen. And by fun, I mean for my 10 year old self when I used to dream of working the drive through at McDonald’s (talk about #goals). The dining room also has a chandelier very typical for the 1980’s, bright brass and faceted glass panels.
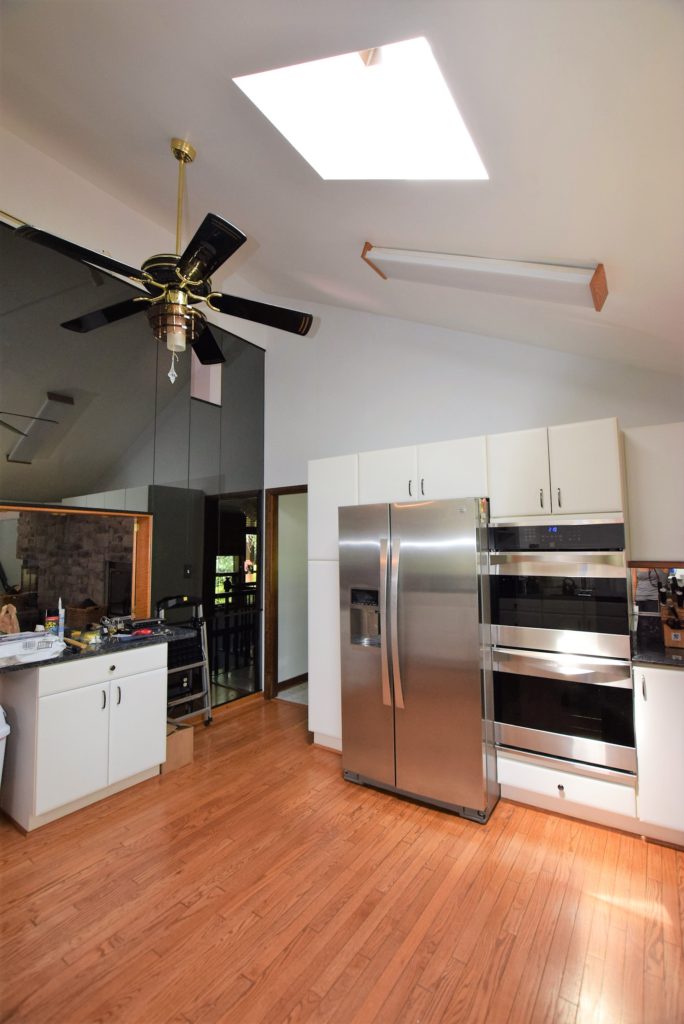
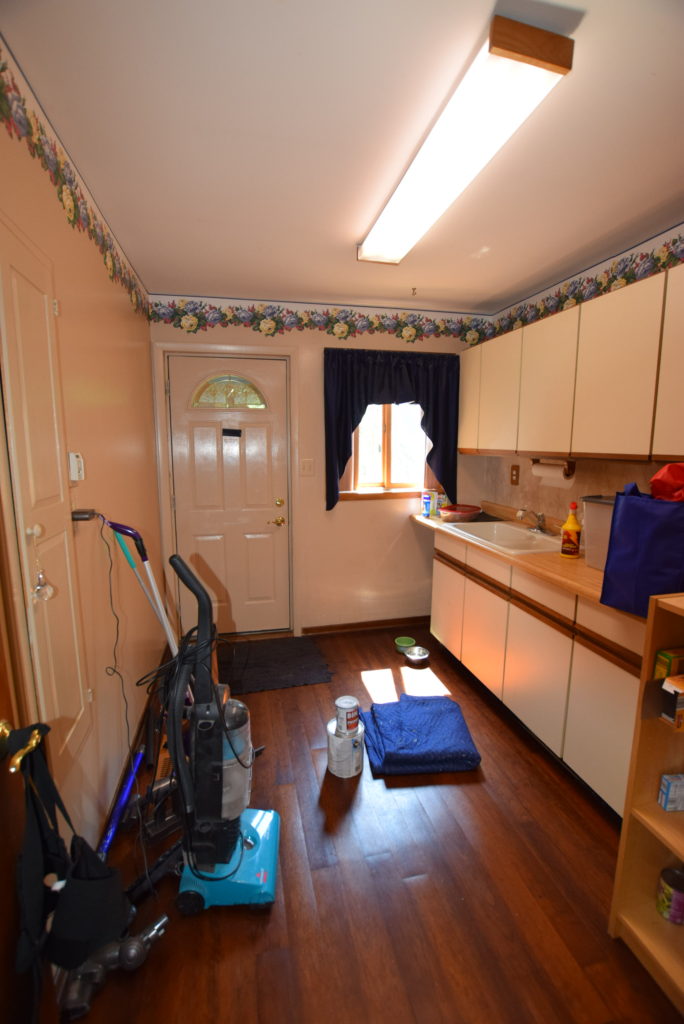
The adjoining kitchen is small by today’s standards. The dated white cabinets, oak flooring, leaky skylight, unintentionally retro ceiling fan, fluorescent lighting and a wall of black mirrored glass are all the things that need to change. To its benefit it does have nice granite counters and an updated fridge and wall ovens. The ancient ceramic cook top and mismatched dishwasher are also less than ideal.
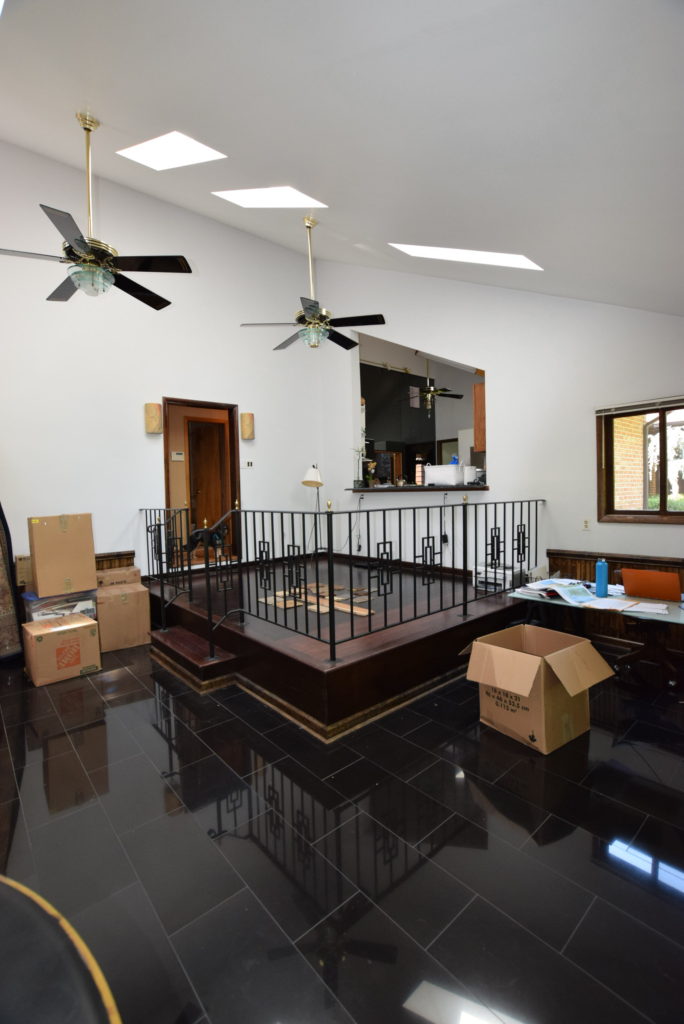
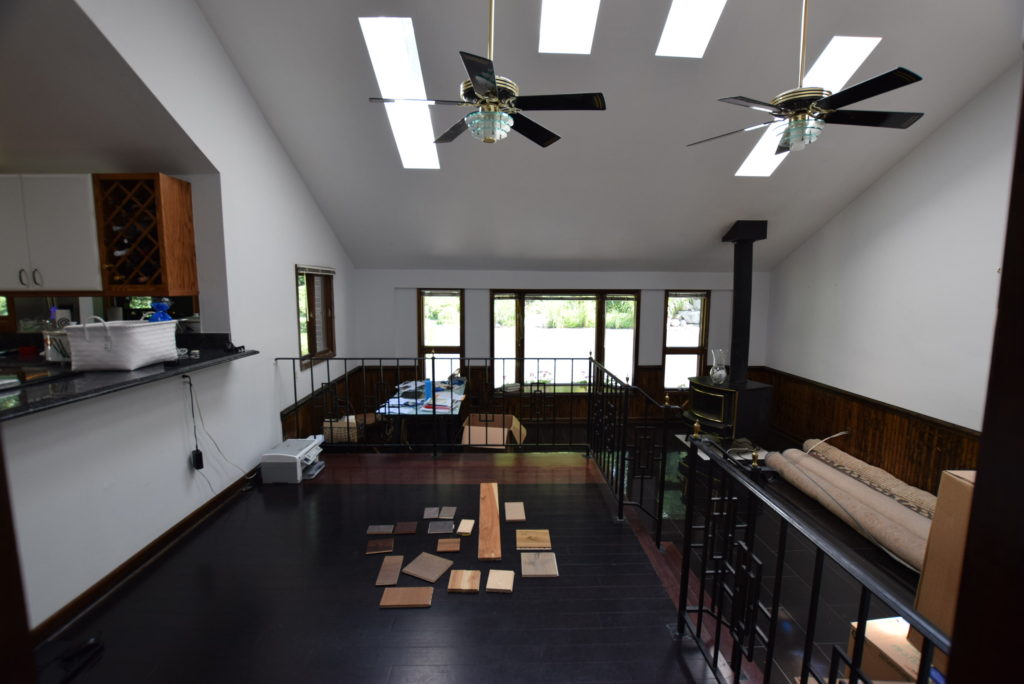
The hall next to the kitchen leads to another room with a raised platform that forms a bar to the kitchen cutout, but this platform makes the rest of the space in the room awkward and unusable. This room, which probably served as a family room, breakfast room has 3 different floors, black bamboo, red bamboo and glossy black granite. The vaulted ceiling is nice as are the skylights and the large front windows. We hope the woodburning stove will help with energy efficiency this winter. This room actually used to be a garage so when it was converted to living space room was “taken” for the electrical panels by building a awkward closet. The home has a number of electrical issues so as we fix them we’ll probably also relocate these panels since their current set-up is neither to code nor aesthetically pleasing.
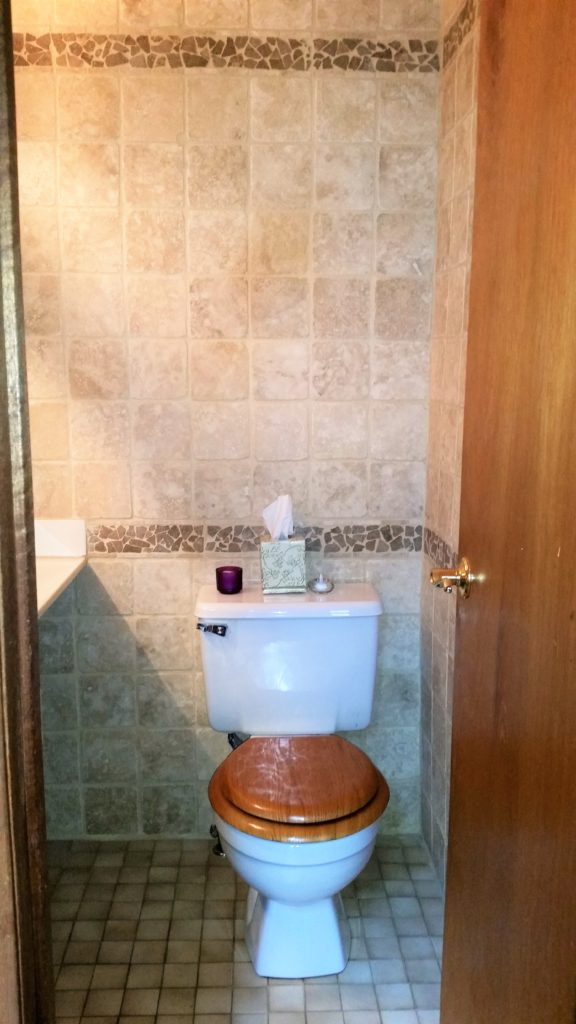
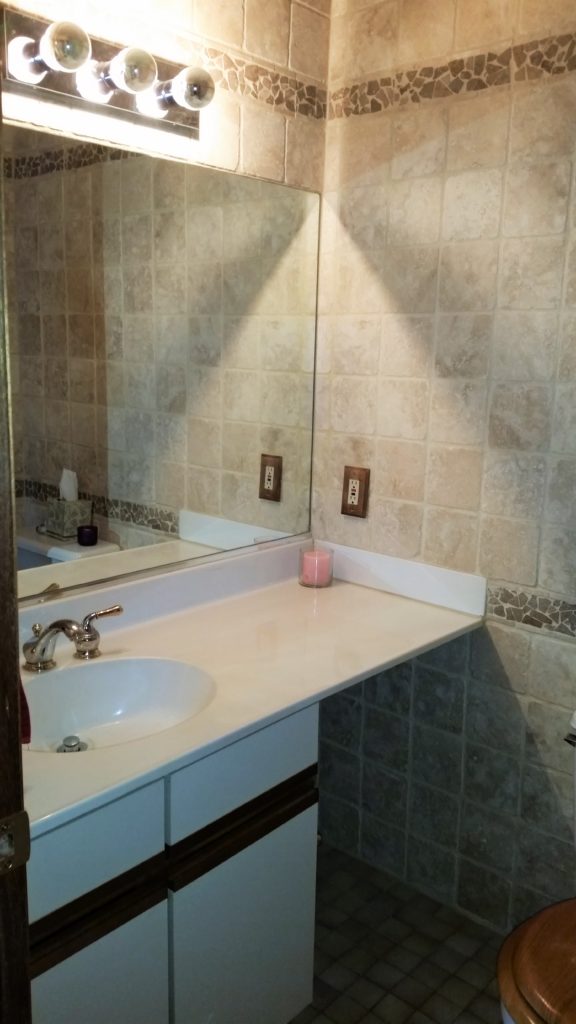
Across the hall from the family room is a powder room, with floor to ceiling travertine tile, dated sink cabinet and lighting and a toilet complete with a wooden toilet seat.
Next to the powder room is one of my favorite rooms in the house… well not in its current state… but I’ve been wanting a mudroom forever. Eventually this will be a mudroom/ laundry room with extra pantry style storage.
The final room on this side of the house is yet another living room type space, which we’ll call a den since we’ve already got a living room and a family room. Our hope is to not call it a den for long, we’d love to convert this room to the kitchen to maximize easy access to the back decks and the overall larger space. We’ll know this Friday when we meet with a structural engineer to tell us if these dreams can come true since some adjoining walls would need to come down and we’d want to vault this ceiling as well.
Across the other side of this level is the bedroom wing. The hallway has a coat closet (with mirrored doors of course) and leads to a bathroom and our daughter’s room. The bathroom isn’t too bad. Sure it’s got a grey toilet and tub, 4 different kinds of tile (to the ceiling no less), a worn vanity, dated lighting, a mirrored medicine cabinet on top of a wall mirror, old brass fixtures and a brass and glass shower enclosure. While we await for approval to knock down walls, I’ve taken on this bathroom and the nearby linen closet as my first pet projects. I’ll detail more in a future blog post so you can see my low-budget reno on this bathroom.
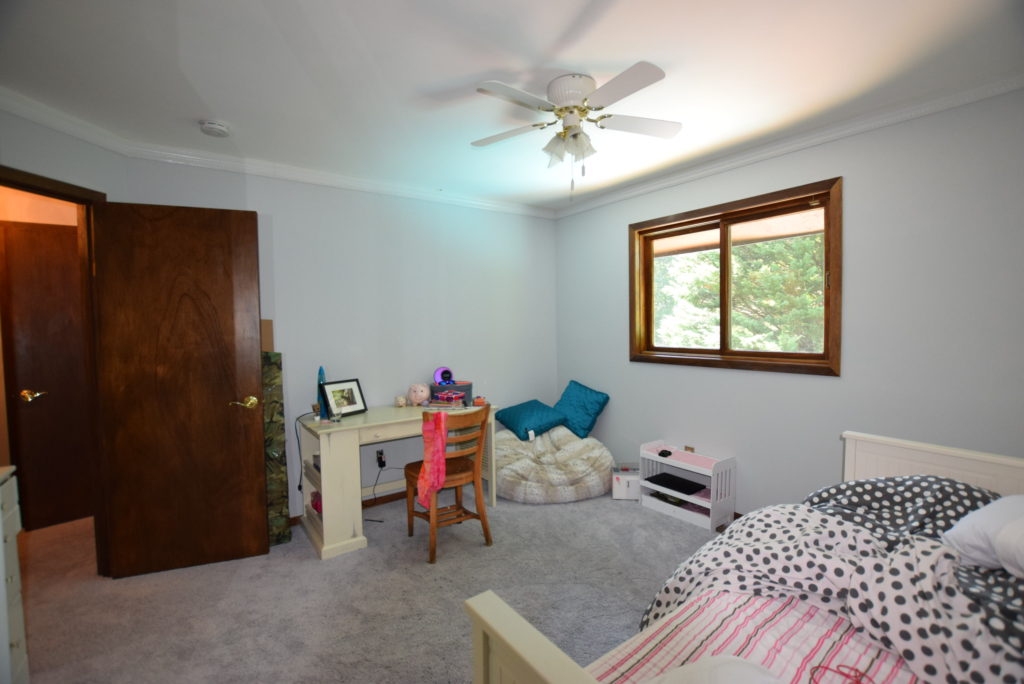
The 1st bedroom off the hall is my daughter’s and it’s a pretty standard bedroom. Smaller than her last but it overlooks the pool. We’ll eventually update it by replacing the traditional trim with something more contemporary, replace carpet with hardwood, new closet doors and paint. Pretty simple, right?
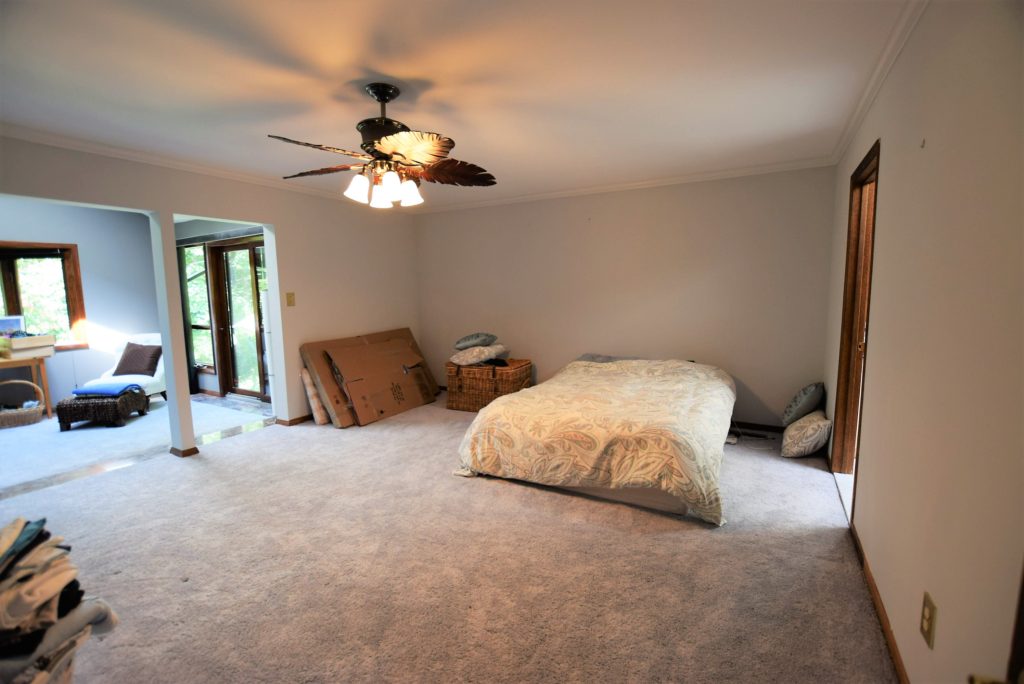
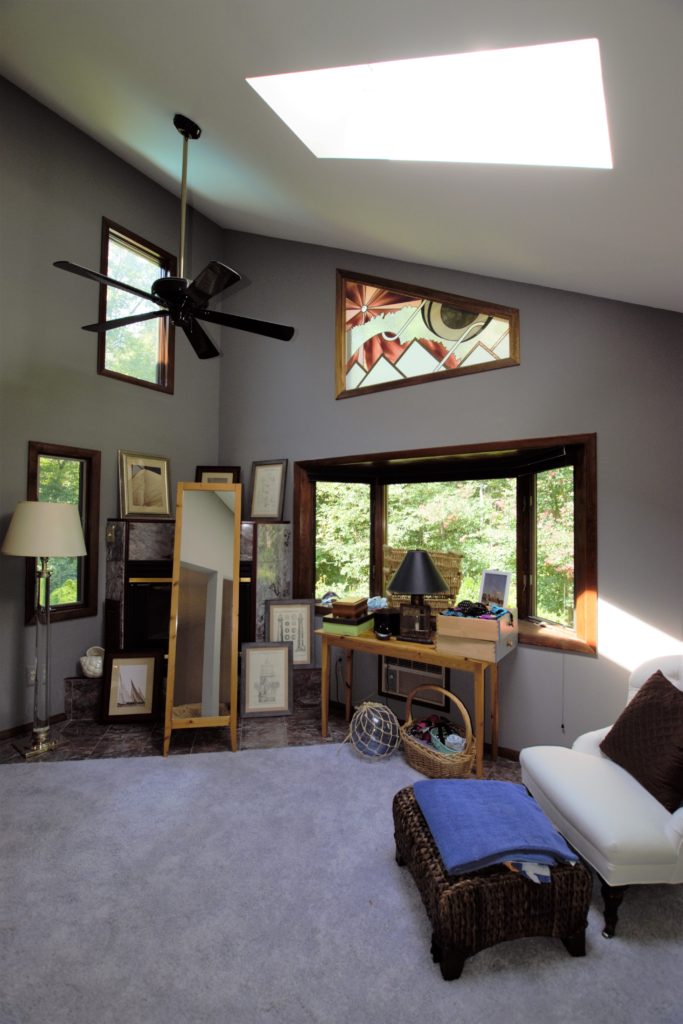
Finally, the master suite. It’s huge, thanks in part to an addition in which the previous owners added a room on top of an existing deck. However, this room currently seems to slope downward and features a gas fireplace that doesn’t seem to work, and burgundy and grey tile that is popping up unprovoked. It’s a good thing that this space is so large because we will need to borrow some space to make the master bathroom larger. The bath currently has gold framed shower doors, mirrors everywhere, some glass block and a plum purple sink and coordinating 80’s era tile on the walls.
That’s all for today, over the coming days I’ll take you on a tour of the basement and our favorite part of this property and the real reason we bought it, the outdoors. Of course if you have great design recommendations, put them in the comments and share with your friends and family!
So as many of you may know, I own a vacation rental property in the Outer Banks of North Carolina. (And you can read all about our adventure embarking on a vacation rental here). Is it wonderful owning a beach house? Yes, it is. It is a sanctuary for my family. Is it ALL bliss though? No, it’s not. Wait. Why, you ask? Because our dream home is rented out to folks who mostly don’t take care of it and don’t worry about damaging or breaking anything, and, in a way, I can’t blame them, they are on vacation. They aren’t worried about spilling sticky stuff down the front of the cabinets, cleaning the crusty stuff off the grill or dinging the walls as they roll their suitcases down the hall. After a season of rentals, I often feel like crying as I wander the house assessing the last 4 months of “wear and tear.” Occasionally, there are issues that take a professional intervention. For example, we recently had to have sensors installed on the exterior doors that turn the HVAC system off when the doors are open. When renters leave the doors open while the AC is running, then hot, moist air from outside colliding with cool dry air inside, not only creates monster electric bills, it also creates excess humidity and potentially mold in the house. Thankfully though, most renter rigors can be fixed pretty easily (magic erasers are a wonderful thing). In the 3 years since our rental had been built, I was continuously either magic erasering or repainting our 2nd floor hallway because it got a lot of abuse from things banging against it; suitcases, laundry baskets, coolers, you name it, it’s apparently bounced off the poor flat-painted walls of this hall.
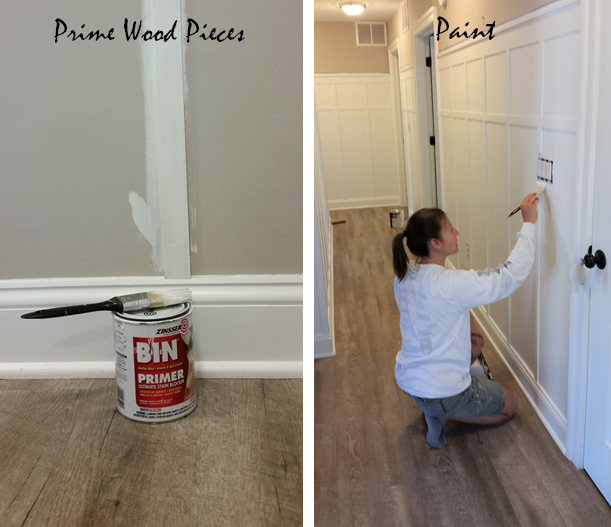
Hallway Before Board and Batten
This past week was spring break and my family and I headed to the beach for some home maintenance and relaxation. (While projects may not sound fun to most people, I have trouble sitting still, so I need a home project to relax). I decided to create a board and batten wall down the hallway in the hopes that the finish (being a semi-gloss, interior trim finish) would stand up to the scuffs and scrapes better than ‘ol flat paint, and easier to wipe off.
DIY It!
First step, after scouring Pinterest for ideas of course, was to measure the walls and acquire the materials needed for the project. We already had decorative baseboard which we wanted to keep. The baseboard stuck out a ¼” from the wall, so we were looking for a material with ¼” thickness that wasn’t too expensive and wouldn’t require too much sanding and finishing. We found everything we needed at Home Depot…in Virginia… apparently our local beach Home Depot didn’t carry this same material, so we bought it in VA and schlepped it all the way to NC.
We used the following materials and equipment:
48” x 1.5” x ¼” vertical battens
48” x 3.5” x ¼” top horizontal battens
6’ x 1” x 2” top caps ripped in half lengthwise (since we didn’t want anything to stick out too far)
Brad nails
Brad nailer and compressor
Measuring tape
Level
T-square or Triangle square
Wood filler and putty knife
Sand paper
BIN Primer
Sherwin Williams SuperPaint Interior Latex Semi-Gloss (The color is untinted white since the rest of the trim in the house was already this color).
Paint Supplies (brushes, rollers, tape etc)
Paintable caulk & caulk gun
Construction adhesive (note we didn’t glue & nail, just nailed, but in hindsight, it may have been a bit sturdier to do both, I suppose time will tell).
We began by measuring the walls, and determining the pattern in which we wanted to do board and batten. There are multiple variations; some with wide boards, some with thin, some with a top cap, some without. Whichever one you want to do is fine but definitely design first, construct second, winging it is not recommended. After we determined the height of our board and batten and we measured the longest / most prominent wall and determined how frequently we wanted the vertical boards to repeat in a way that we wouldn’t end up with a weird partial batten at a corner. For us, this was about 14” apart. On all other walls, which were either broken up by doors or shorter in length, we first laid the boards out at 14” apart and if they created a weird space we “fudged” the 14” pattern into 13” or 13.5” or even 14.5” apart so that all battens were visually appealing and well-spaced on all walls in this hall.
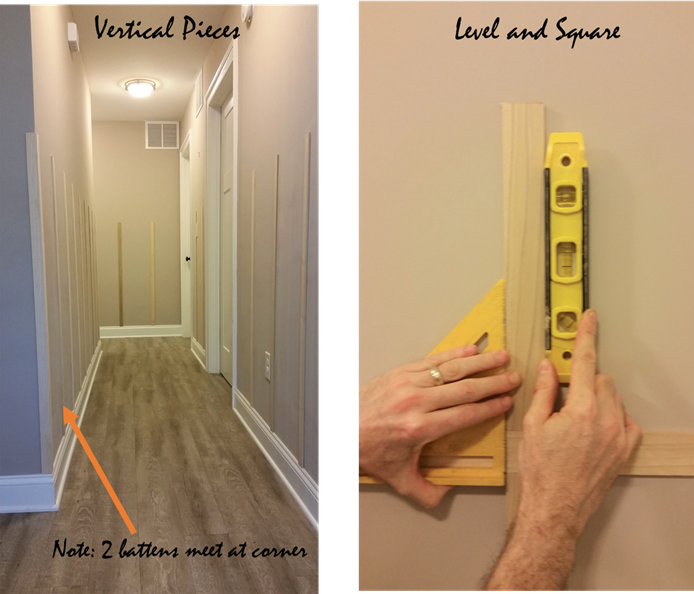
We leaned each vertical batten in the approximate area where it would get nailed to the wall. We nailed the first batten in at the edge of the hallway corner on the “main wall”, we measured for accuracy, held the level up against the batten to ensure it was level from top to bottom (nothing worse than crooked battens). Note this works best with two people, one holds and wields the nailgun while the other measures and levels. Did each 48”x 1 ½”x ½” on all walls first.
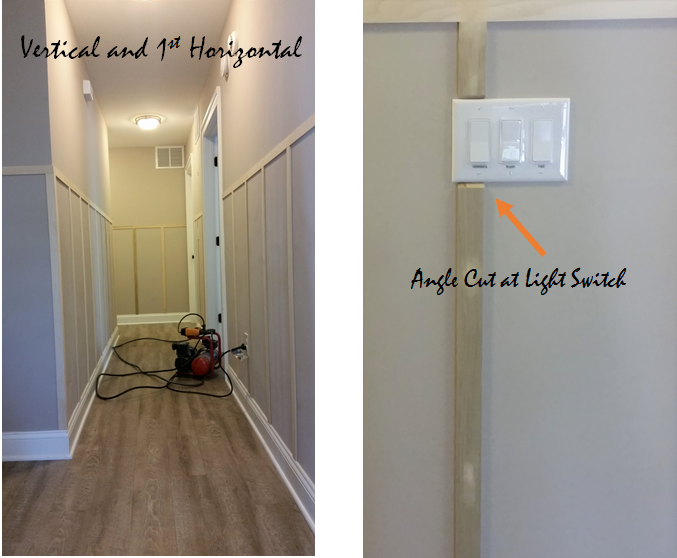
Then we levelled and nailed on these same boards in a horizontal fashion across the top. Next, we cut more of those same boards into 12” sections to make the next vertical pieces.
We repeated the levelling and nailing process (which is easier with pieces that are only a foot long). Finally, we placed, leveled and nailed on the 3.5” boards horizontally across the top and topped it off with a little ledge or top cap.
Already with just the wood up I was liking how it made the hallway instantly more interesting. Next came the boring, messy parts. All gaps, joints and nail holes have to be filled with wood putty and sanded smooth. This creates a mess. In a space as confined as this we ended up setting off the smoke detectors with dust, and then forgot that our system there was connected to the fire alarm, and since we don’t live there all the time it took us a while to remember the code to shut it off. We used the caulk to fill in any long vertical or horizontal gaps between the wall and the battens. If you miss any or think that some gaps are too small to merit caulk, wait until you have a coat of paint up and if you see black space among white boards, you need more caulk.
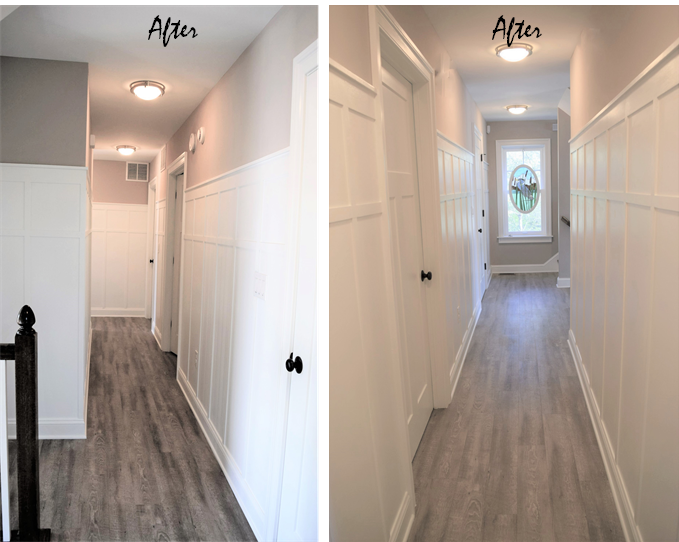
After all gaps and holes are filled, sanded and dust wiped off its time for priming and painting. Note this post is not sponsored in any way, but the ONLY primer I have found that covers up wood knots and prevents the yellow-ish seepage of wood juice (there has got to be a better term for that) through paint is a primer called BIN. This stuff is pricey, but awesome. It’s surprising, because it’s milky in consistency and goes on thin, dries fast and will need 2 coats, but it does its job. It’s really only necessary to apply this to the wood parts of the wall. After priming and letting it dry overnight, I added 2 coats of semi-gloss paint. I used a brush on all wood parts and a roller on the wall portions. In hindsight it may have been helpful to paint the walls prior to putting up the wood or to use a foam roller as that gets in nooks and corners better than a large roller. Since the board and batten is technically a trim, it looks best in a semi-gloss finish.
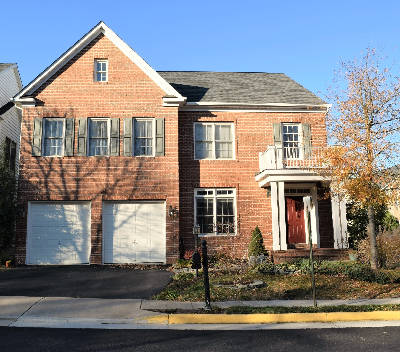
What a Difference!
The project took 1 long weekend to complete and we spent about $200 in materials, and what a difference! I can only hope that it will make cleaning up after scuffs and dings easier, or at least less noticeable. Already I like how the amount of white in the hallway makes the area seem larger and brighter than just the plain greige paint. Hmmm, if this works maybe I could continue it up the 3 flights of stairs too?
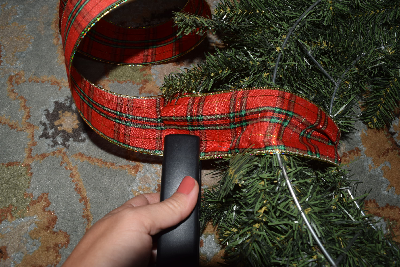
In keeping with my love of classic colonial design, I have for years admired the timeless look of putting a wreath hung by ribbon in each window. I also am a fan of a candle in each window during the holidays and have been sporting this look for some time now. This was the year I decided to make the investment in wreaths for each of my 8 front windows, and it was neither as difficult nor as expensive as I thought it would have been. Here’s how it’s done. First, a before shot of my house, boring!
You’ll need:
One evergreen or faux evergreen wreath for each window (most people only do the front of their home). I used 24” diameter wreaths for my windows.
Wired ribbon, I used 4 spools that were 10 yards each and at least 2.5” wide
Floral wire
Hot glue gun and glue
Scissors
Wire cutters
Stapler and staples
The first thing I did (and I bribed my kids to help which made it go SOOO much faster) was remove the screens from my windows and cleaned the glass. This will allow you to hang the wreaths from the inside and will overall look very neat and clean.
Next, before you hang the wreaths you probably want to put a bow on them. A bow can either be placed at the top or the bottom of the wreath. I opted to put my bows at the top. Making the bow is the most time consuming part of the whole process and I’ll be honest, it can take some practice to get them right.
Cut a length of wire about 5 inches long and place it nearby. Take a length of ribbon of about 18 inches but don’t cut it off the spool, but pinch it at the 18” mark. This will leave one of the 2 “tails” of the bow. Take about 3 to 4 inches (depending on how large you want your bow to be and how big your ribbon is) make a loop and repinch it.
There’s going to be a lot of pinching going on for the next few minutes – warning – your fingers will probably cramp up. Turn the ribbon about a quarter turn and make and pinch another loop.
Repeat this process several times until you have 5 or 6 loops, just until it looks right. Brilliantly descriptive, eh? Take your pre-cut length of wire and wrap it around the area where you are pinching and twist it very tight so that the loops stay intact and are held together.
Pull the ribbon another 18” from the spool and cut it free from the spool. Angle cut the end of each tail. Ta-da! You made a bow. Once you get the hang of this technique it is such a great skill to have in your repertoire for gift wrapping, floral arranging, it really comes in handy!
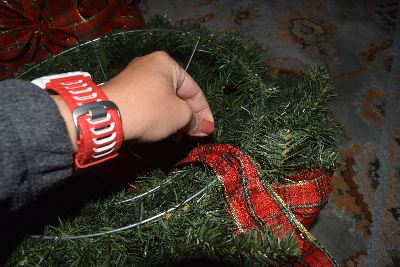
Next, it’s on to attaching the ribbon that will actually hang the wreath. Pull several feet of ribbon from the spool (will depend on the size of your window and the size of the wreath). I like to hang mine about halfway down the window so about 3.5 feet of ribbon was enough for me. Again, leave this length of ribbon attached to the spool and wrap it around the “top” of the wreath leaving an overlap of about 4 to 6 inches in the back. Staple the ribbon where it overlaps.
I also like to add a few dots of hot glue between the 2 lengths of ribbon to really hold it.
Next attach your premade bow. You could hot glue it on, but over time, especially if you live in a warm climate, this could come free, so I prefer to wire mine on.
Take a length of about 5 inches and wire the bow to the wreath. Since I put my bow at the top of the wreath I wired mine around both the wreath and the top ribbon for extra security.
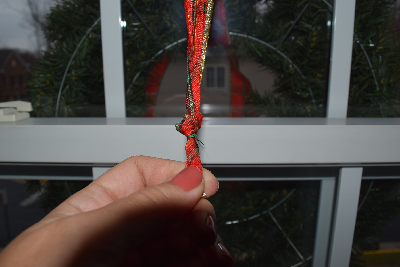
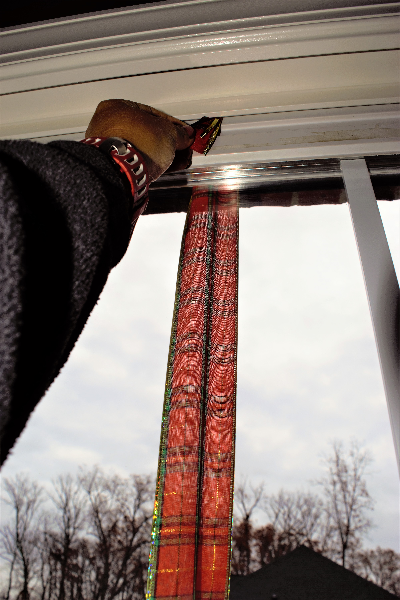
Now it’s time to hang your wreath! You could measure out exactly how long you want to hang them but I used the grids on my window and just eyeballed it. Open the top of your window and dangle the wreath out, holding onto the spool end of the ribbon. Lower the wreath to the place you want it and close the top window. Cut your ribbon from the spool with about 5 inches to spare. Use this excess to tie a knot (depending on how substantial your ribbon is you may want to do this several times over so your wreath stays secure in the window). If you have wood windows you could also thumbtack them to the frame, but the knot method works for vinyl or wood windows.
Cut off any excess ribbon hanging inside the window.
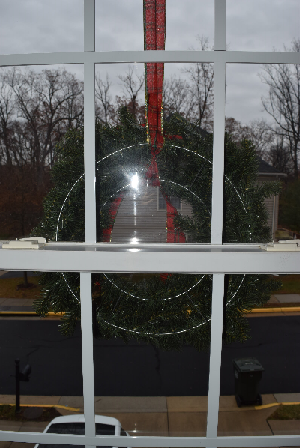
Repeat for all of your windows, and once complete be sure to take a trip outside to make sure they all look even and if necessary just pop inside and reknot if a wreath needs to go up or down!
I got both the wreaths and ribbon on sale and spent under $40 for the project. Besides cleaning the windows it took me about 2 hours to complete and hang all 8 wreaths, though I did have this little helper.