Experiencing Colombia!

I took a break from the blog last week in order to travel to Colombia!  I had never seriously considered vacationing in South America  short of some day heading to iconic areas like Rio de Janerio or Machu Pichu, but we were presented with the opportunity to travel to Colombia so my son could take part in a soccer tournament as a member of the AC Milan Junior Camp International Team.    With such a unique athletic and cultural experience confronting us, who could say no?  So while this post is a bit astray from the normal design focused material, I wanted to share some of the sights and experiences from my week in Colombia.

While the kids were practicing with their soccer teams, the parents took a sightseeing tour of the historic, picturesque  town of Salento and its fantastic mountain and coffee farm views.

dsc_0484-2 dsc_0494-2 dsc_0515-2 dsc_0524-2 dsc_0525-2 dsc_0532-2


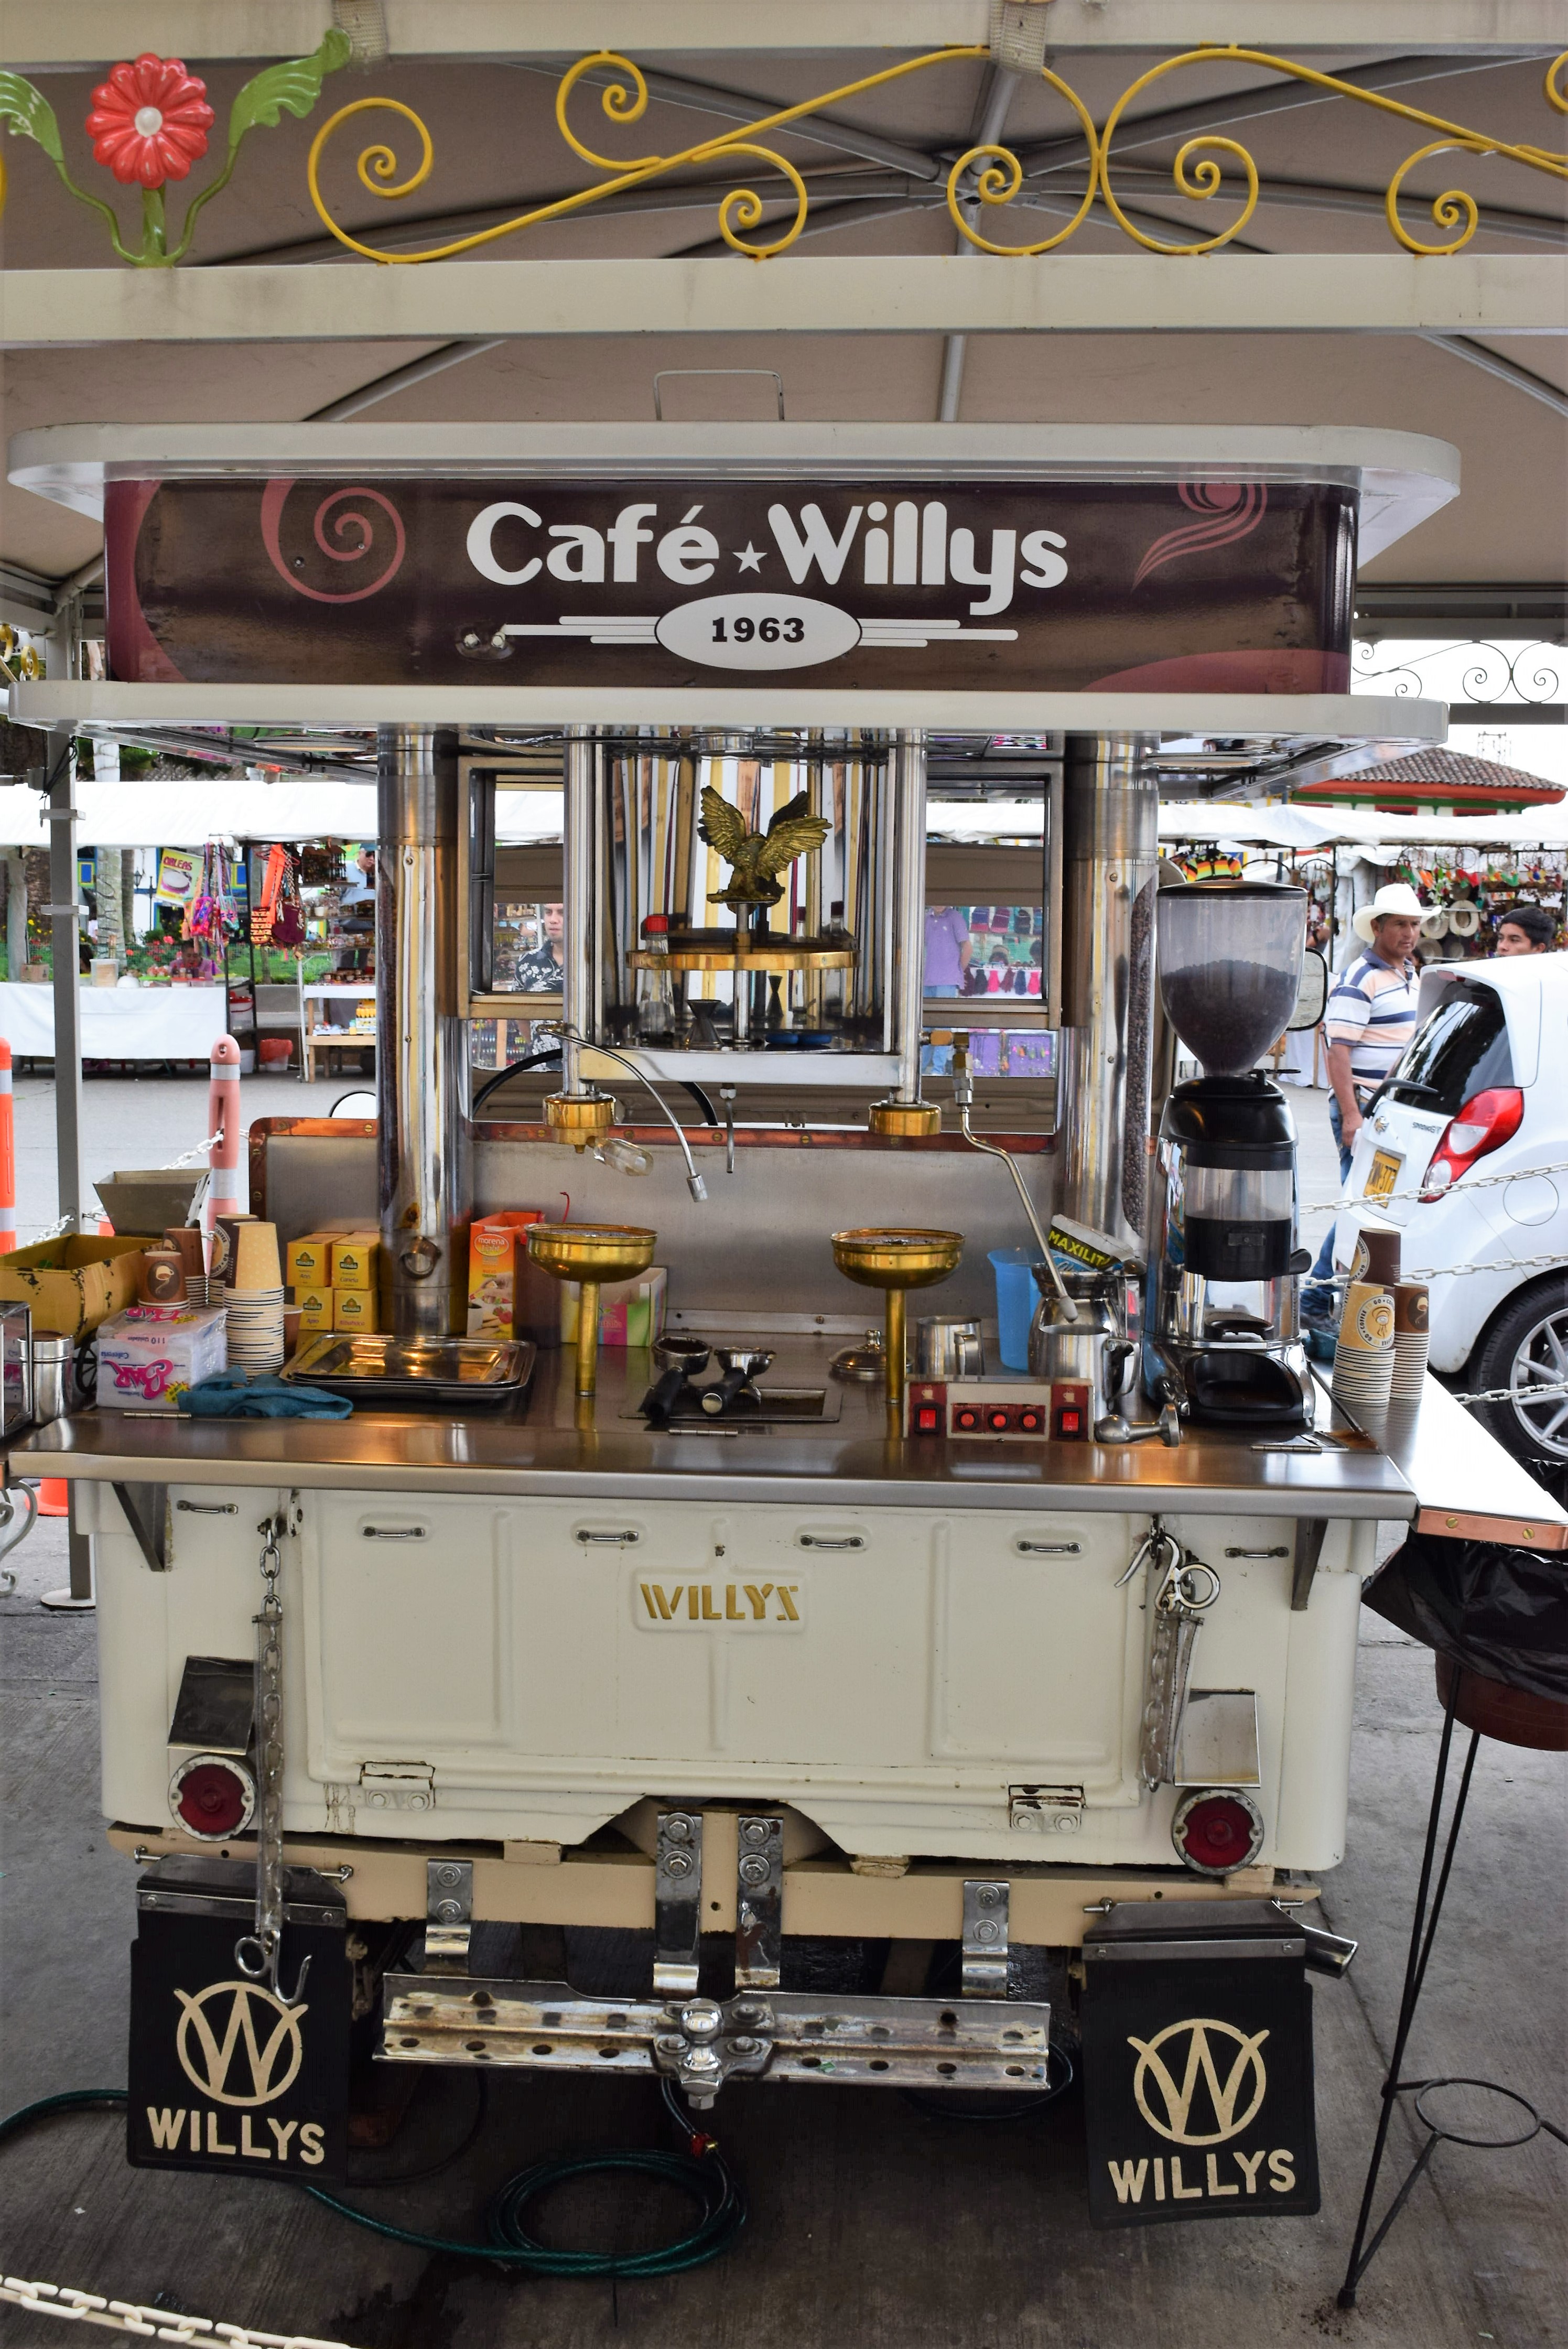
The Willys Jeep is a revered icon in Colombia where it has been used as a workhorse utility vehicle for carrying coffee, fruits, vegetables and even furniture from one place to another through the rugged terrain of Colombia. I personally would like to have this one with the built in coffee bar parked in my driveway every morning.

dsc_0538-2


We spent most of our time in the city of Pereira, where the tournament was hosted. Pereira, also a coffee town, had a number of scenic town squares and churches.


dsc_0755-2

dsc_0754-2

dsc_0748-2

dsc_0747-2

dsc_0728-2
Save


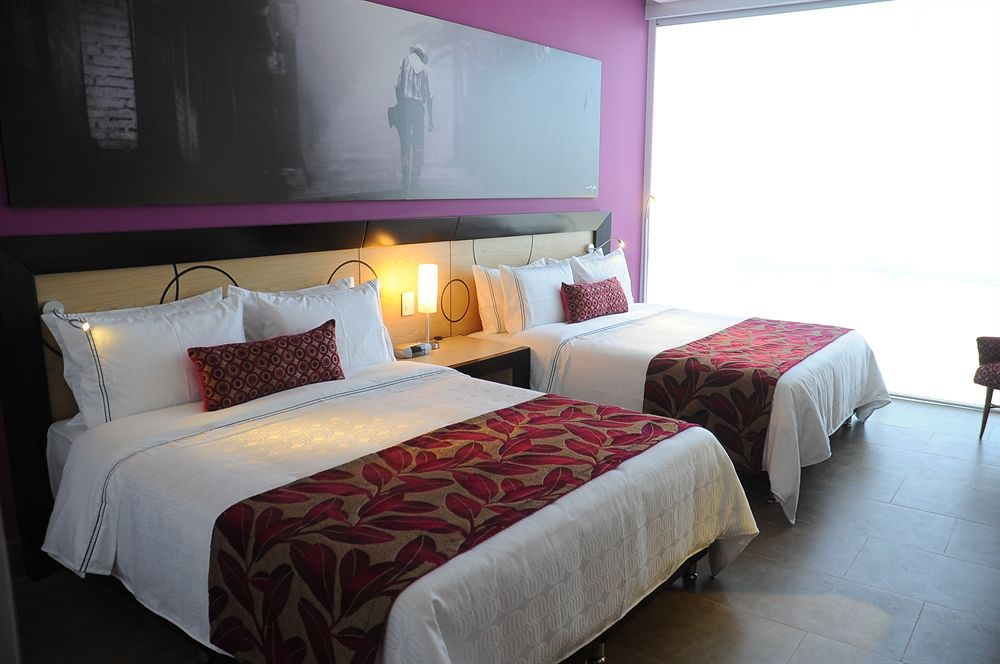
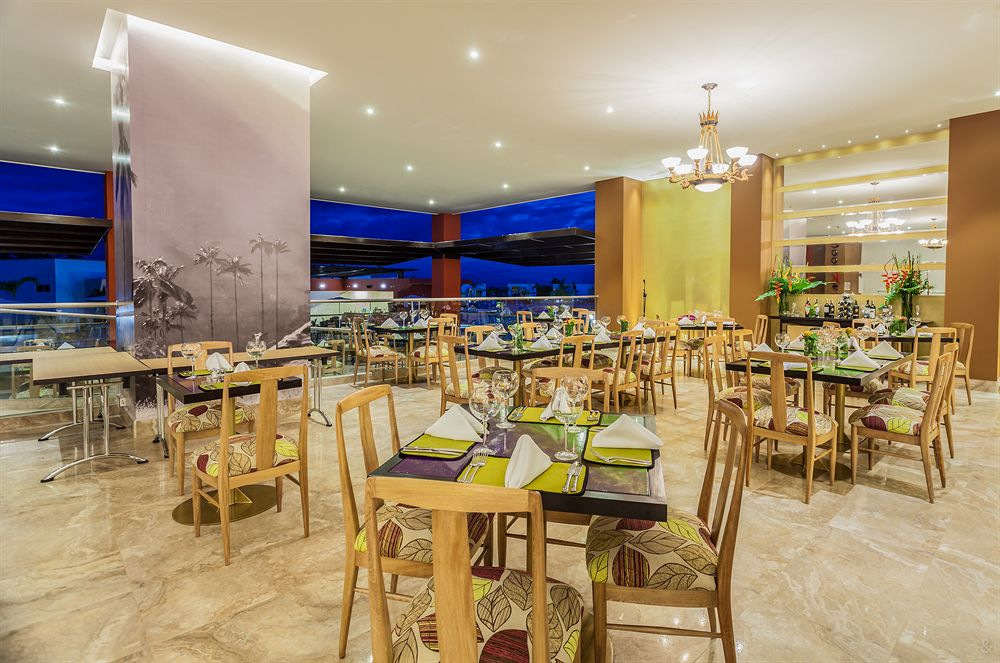
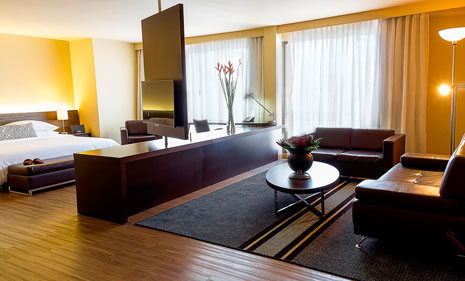
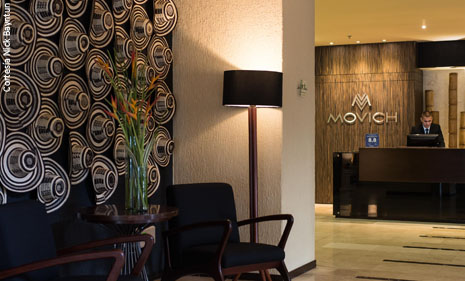
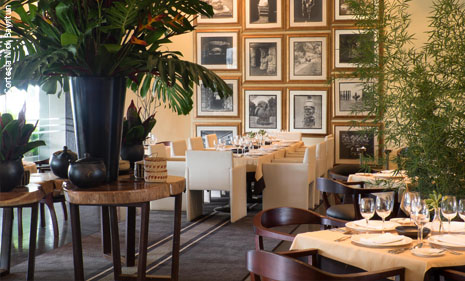
Accommodations for both players at Hotel Sonesta and the parents at Hotel Movich, both in Pereira, were fantastic.


sonesta-room

sonesta-exterior

sonesta-dining


movich-rooms

movich-lobby

movich-dining


The tournament was a great cultural experience and we had a fantastic time and met a number of wonderful people, I am looking forward to exploring other parts of this beautiful country. Hasta Luego, Colombia!


dsc_0693-2

Save

Save

What to Wear Wednesday: Distressed Jeans

I hadn’t been keeping up with posting last week because I was out of the country, visiting Colombia!  We made our first trek to South America because my son was selected to play in a soccer tournament there.  I wasn’t sure what to expect in Colombia, but we thoroughly enjoyed it!  The landscape is uniquely tropical and mountainous, the food was delicious and the people were welcoming. For sure, many of the fashion trends in Colombia don’t speak to my particular style, as it’s muy sexy, muy tight, leaving nada to the imagination type of style.   Think of a more casual version of Sophia Vergara and that describes how about 80% of women in the 18 to 55 year old range dress there.  One of the big trends I saw in Colombia is also hot here is the US, it’s the distressed jean.  This is a wardrobe staple I can definitely embrace for fall.  Here’s a selection of some of my favorites, all under $80!

distressed-jeans


1. Arizona Distressed Medium Wash Ankle Skinny Jeans $60

2. Dollhouse Women’s Mid Rise Rolled Cuff Destructed Jeans $32.99

3. AEO Denim X4 Jegging $59.94

4. Miss Me Ripped Gray Wash Skinny Jeans $67.99

5. Old Navy Mid-Rise Raw-Edge Rockstar Jeans for Women $36.94

6. Express Low Rise Distressed Skinny Jean $79.90

7. Piper Deconstructed Skinny Jeans $48.00

8. H&M Boyfriend Low Ripped Jean $39.99

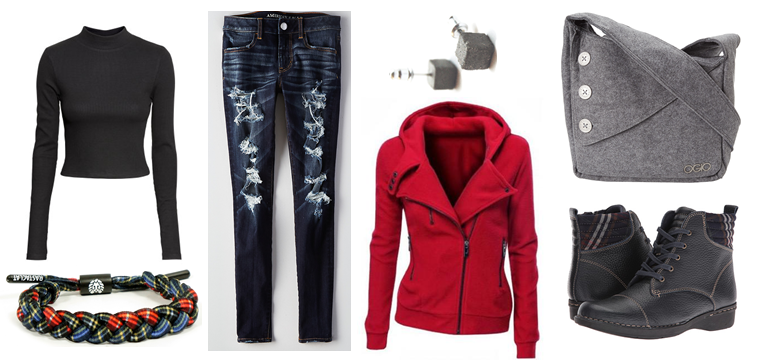
Here’s how I’d style the distressed jeans for fall.  How will you wear them?

distressed-styled-fall

Gallery Wall Greatness

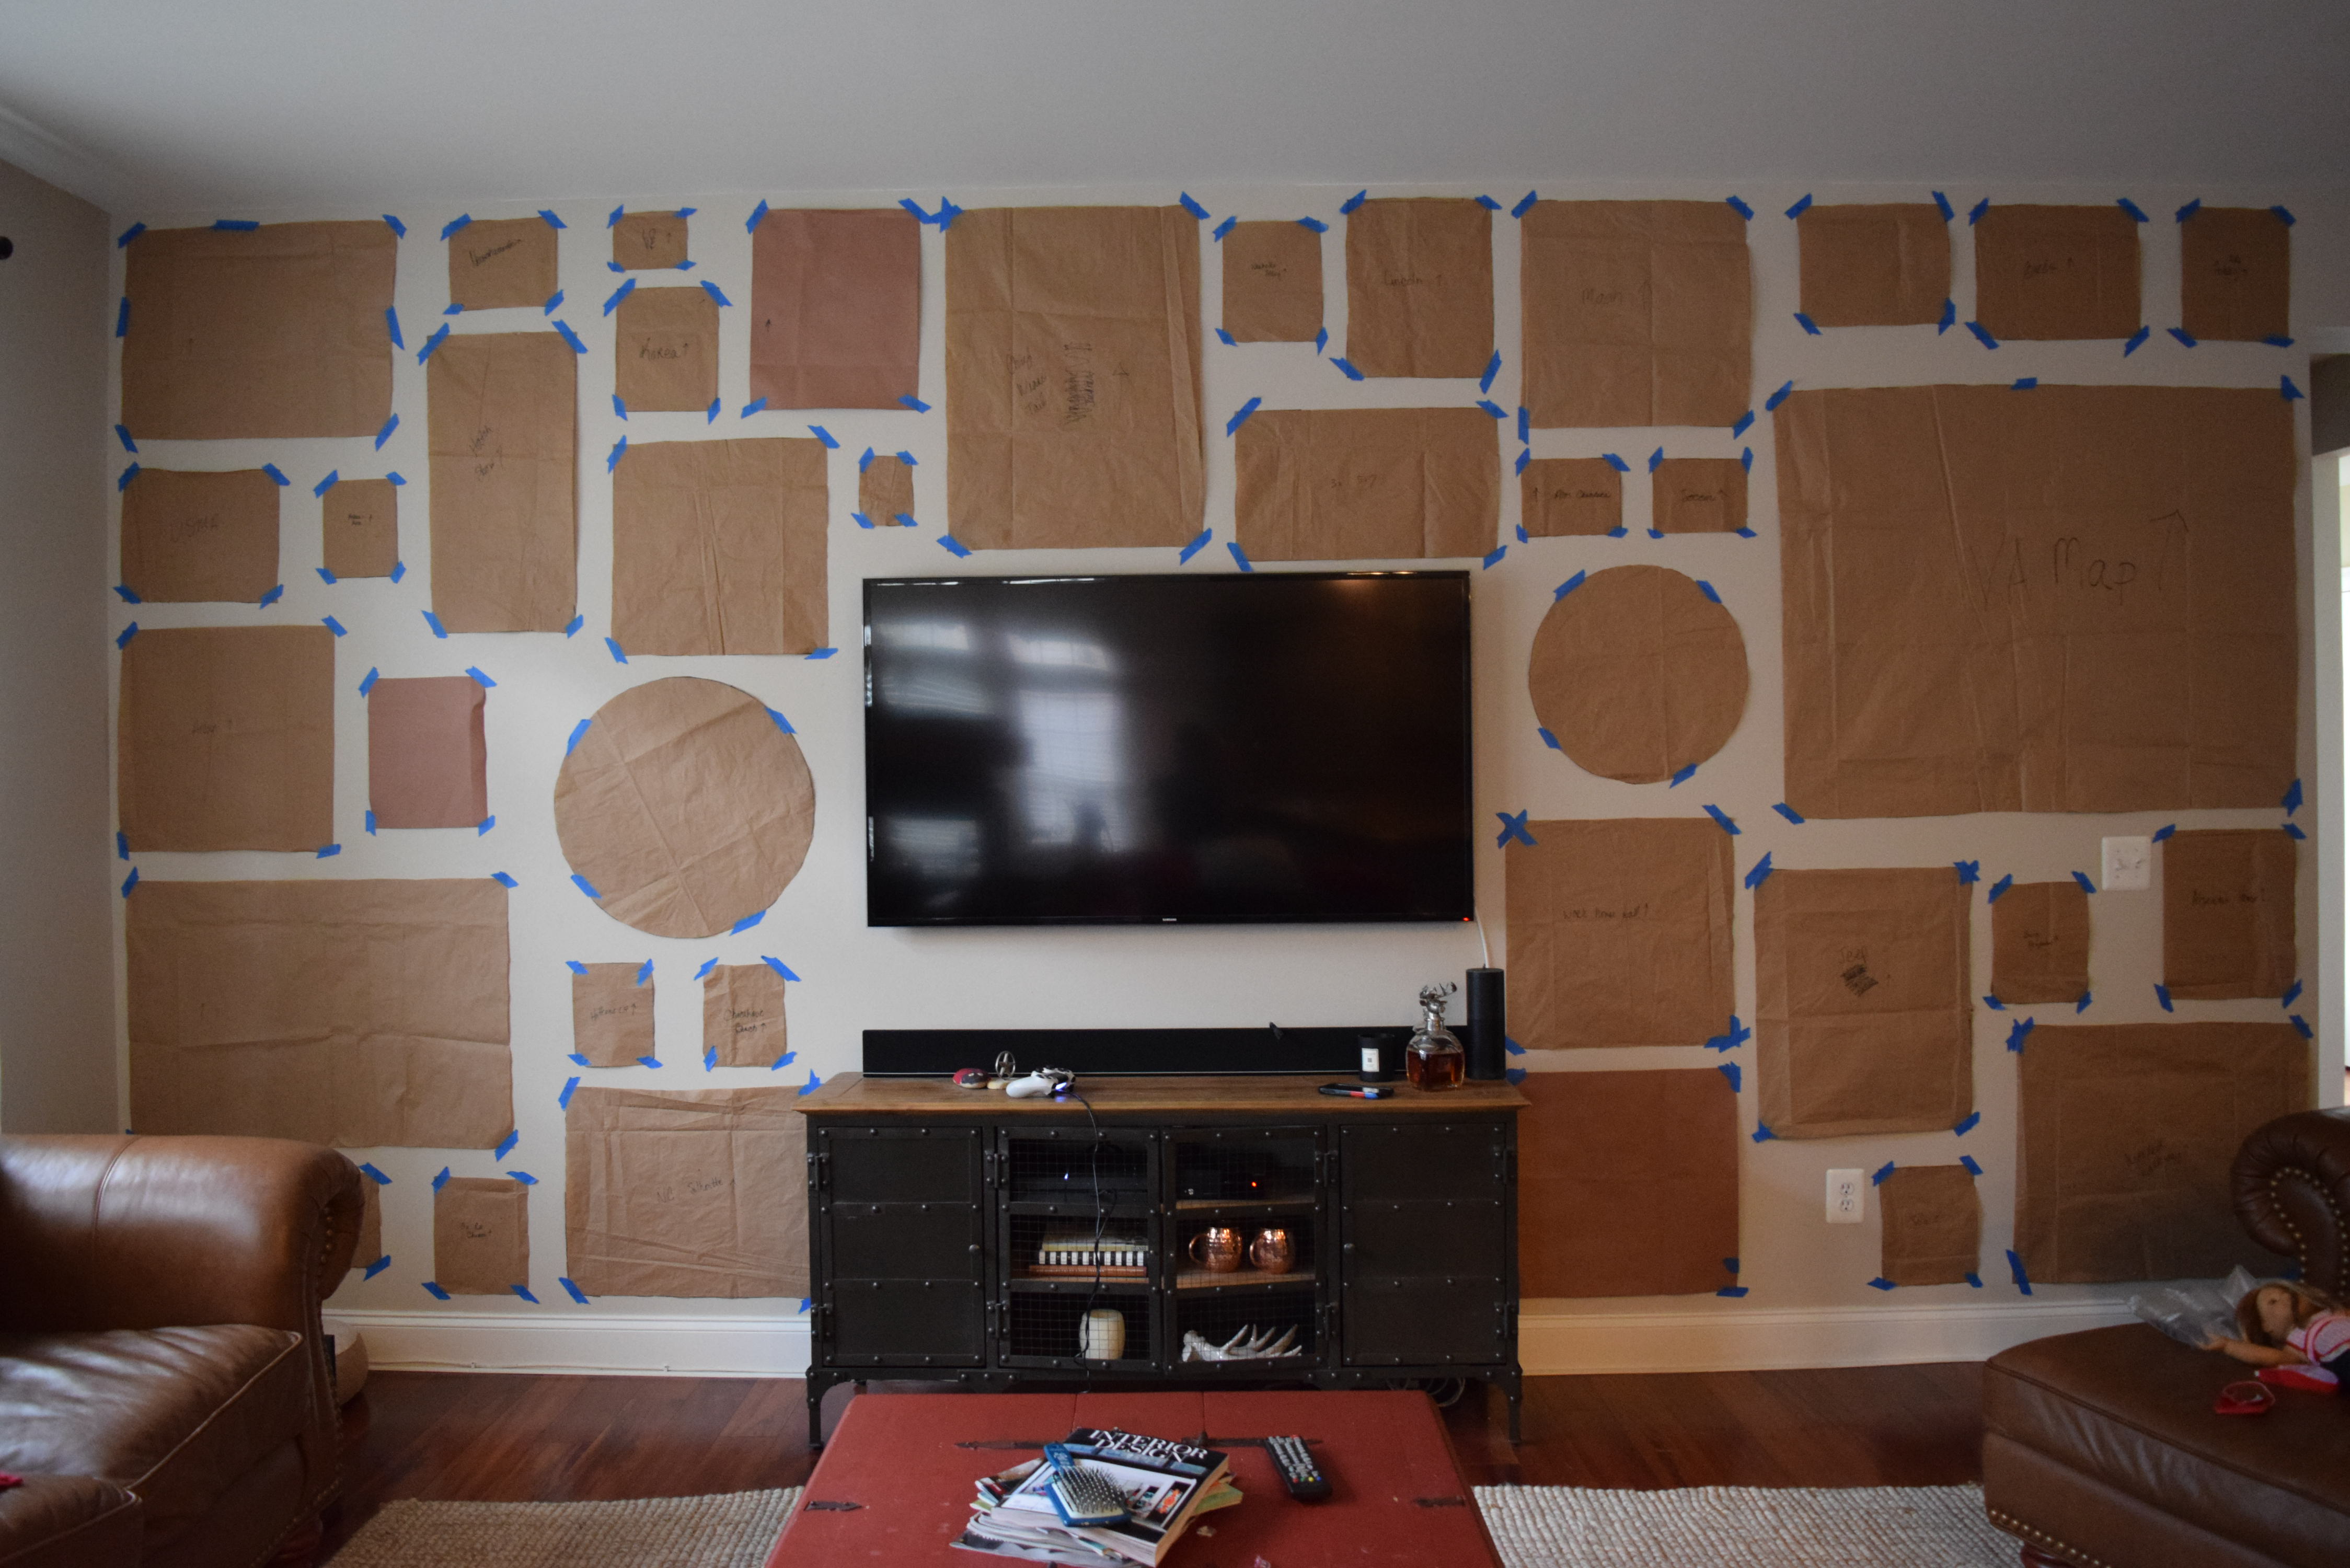
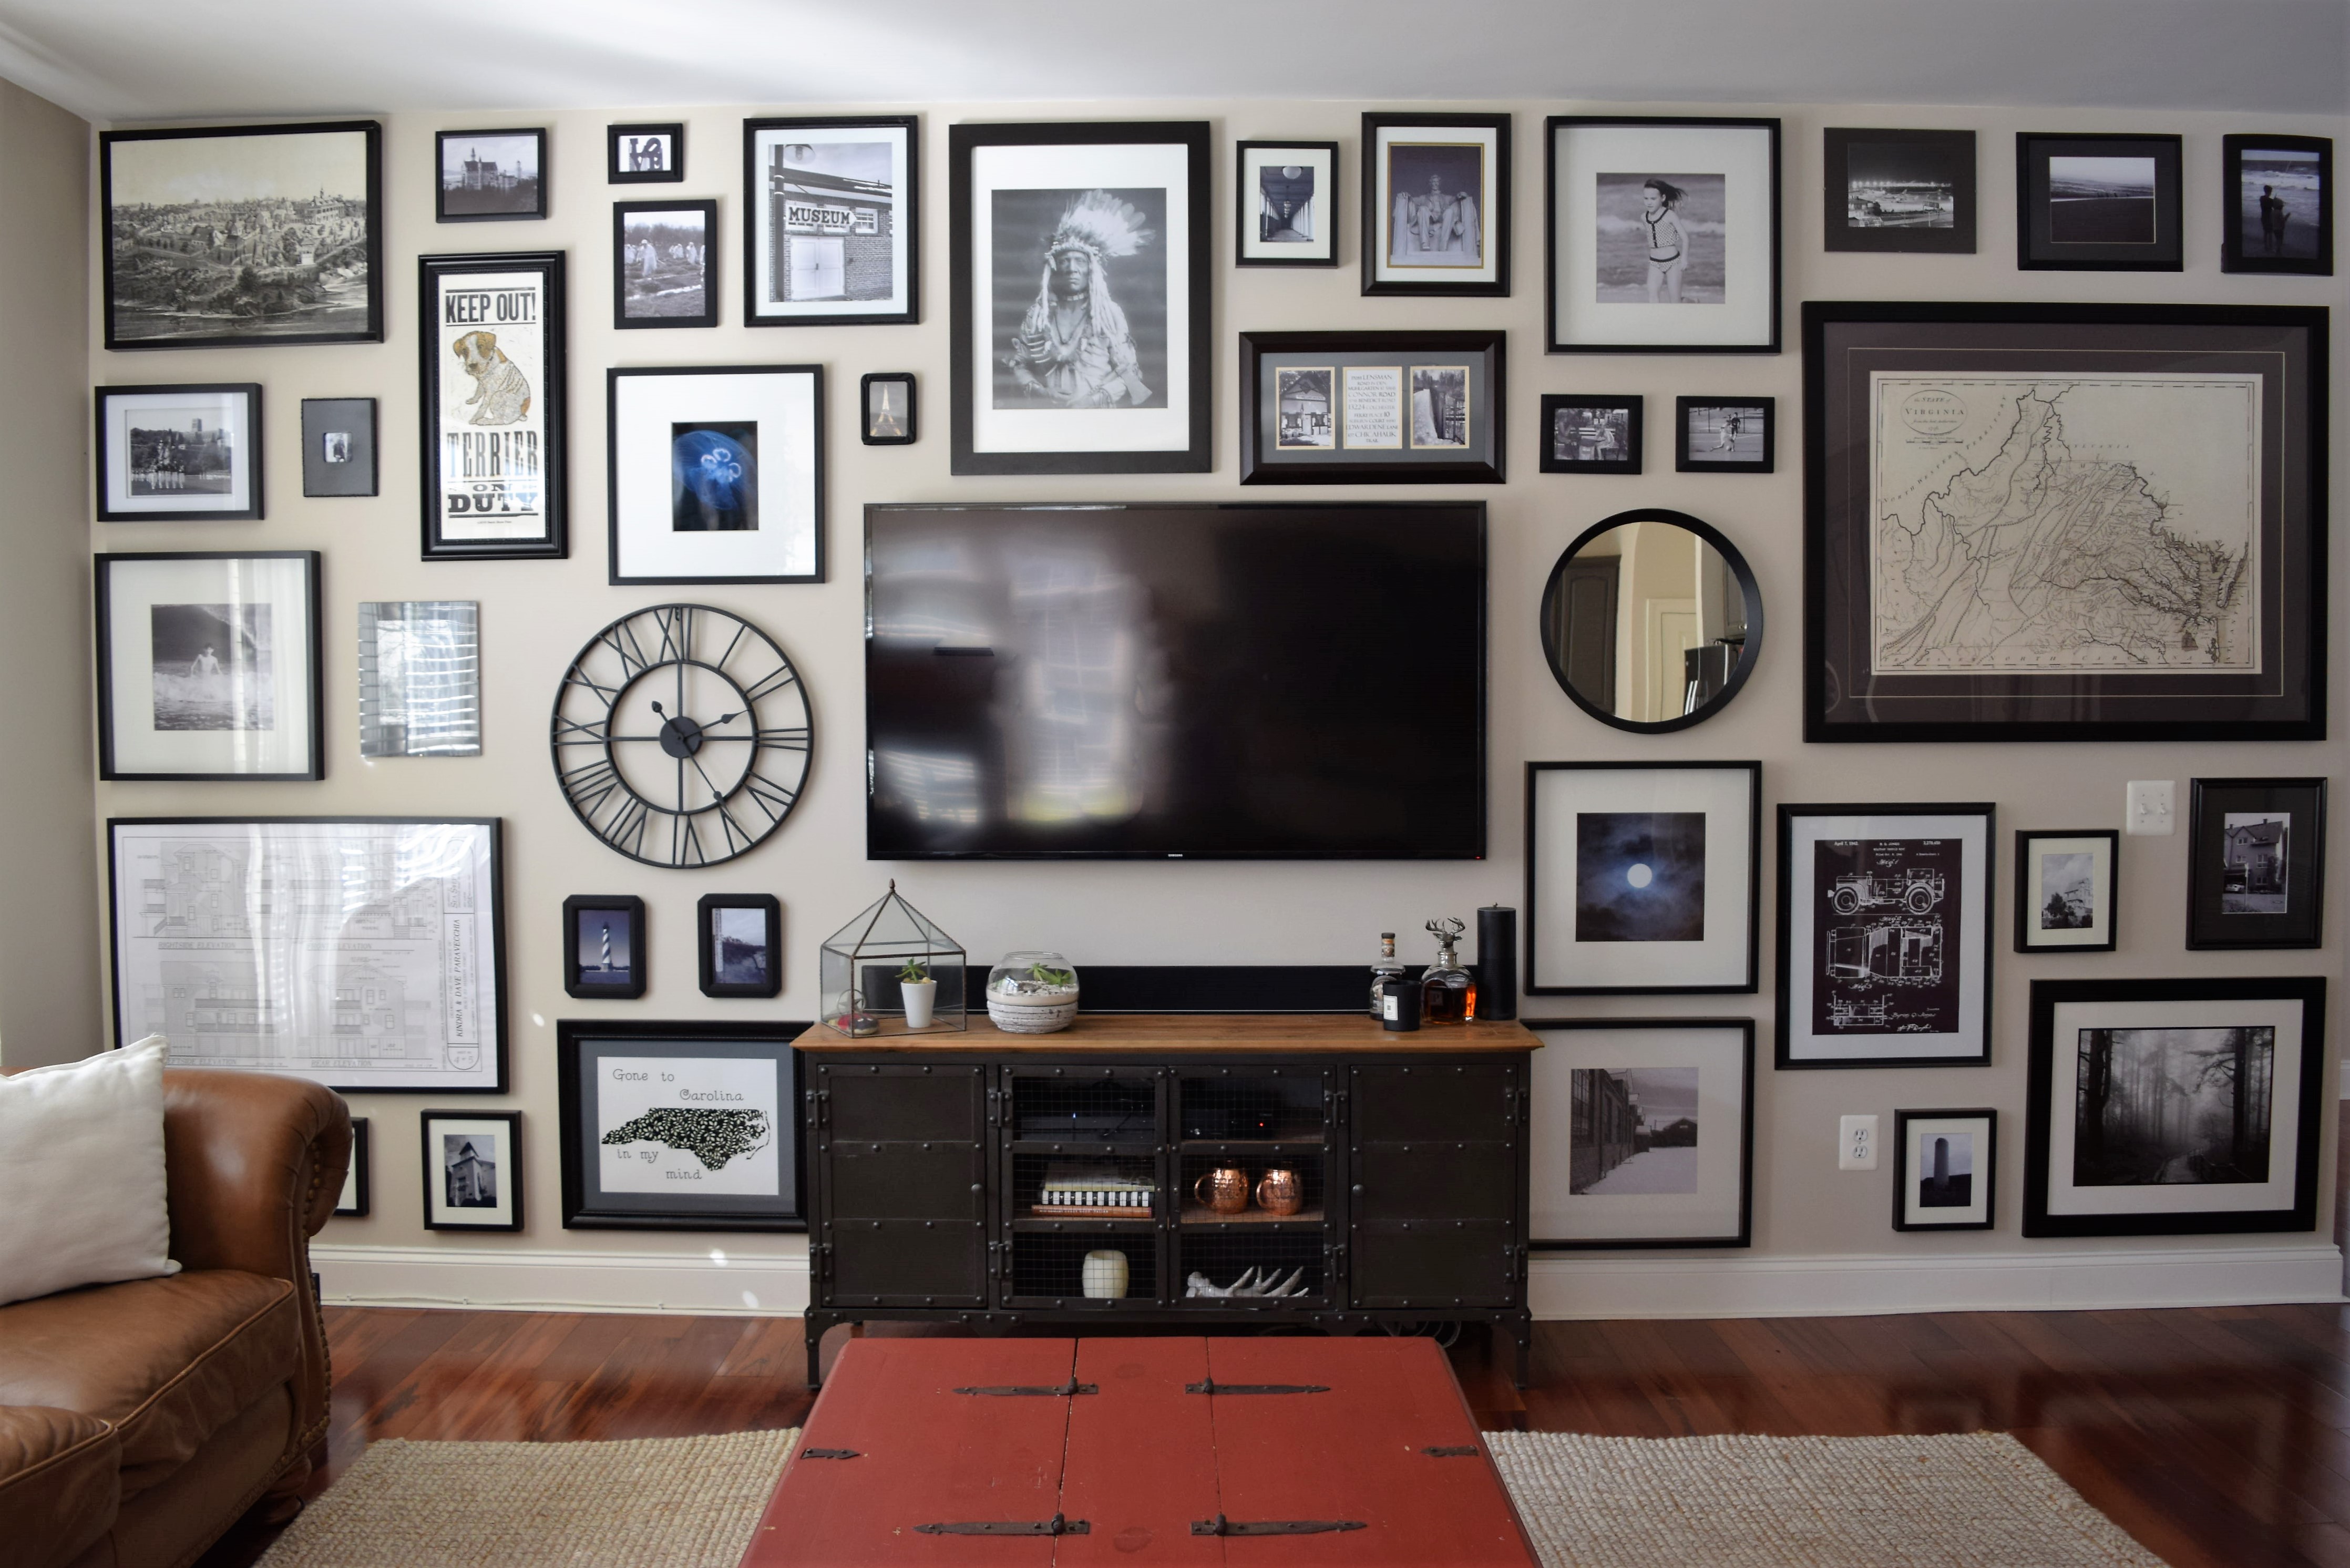
About 2 years ago we bought a new TV for our family room.  We mounted it smack in the middle of the only real wall in that room, the others being covered in windows or too short to accommodate it.  This created a really awkward situation for the rest of the wall.  It was just too … well… blah.  Even with a large TV the wall was too stark, too naked.  Placing a piece of art on just either side of it would be too matchy-matchy.  For a while I considered covering the while wall in a dark hued board and batten, but ultimately rejected that idea because it may have looked out of place next to the adjacent colonial style chair rail molding in the dining room.  I finally decided on a black and white full-wall gallery.    And yup, it took me 2 freakin’ years to do it.  Well, at least that’s when I started collecting frames at yard sales and from the Ikea “as-is” area.  In actuality it took me maybe 2 active months, once I thought I had collected enough frames, art and photography.  And by the way, if you ever embark on a full gallery wall, you’ll never have as many frames as you think you do.  I ended up scrounging and painting frames from all over the house to fill any leftover blank spaces.

I really should have taken a true before photo with the lone TV hanging on the wall, but alas, I didn’t, so the best before shot I have is the wall covered in brown craft paper that I moved around ad nauseam to get everything placed right where I wanted it. So here’s the before:

dsc_0459


And the after…. so much better than staring at the starkness of a TV and blank wall!  A great way to disguise a TV without having to cover it up!

dsc_0471-2


Do you have a gallery wall to share?  Add a link to your favorite in the comments.

Growth Ruler DIY

Have you ever been to a baby shower and even though there is a registry and you dutifully used it properly, you still somehow manage to bring the 5th copy of a baby blanket?  One way to beat the registry game is to make a unique homemade gift. Before attending a baby shower I saw these growth charts for sale on Etsy, and thought, huh, why buy this when I could make it myself?  It was very easy!  And the best thing about it is the parent can bring this with them if they decide to move to a different house. Can’t say the same for marking your kid’s growth on the garage wall or behind the kitchen pantry door.

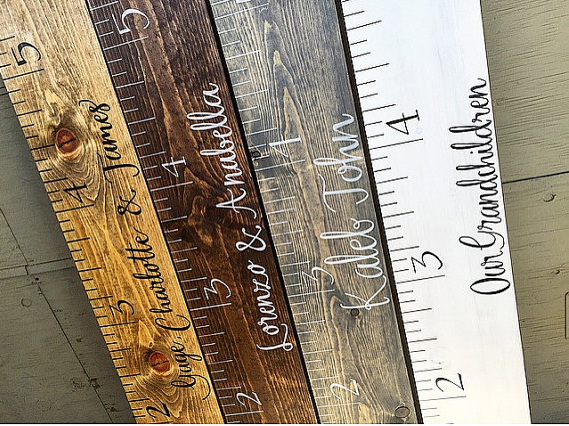
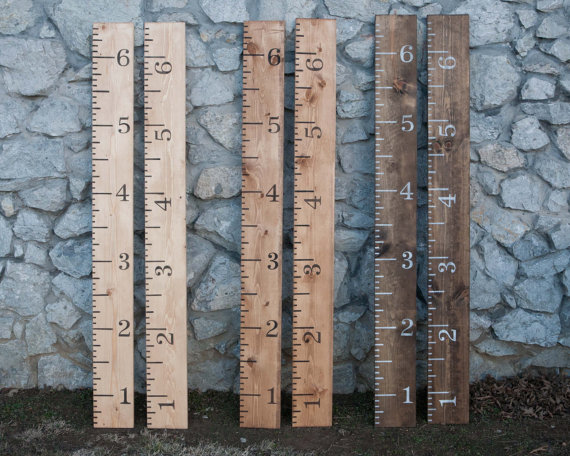
So first, here are a few I saw for inspiration (from the TwistedK and ShimmerStain on Etsy)…and if you don’t have time to DIY your own, fear not,  there are a ton of options to buy a completed one.
growth-example-1


growth-example-2


Gather your materials.  You’ll need:

  • A flat, straight board that is at least 5 feet long and 6 or 8 inches in width
  • A tape measure
  • Pre-made wood or MDF numbers
  • Stain and a rag
  • Paint (brush on or spray)
  • Wood glue
  • Pencil
  • Super wide Sharpie
  • T-square (or other right angle straight edge)
  • Sand paper

A few notes about the materials, I wanted a finished ruler without a lot of wood grain, so I purchased a premium board of Poplar at Home Depot.  Different kinds of wood will give you different results depending on if you want to stain or paint it.

Step by step instructions:

1.If necessary, cut your board to the desired length. Generally, a board about 5 or 6 feet in length will be sufficient.  Let’s face it, who’s measuring a child much past 5 feet in height? They’ll be cranky teens by that point and who wants to measure a cranky teen?  However, you don’t want a mini board either as it will look strange hung low on your wall.
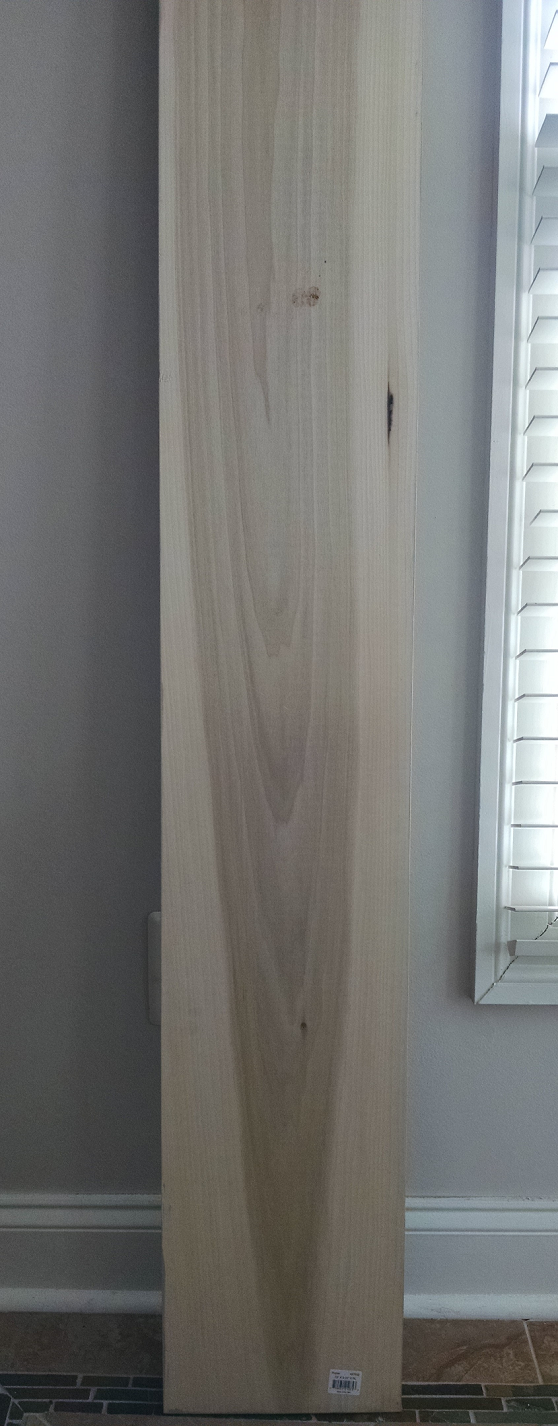
naked-board-3


2. Lightly sand the board to remove any splinters and to prepare it for stain.

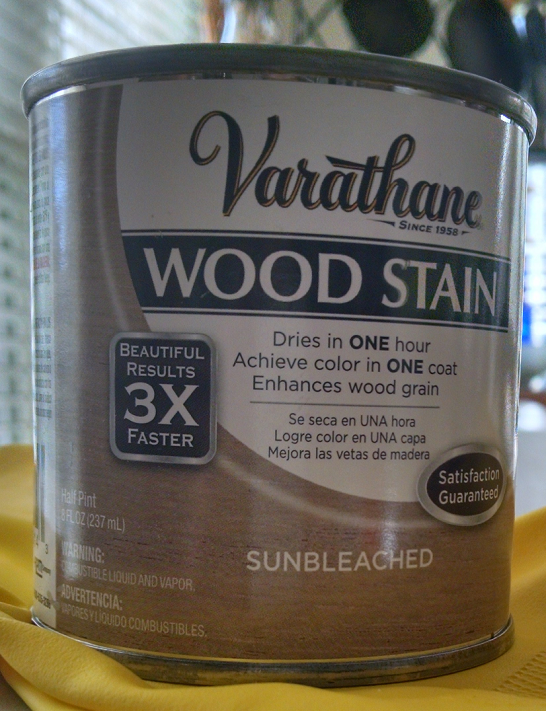
3. Stain the board. I choose a light grey stain that I applied with a rag and wiped off the excess.
stain-2


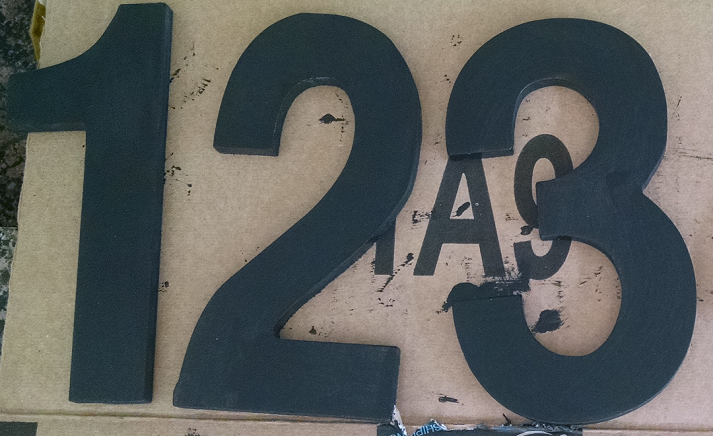
4. Paint the pre-made numbers. (These are usually available at a craft store). I choose to paint mine black because it would contrast well with the light grey.  If you choose a dark stain you may want to paint our numbers a light color so that you will be able to read them.  Note if you go with a dark board you’ll also to need to make light ruler lines so you may opt for a paint pen instead of a wide Sharpie.
numbers-2


5. After your stained board is dry, measure out and mark where your ruler hash marks will go with a pencil. Use a T-square to make sure that they are properly spaced and exactly perpendicular to the board edge.  *Important note: Almost all walls have some sort of trim at the floor, so you don’t want to start your board at zero, I started mine at 6 inches, so when hung it will have to be hung exactly 6 inches from the floor.

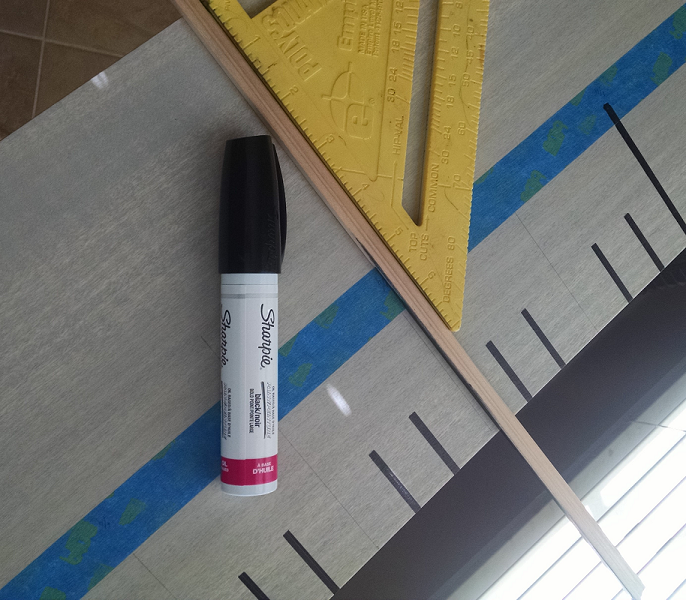
6. Once you have your pencil lines looking good and straight, go back over them with the wide Sharpie. Use your T-square as a straight edge to keep your lines straight.  I used blue tape on my board so my lines didn’t go further than they should.  Be sure to wipe off the edge of your T-square after tracing over each line and don’t drag your straight edge up to the next line because it may drag the wet Sharpie ink and smudge it.  I did all foot marks first, then went back and did half foot marks, then quarter foot marks, then eighth foot marks, that way I was sure to not bump and smudge those that were still drying.
sharpie-2


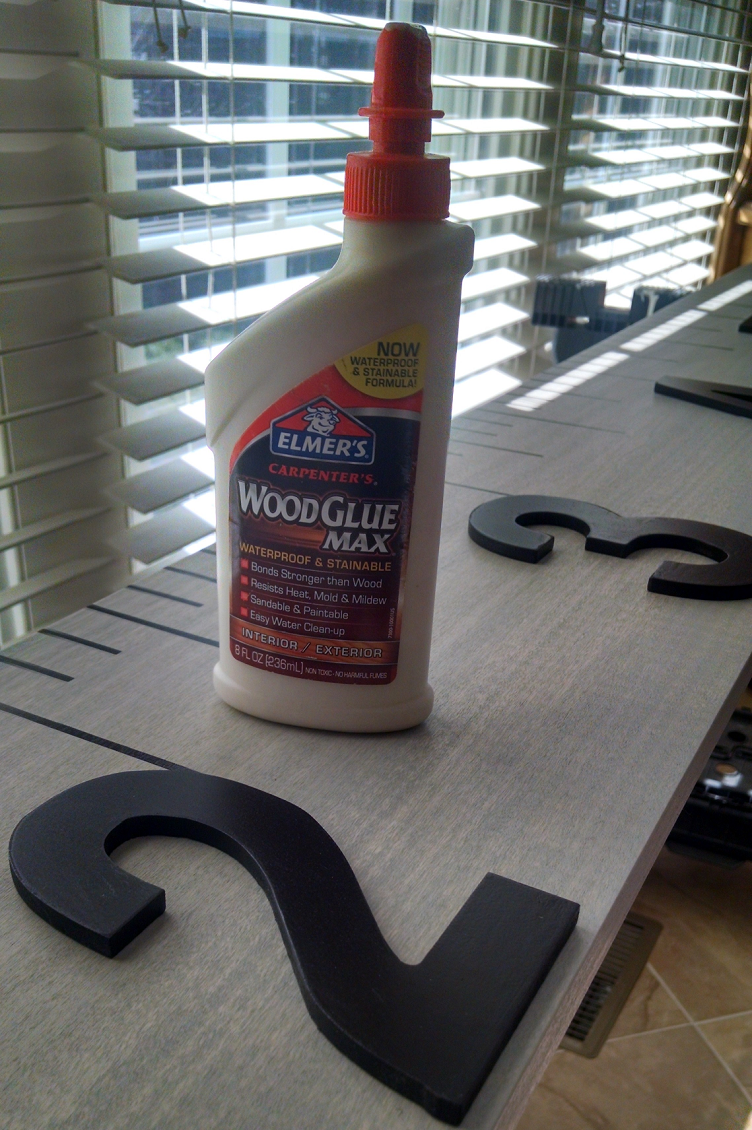
7.  Using the wood glue, glue each painted number in the spot adjacent to the corresponding foot hash mark.
glue-2


8. If desired, screw in a picture hanger bracket on the back, just be sure to use very small screws so you don’t poke through to the front of the board.

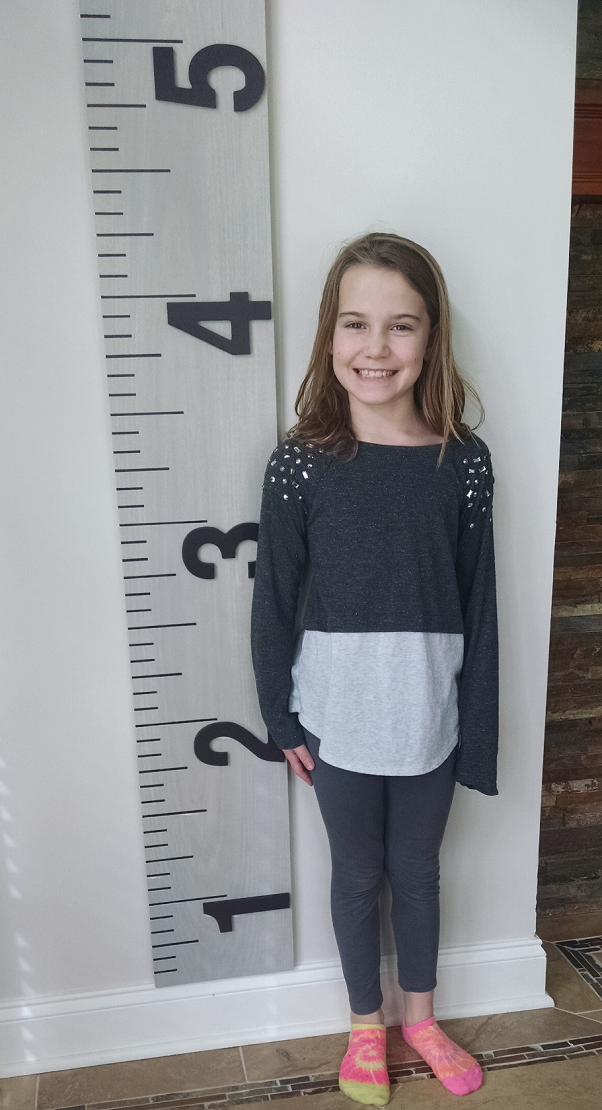
9.  Measure out the right spot on the wall to hang it and get to measuring those little cuties! If you’re giving it as a gift, you could affix a variety of colored permanent markers on some ribbon so the recipient is ready to mark the height of their new bundle of joy right away.

growth-ruler-2

What to Wear Wednesday: Fall Wedding Guest

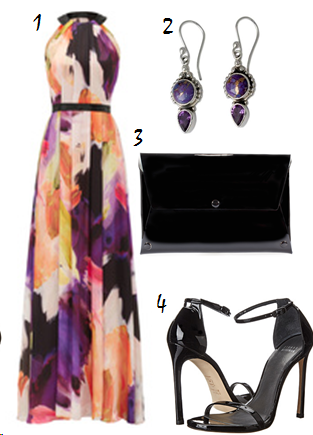
Lots of people I know are headed to fall weddings in the next couple of weekends! This week’s “What to Wear Wednesday” could maybe help give you a few suggestions so you’ll be the best dressed guest in attendance.  This first look is super versatile because it could work in spring or fall.  I particularly like it for autumn because of the rich amethyst combined with a bit of orange and green.   The Pamella Roland Dahlia gown gets completed with a simple black patent envelope clutch, ankle strap sandal and antique-look amethyst earrings.

pamella-dahlia


1- Pamella by Pamella Roland Dahlia Watercolor Gown

2- Novica Amethyst Dangle Earrings

3- Pedro Garcia Black Patent Snap Clutch

4- Stuart Weitzman Black Patent Nudist Heel

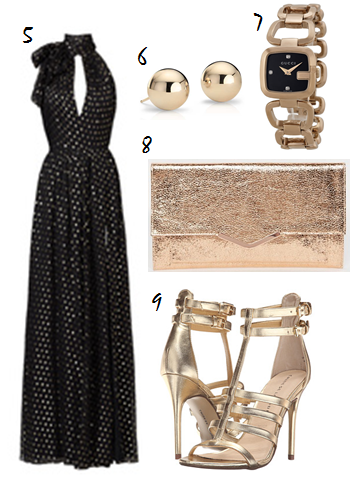
I am a sucker for polka dots.  Sometimes it’s hard to pull them off without looking like you’re wearing your nine-year-old daughter’s clothes.  Well this Jill Stuart gown does sophisticated gold polka dots in the most spectacular way.

black-and-gold-polka-dot


5- Jill by Jill Stuart Orleans Gown

6- Blue Nile 14K Gold Ball

7- Gucci Black Watch

8- Asos Metallic Slim V-Bar Clutch

9- Chinese Laundry Lacy Gold Dazzle Metallic Heel

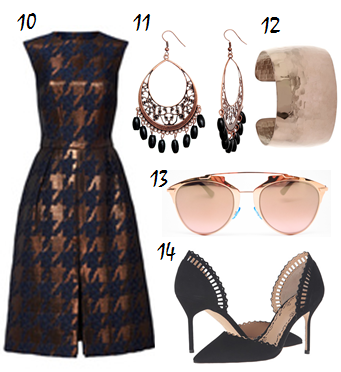
For a less formal wedding, this short copper and black Martin Grant houndstooth number capitalizes on the copper trend this year.  The look is rounded out by filigree copper and black dangle earrings, a copper cuff, Dior sunglasses, and black Marchesa heels (that could also work with a work outfit or jeans).

copper-houndstooth


10- Martin Grant Bronze Houndstooth Dress

11- Candy Luxx Black Beaded Filagree Earring

12- Fred Meyers Copper Cuff

13- Dior Copper Gold Blue Sunglasses

14- Marchesa Charlotte Black Heel

Are you headed to a fall wedding? Share your outfit choice with us!

Haunted Halloween Decor

Halloween is huge! It seems like all major retailers carry Halloween decor items for both indoor and outdoor.  And it’s more than just those wispy cotton spiderwebs that look great for a minute until it rains or the ‘ol standby DIY sheet ghosts.  Halloween decorations today are thoughtful, imaginative, chic, and wonderfully creepy.  Here are a few favorites that will spook up any home.

So, I’m not sure if this first one from Grandin Road is cute or creepy.  Cute because its dogs, but creepy because obviously it’s supposed to be dead dogs,  so there’s THAT… nevertheless it makes for a scene that would garner a lot of looks for your front lawn.

I’m a sucker for black and white, and while this porch scene by Jill at Create.Craft.Love is simple, it also has class.  Even those without a DIY “bone in their body” might create this sophisticated porch.

raven inspired halloween porch

This one would be fantastic all lit up at night, so start scouring sales at the hobby stores for all those funkins and battery operated tea lights.

https://s-media-cache-ak0.pinimg.com/originals/72/73/d0/7273d009971aa6ce09c68edb0f36e789.jpg

Martha Stewart is the queen of Halloween (I figured that was nicer than making some witchy remark), but seriously her empire is crazy imaginative when it comes to Halloween and in my opinion nobody does it better. This wreath is so simple and would be so easy to create, such a great idea, I can’t believe I didn’t think of this before.  Duh, it’s because I’m not Martha.

And the indoor version also by Martha, a great contradiction of spiders, flies and snakes with pure white roses.

For a party or special event the ripped cheesecloth  draped over the sofa and bats on the wall is spooky and fun.

The Best Room Ideas for Halloween halloween decoration ideas The Best Halloween Decoration Ideas Room Decor Ideas Room Ideas Room Decoration Halloween Halloween Decoration Ideas Homemade Halloween Decorations 13


This foyer idea is genius and so cute.

Our Indoor Decor ~ Withering Heights Inn (New for 2015)-coatrack.jpg:

And a final smart and classy idea from Martha.  You could do a silhouette of just about anything spooky.

What are your great ideas fitting for for a disturbing Halloween decor?

Discount Dozen: Pendant Lights under $100

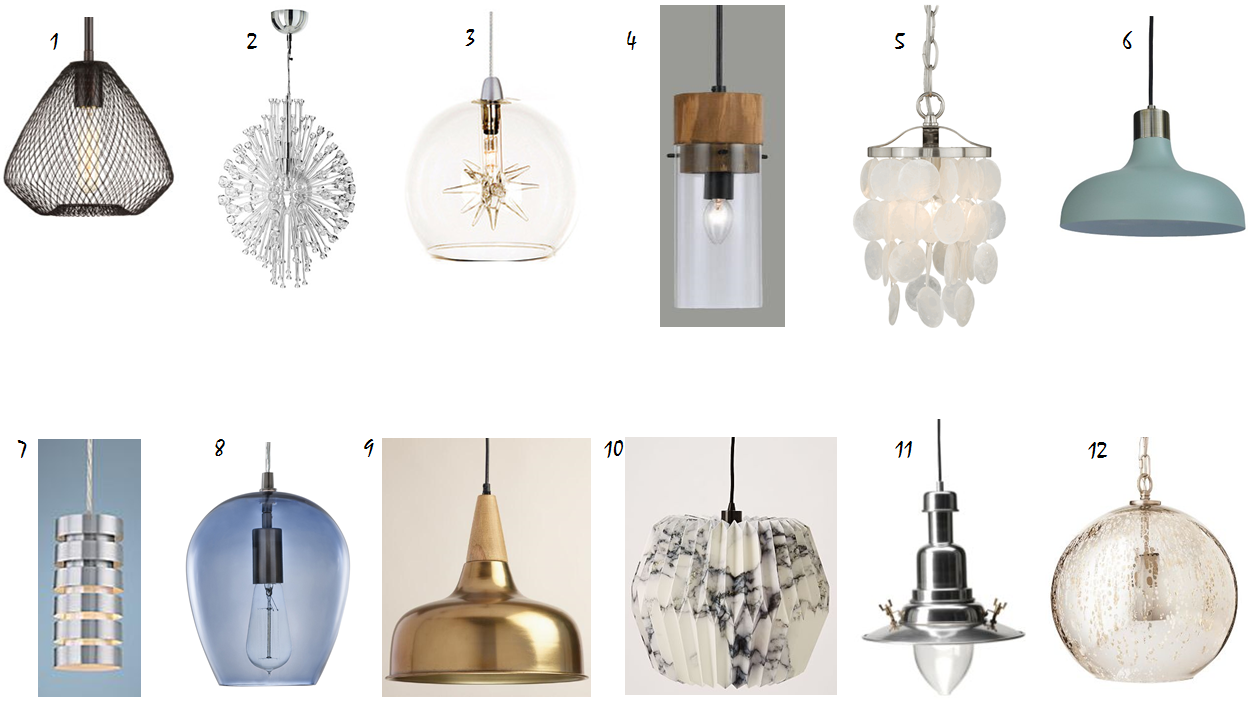
I have always been fascinated and wowed by all of those Pinterest posts of crafty people that DIY light fixtures from all kinds of junk. Mason jars, wine bottles, toilet paper tubes, you name it, pinners can make a light out of it, by just buying a “simple pendant light kit at your local hardware store”.  Ok, now, I don’t doubt that it can be done and while I’m willing to invest time in home projects, I’ve just never gathered the motivation to DIY a light.  Perhaps it’s because there are so many great inexpensive options out there already.  Here’s a quick discount dozen lights, with great style that I’ve found for under a hundred bucks. Heck, 5 of them are under $55!

discount-dozen-lighting-under-100


  1. Progress Lighting Mesh Pendant $83.60
  2. Ikea Stockholm Chandelier $99.00
  3. ET2 Starburst 1 Light Globe Pendant $52
  4. World Market Wood and Glass Pendant Lamp $89
  5. Bella Coastal Elsa Mini Pendant Light $98
  6. Threshold Crosby Collection Small Pendant Light $31.49
  7. Lamps Plus Lite Source Tendril Mini Pendant $91
  8. Allen and Roth Brushed Nickel Art Deco Mini Tinted Glass Bell Pendant $47.98
  9. World Market Brass and Wood Glenn Pendant Lamp $69
  10. West Elm Fanned Paper Pendant $69
  11. Ikea Ottava Pendant $34.99
  12. Threshold Mercury Glass Globe Pendant $53.99

What to Wear Wednesday: It’s Raining It’s Pouring

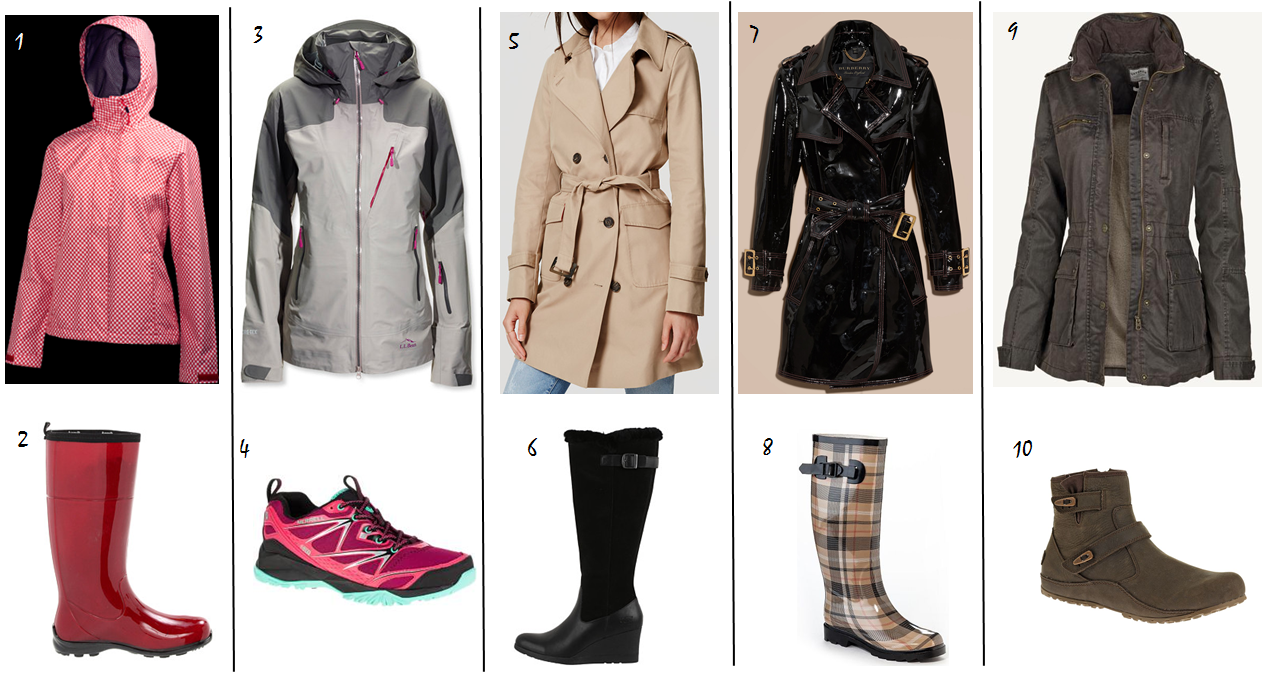
I was planning on posting something more fall wardrobe oriented, but since it is pouring rain here in Northern Virginia today and apparently it’s supposed to continue for the next 3 days.  So rather than be all glum about the dreary weather here, I thought we’d do a roundup of some rain jacket and boot pairings.  Here are some that would brighten a rainy day. (And that black Burberry trench is phenomenal, but let’s be real, it costs more than the contents of my entire closet).
rain-gear


  1.  Helly Hansen Nine K Rain Jacket
  2. Kamik Naomi Rain Boot
  3. LL Bean Patroller Jacket
  4. Merrell Capra Bolt Waterproof
  5. Loft Essential Trench
  6. Ugg Mischa Black
  7. Burberry Unlined Black Patent Trench
  8. Henry Ferrera Dry Stone Rain Boots
  9. Fatface Sussex Four Pocket Jacket
  10. Merrell Haven Duo Waterproof

Spectacular Homes: Savannah Southern Charmer

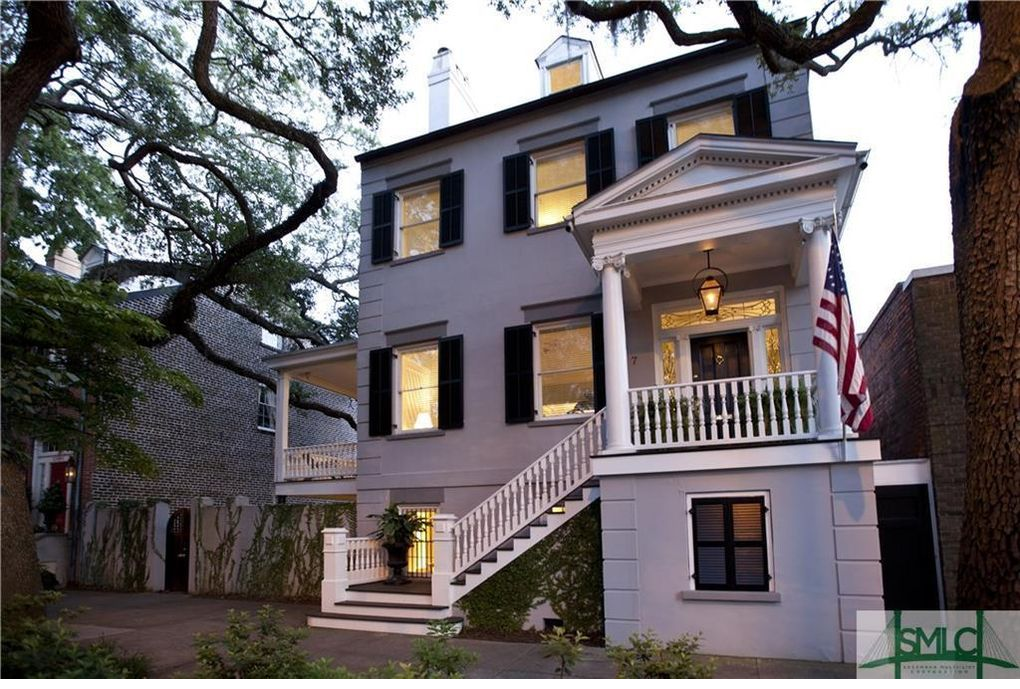
I am a real estate voyeur.  No, I won’t be creeping outside in the bushes, but I do troll realtor.com looking for spectacular homes for sale.  I just like seeing what’s out there, peeking at how homeowners decorate their spaces, and ogling architectural details.  I found this circa 1850 beauty on Jones Street in Savannah.  Savannah has a genteel and historic downtown with lots of ornate details and brick of all colors and lots of wrought iron framed by trees dripping with Spanish moss.   This one could be yours for a cool $2.5 mil.

savannah-front-2


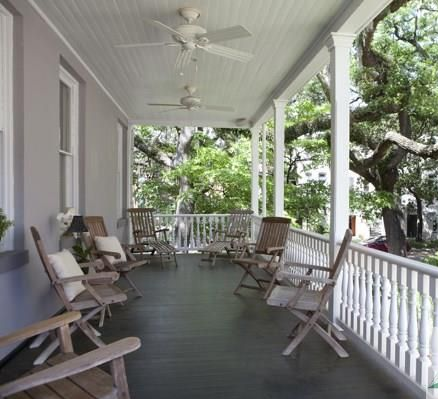
The side porch offers a welcoming respite for city dwellers.  If I move in (um, only if I win the lottery sometime soon) I’d add a porch swing, a few rocking chairs in black to match the shutters I’d place on the windows, a few large potted plants, a colorful outdoor rug and a pitcher of lemonade.

savannah-porch


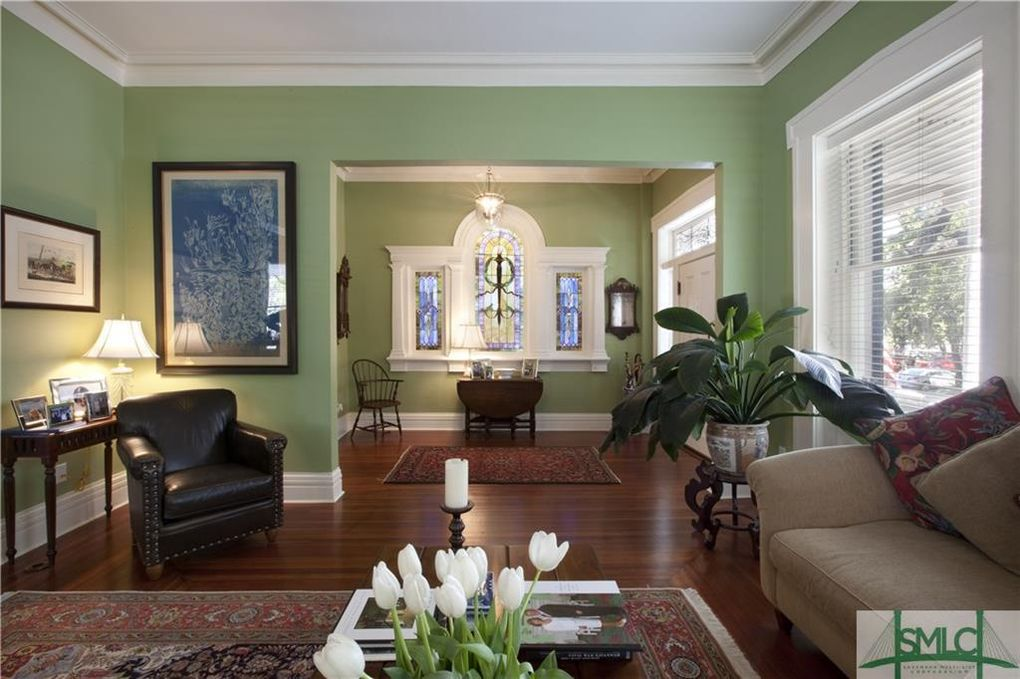
The entry room and front parlor has interestingly shaped stained glass windows and lots of great light and gleaming hardwood floors.

savannah-entry-and-living


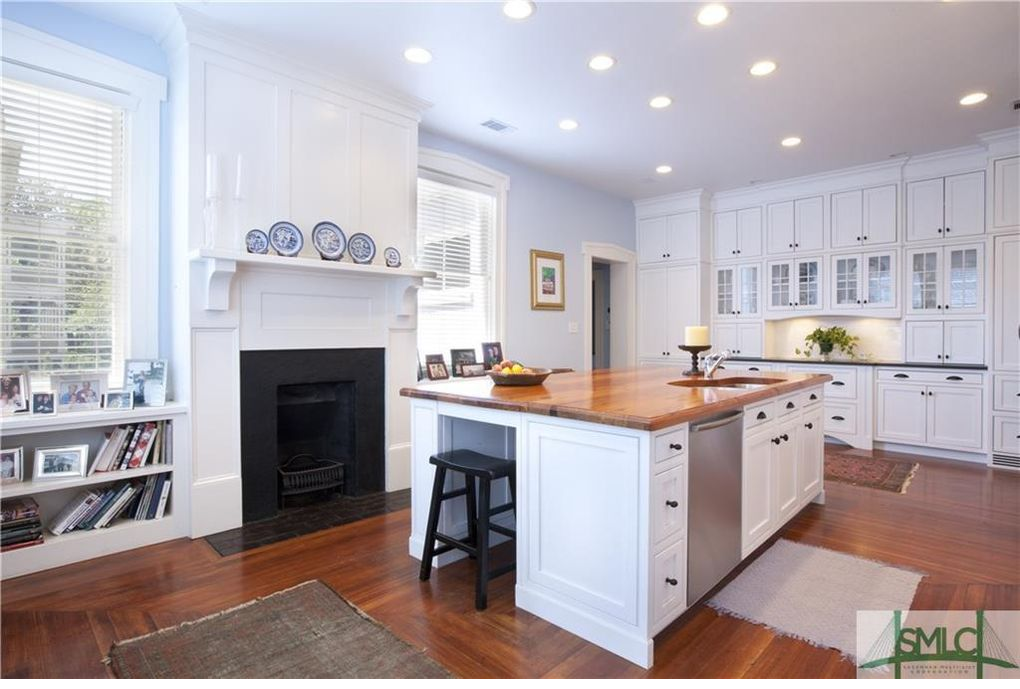
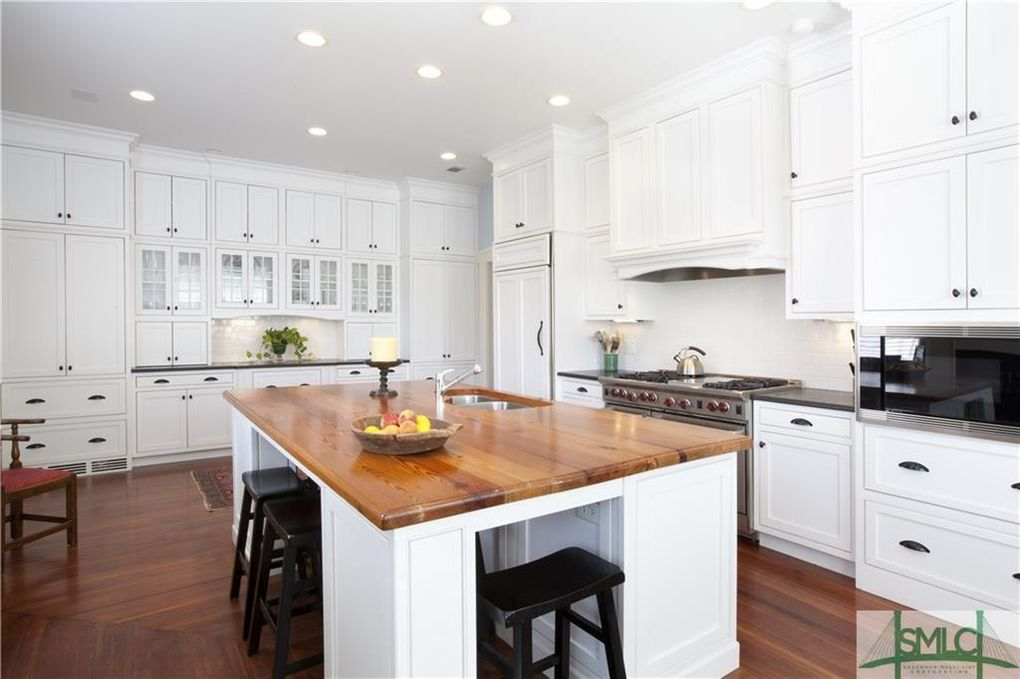
A fireplace in a bright white kitchen?  Yes, please.  I don’t know if the concentric wooded floor laid in that pattern was intentional from the get-go or if it was done to combat an existing problem, but I love it.  It ads a ton if interest and uniqueness

savannah-kitchen2


savannah-kitchen


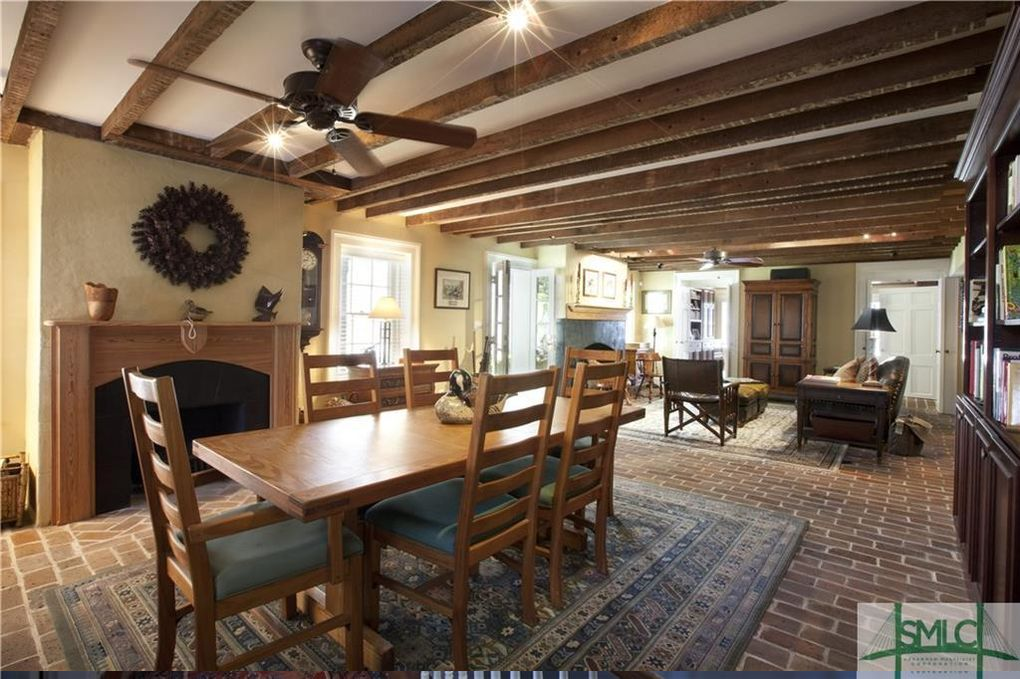
The lower level looks like it could serve as guest quarters or a separate apartment.  The beams and brick floors are true to the pre-civil war era of this home.

savannah-guest

Highbrow, Low Budget

There was a show on HGTV a few years ago that I really liked called The High Low Project.  It’s unfortunately no longer airing, but the concept was fantastic.  A client had a dream room that they saw in a magazine that was finished with very high end furnishings that naturally the client couldn’t afford.  The designer would then recreate the expensive look for a mere fraction of the cost.  I was always amazed to see that with a little ingenuity and smart shopping that a great looking inexpensive room was achievable without having to resort to dumpster diving or hand crafting everything.  Sure, there was some refinishing, repurposing and yard sale shopping, but it certainly wasn’t the only trick up the designer’s sleeve.

I personally enjoy the challenge of creating a design on a budget. (This is probably because I am cheap….ahem, thrifty….ahem, resourceful).  I have never once had a client tell me that they had a limitless budget.  Don’t get me wrong, while that would be fun too, the reality of the situation is that there is always a budget and it’s great to know that good design is possible with just a little bit if money.

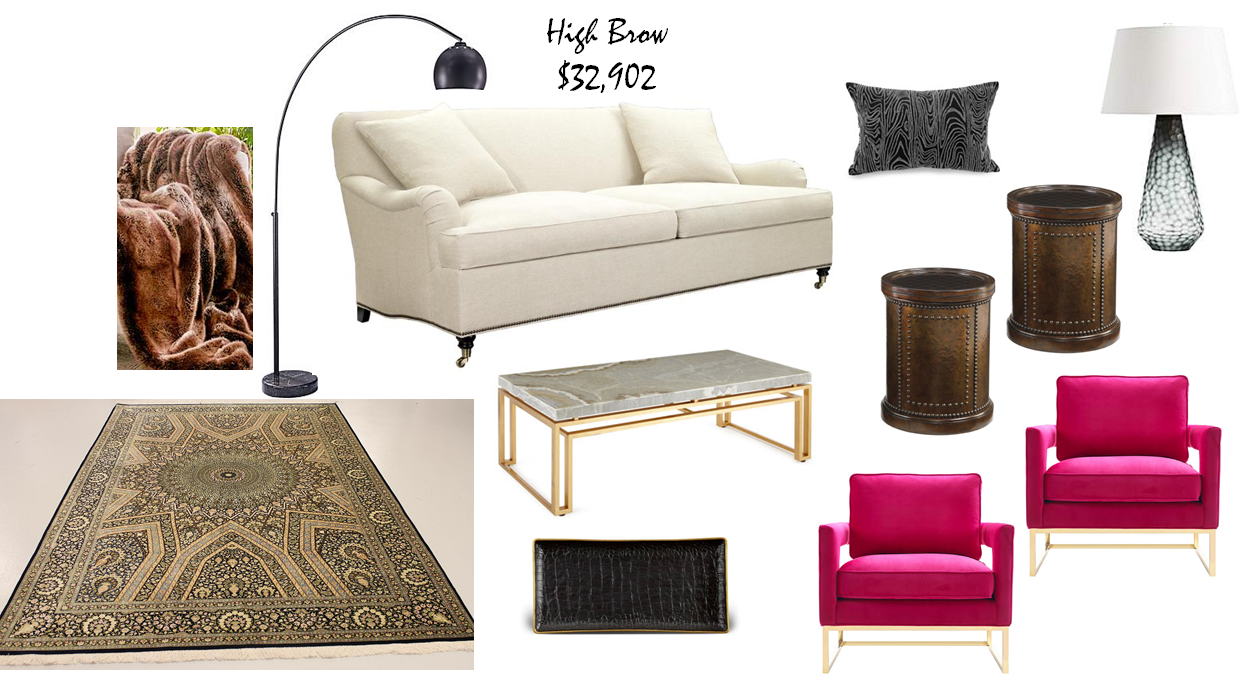
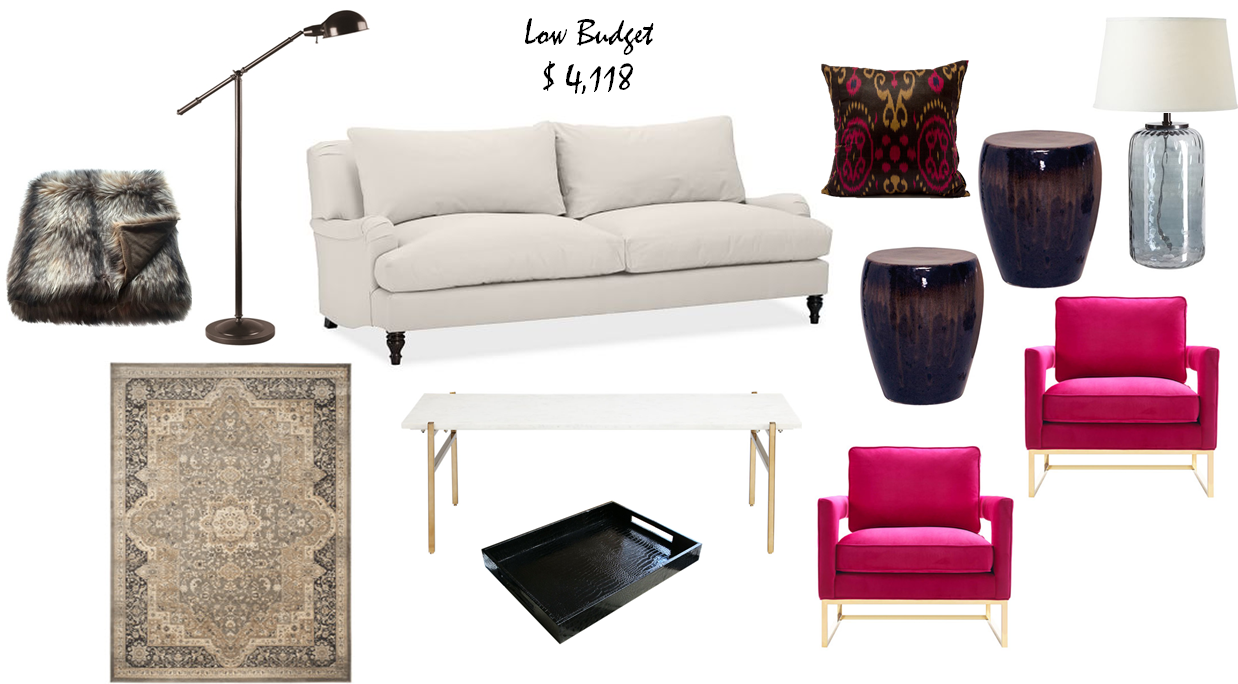
So in the spirit of The High Low Project I am creating what will hopefully be a recurring spot on the blog that I’m calling Highbrow, Low Budget.  This week, I kept the bright pink chairs as the focus in each room.  These affordable beauties go just as well in the highbrow room as they do in the low budget room.  The highbrow room comes in at almost $33K while my lower budget option was just over $4K.  Still a fantastic look for a fraction of the cost (and honestly I like some of the low budget items better anyway).

high-brow-1


Hickory Chair Silhouettes M2M Sofa $ 9810
Cynthia Rowley for Hooker Furniture Serendipity Coffee Table $ 2799
Spade Arm Chair by Mercer41 $490 x 2=  $ 980
Tommy Bahama Kilimanjaro 20 Round Harcourt Tangier Side Table $1214 x 2 = $2428
Qom Persian Rug 7x 10 $ 15244
George Kovacs Dorian Bronze Arc Floor Lamp $378
Arteriors Home Nathaniel Black Chiseled Glass Table Lamp $408
Crocodile Rectangular Tray by
L’Objet $170
Mitchell Gold Faux
Bois Throw Pillow $385
Faux Puma Fur Throw Blanket $300

low-budget


Pottery Barn Carlisle Upholstered Sofa $1359
CB2 Slab Marble Coffee Table $549
Spade Arm Chair by Mercer41 $490 x2=   $ 980
Vincent Rug in Taupe & Black 7 x 9 $289
Impressionist Garden Stool Java Brown Glaze $278 x 2 = $556
Alana Luster Glass Table Lamp Base Indigo $120
Tapered Medium Linen Drum Shade $59
Lite Source Jensen 1-light Floor Lamp Dark Bronze $97
Threshold Raccoon Faux Fur Throw Blanket $34
Etsy
Silkway Ikat Pillow Cover $20
American Atelier Croc Faux Leather Tray $55