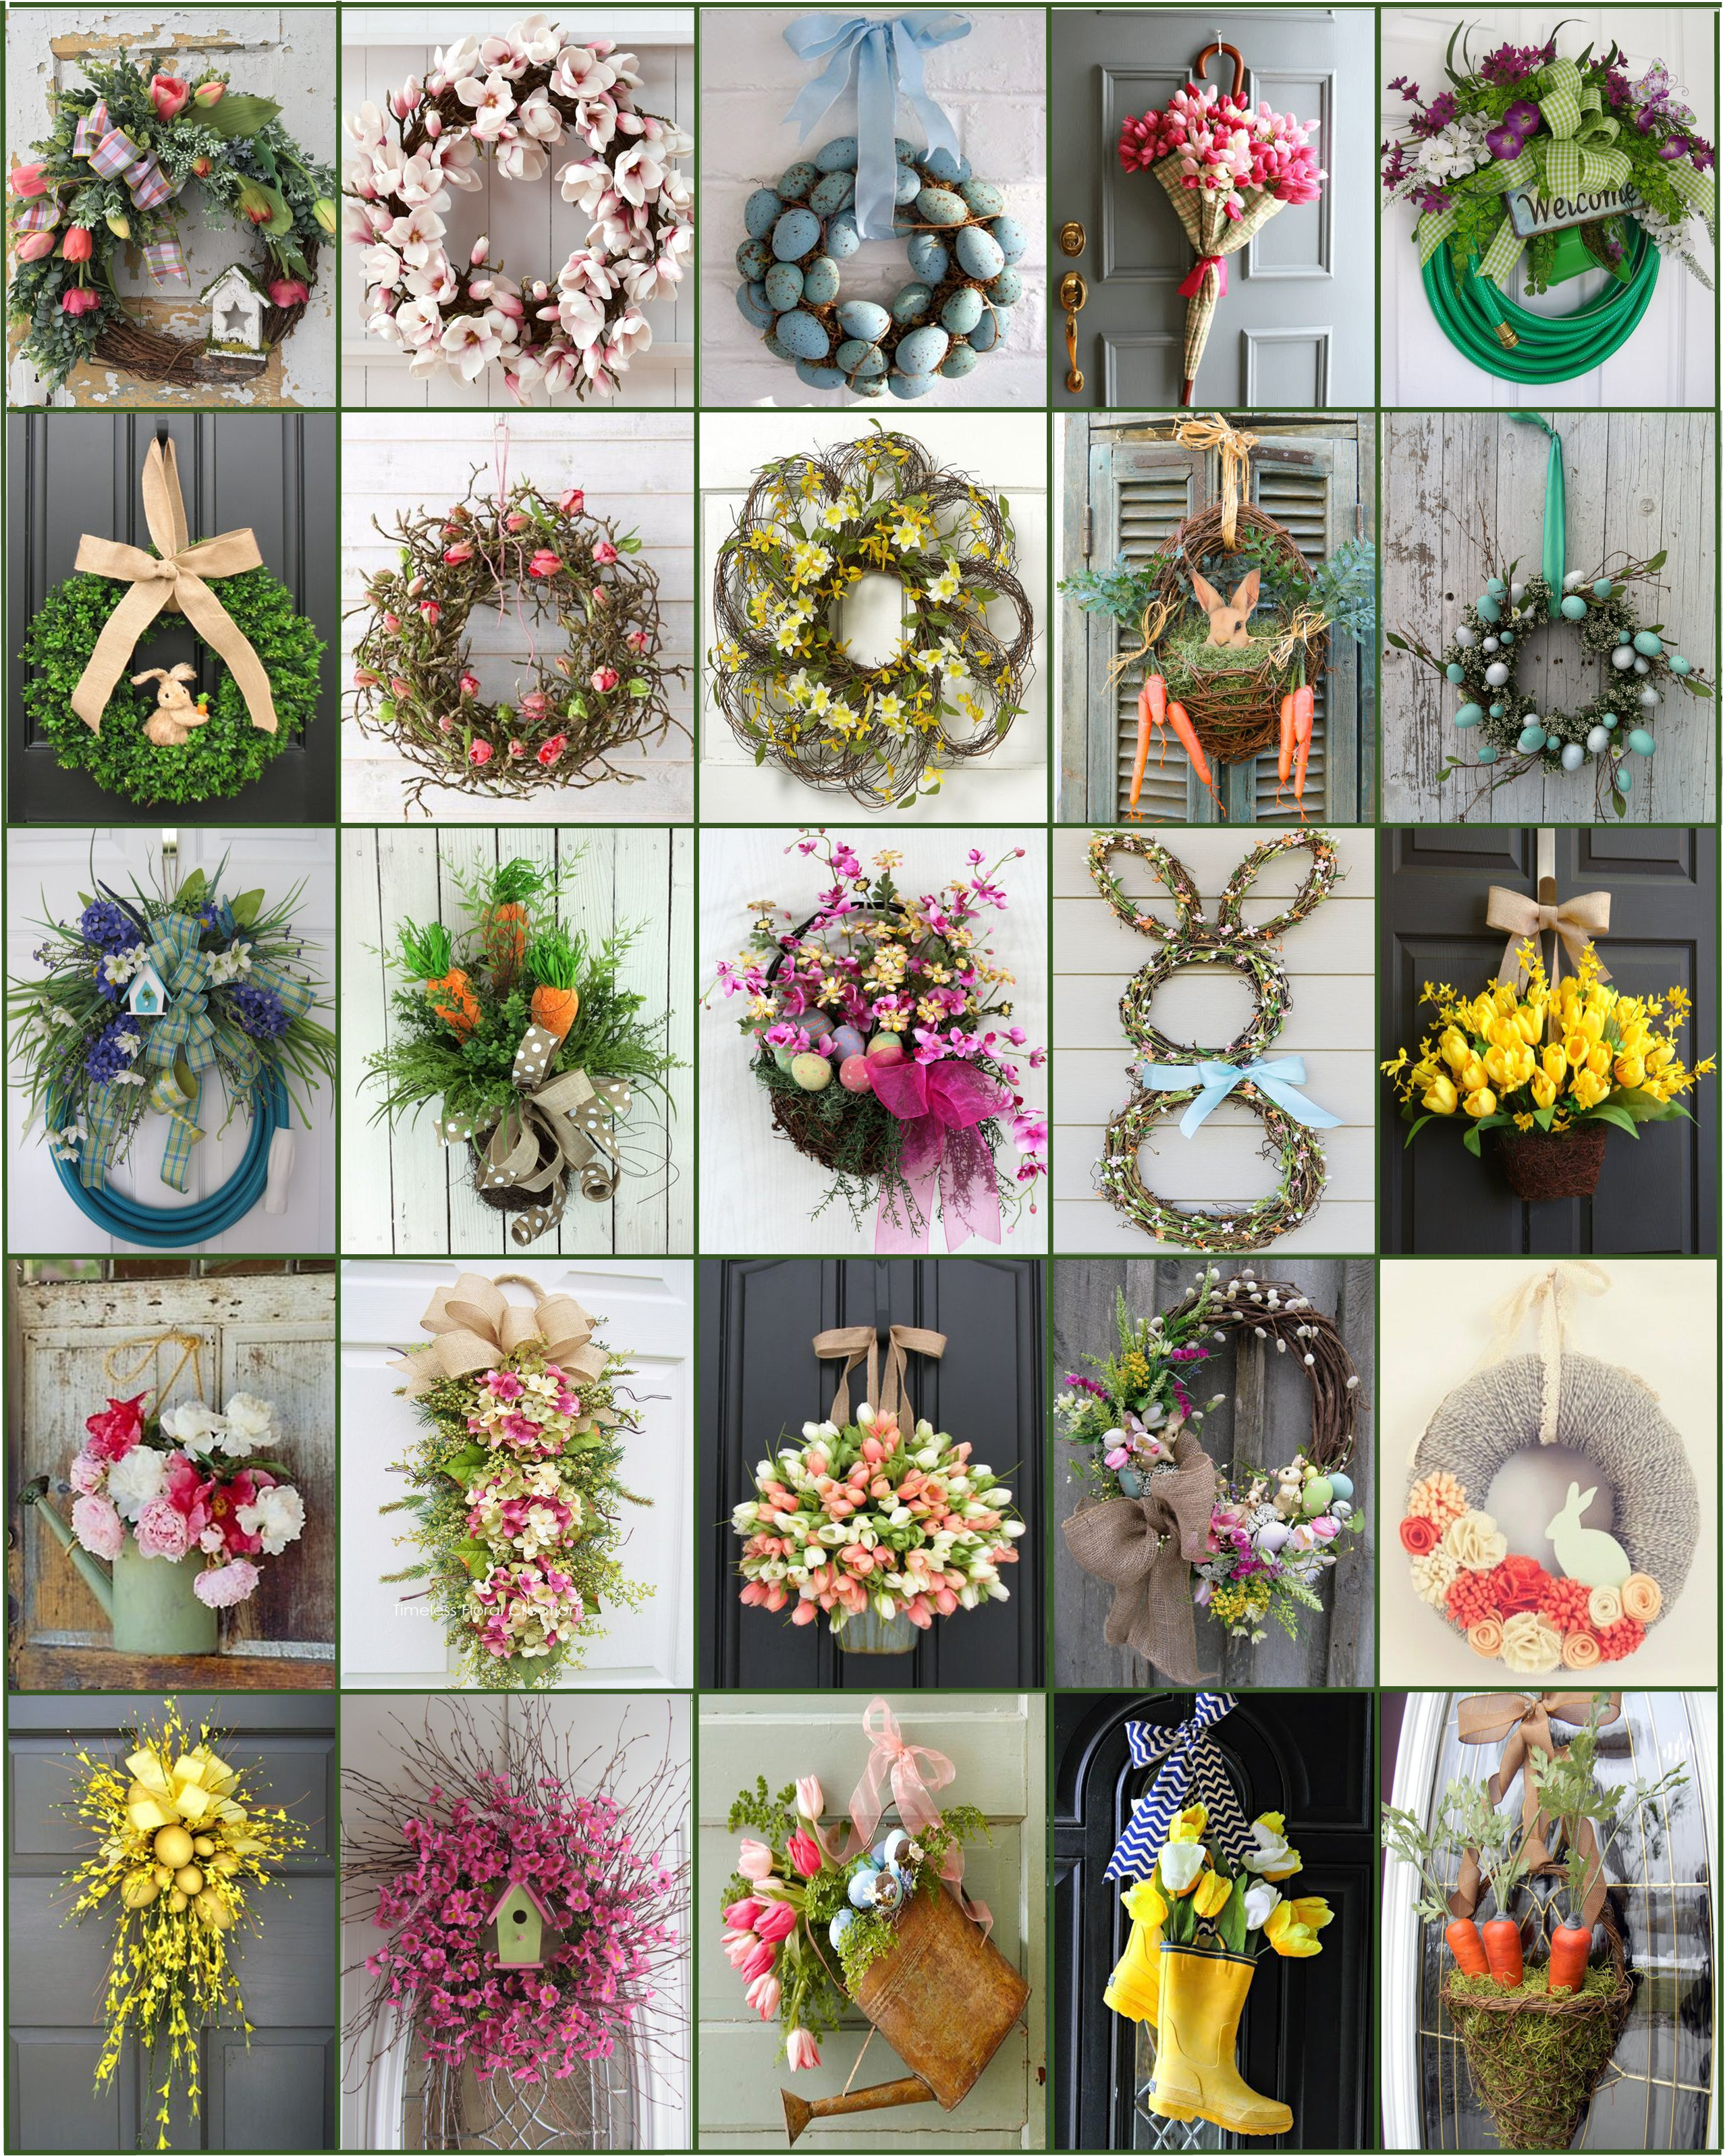
25 Gorgeous Spring Wreaths to Welcome the Warm Weather

I’m not sure about the weather where you live, but here on the Mid-Atlantic coast it’s been feeling like spring for the last week or so. This rush of warm weather has got me on a mission to get seedlings started (inside still) and skip right over the St. Patrick’s Day wreath in exchange for a fun and bright Spring wreath. While looking for inspiration I found so many great ideas. Here’s the 25 best and most gorgeous spring wreaths, I’m definitely going to duplicate one and maybe even a second one for the back door.

The Best of Spring Wreaths

the best spring wreaths


Window Wreath How-To

In keeping with my love of classic colonial design, I have for years admired the timeless look of putting a wreath hung by ribbon in each window.  I also am a fan of a candle in each window during the holidays and have been sporting this look for some time now.  This was the year I decided to make the investment in wreaths for each of my 8 front windows, and it was neither as difficult nor as expensive as I thought it would have been.  Here’s how it’s done.  First, a before shot of my house, boring!

windows-before


You’ll need:

  • One evergreen or faux evergreen wreath for each window (most people only do the front of their home). I used 24” diameter wreaths for my windows.
  • Wired ribbon, I used 4 spools that were 10 yards each and at least 2.5” wide
  • Floral wire
  • Hot glue gun and glue
  • Scissors
  • Wire cutters
  • Stapler and staples

The first thing I did (and I bribed my kids to help which made it go SOOO much faster) was remove the screens from my windows and cleaned the glass.  This will allow you to hang the wreaths from the inside and will overall look very neat and clean.

Next, before you hang the wreaths you probably want to put a bow on them.  A bow can either be placed at the top or the bottom of the wreath.  I opted to put my bows at the top.  Making the bow is the most time consuming part of the whole process and I’ll be honest, it can take some practice to get them right.

Cut a length of wire about 5 inches long and place it nearby.  Take a length of ribbon of about 18 inches but don’t cut it off the spool, but pinch it at the 18” mark.  This will leave one of the 2 “tails” of the bow.  Take about 3 to 4 inches (depending on how large you want your bow to be and how big your ribbon is) make a loop and repinch it.
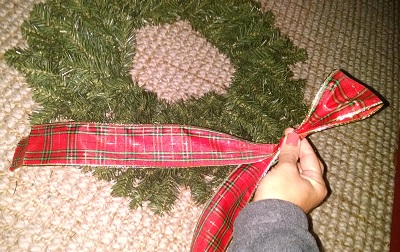
1st-loop-2


There’s going to be a lot of pinching going on for the next few minutes – warning – your fingers will probably cramp up.  Turn the ribbon about a quarter turn and make and pinch another loop.
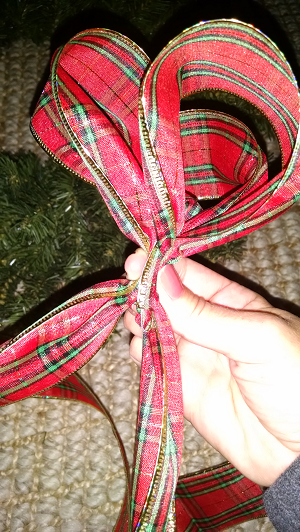
3rd-loop


Repeat this process several times until you have 5 or 6 loops, just until it looks right.  Brilliantly descriptive, eh?  Take your pre-cut length of wire and wrap it around the area where you are pinching and twist it very tight so that the loops stay intact and are held together.
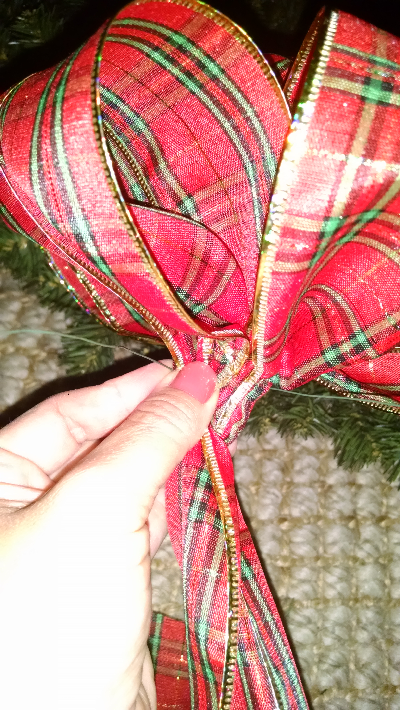
wire-box


Pull the ribbon another 18” from the spool and cut it free from the spool.  Angle cut the end of each tail.  Ta-da! You made a bow.  Once you get the hang of this technique it is such a great skill to have in your repertoire for gift wrapping, floral arranging, it really comes in handy!

Next, it’s on to attaching the ribbon that will actually hang the wreath.  Pull several feet of ribbon from the spool (will depend on the size of your window and the size of the wreath).  I like to hang mine about halfway down the window so about 3.5 feet of ribbon was enough for me.  Again, leave this length of ribbon attached to the spool and wrap it around the “top” of the wreath leaving an overlap of about 4 to 6 inches in the back.  Staple the ribbon where it overlaps.
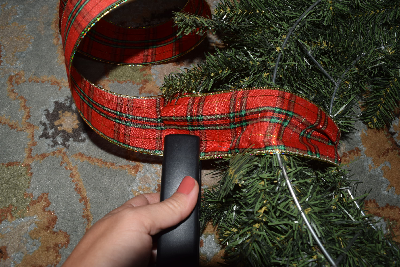
hanging-ribbon-staple


I also like to add a few dots of hot glue between the 2 lengths of ribbon to really hold it.
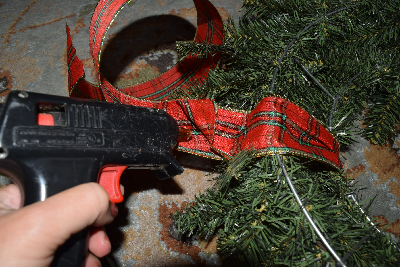
hanging-ribbon-glue


Next attach your premade bow.  You could hot glue it on, but over time, especially if you live in a warm climate, this could come free, so I prefer to wire mine on.
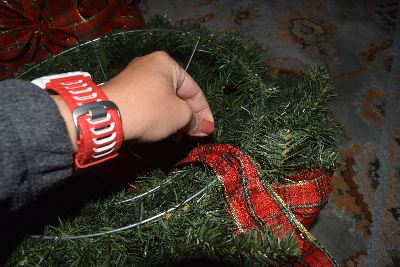
ribbon-attach-to-wreath3


Take a length of about 5 inches and wire the bow to the wreath.  Since I put my bow at the top of the wreath I wired mine around both the wreath and the top ribbon for extra security.
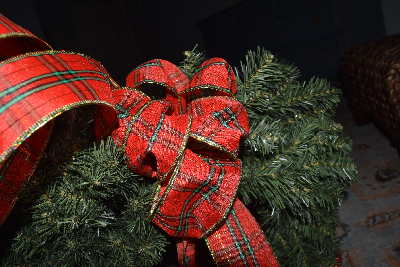
ribbon-attach-to-wreath


Now it’s time to hang your wreath!  You could measure out exactly how long you want to hang them but I used the grids on my window and just eyeballed it.  Open the top of your window and dangle the wreath out, holding onto the spool end of the ribbon.  Lower the wreath to the place you want it and close the top window.  Cut your ribbon from the spool with about 5 inches to spare.  Use this excess to tie a knot (depending on how substantial your ribbon is you may want to do this several times over so your wreath stays secure in the window).  If you have wood windows you could also thumbtack them to the frame, but the knot method works for vinyl or wood windows.
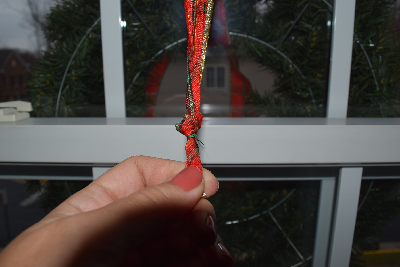
knot-in-ribbon


Cut off any excess ribbon hanging inside the window.
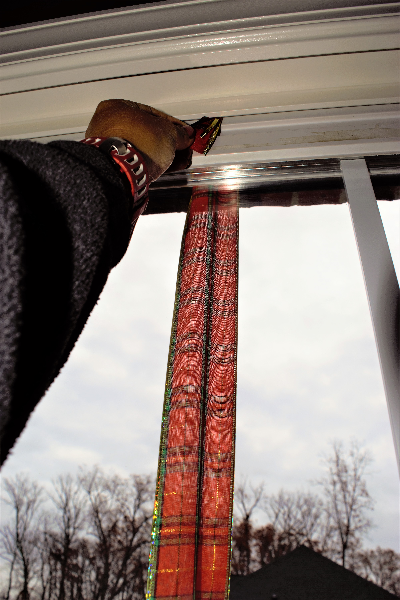
close-knot-in-window


Repeat for all of your windows, and once complete be sure to take a trip outside to make sure they all look even and if necessary just pop inside and reknot if a wreath needs to go up or down!
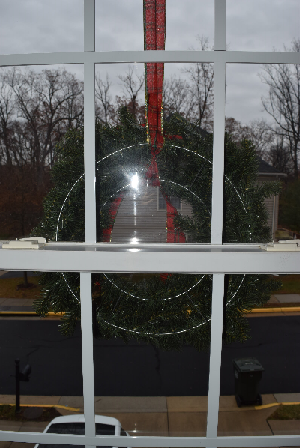
wreath-at-halfway


I got both the wreaths and ribbon on sale and spent under $40 for the project.  Besides cleaning the windows it took me about 2 hours to complete and hang all 8 wreaths, though I did have this little helper.

wreaths-lil-helper


Window wreaths: Follow this simple tutorial to add classic holiday charm to your home exterior with window wreaths!


Get to decking those halls!

DIY Thanksgiving Centerpiece

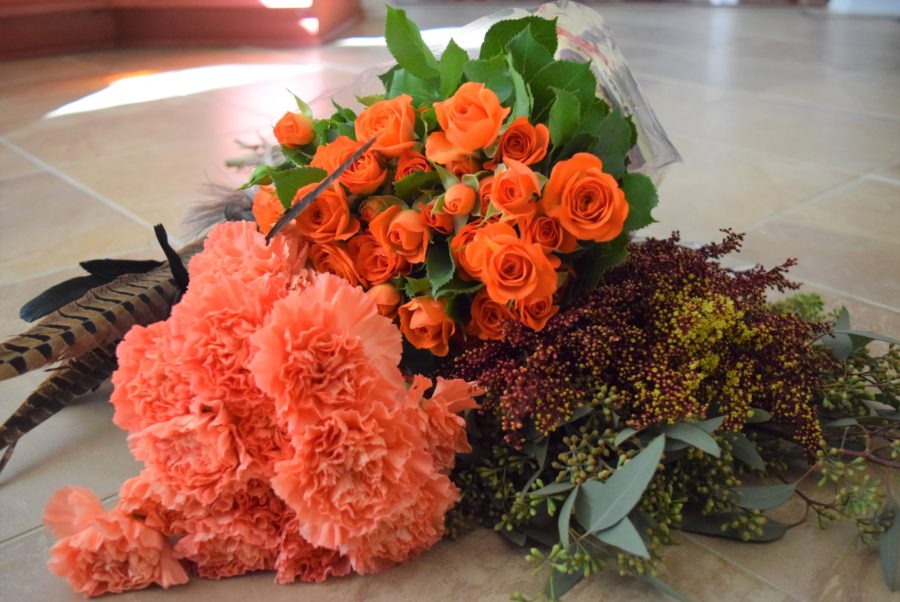
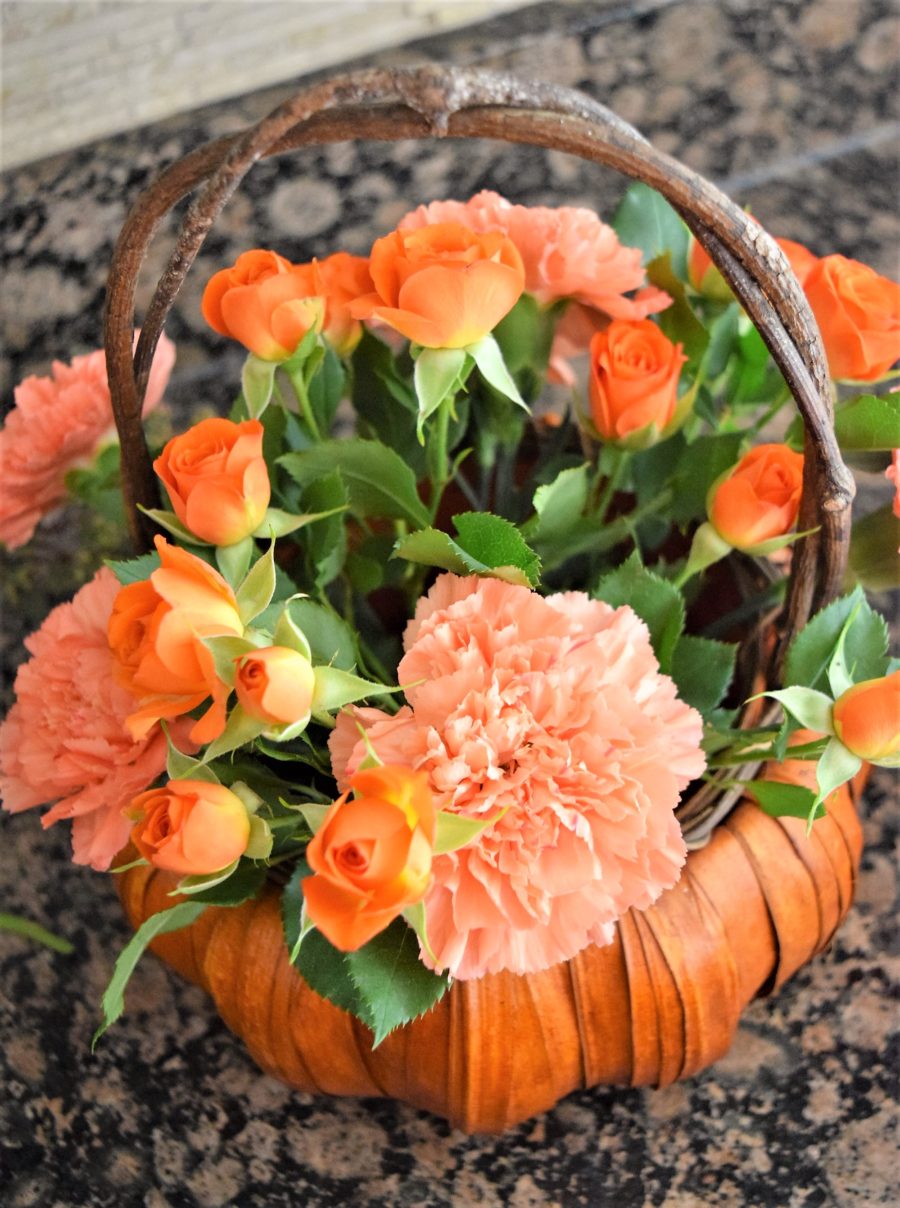
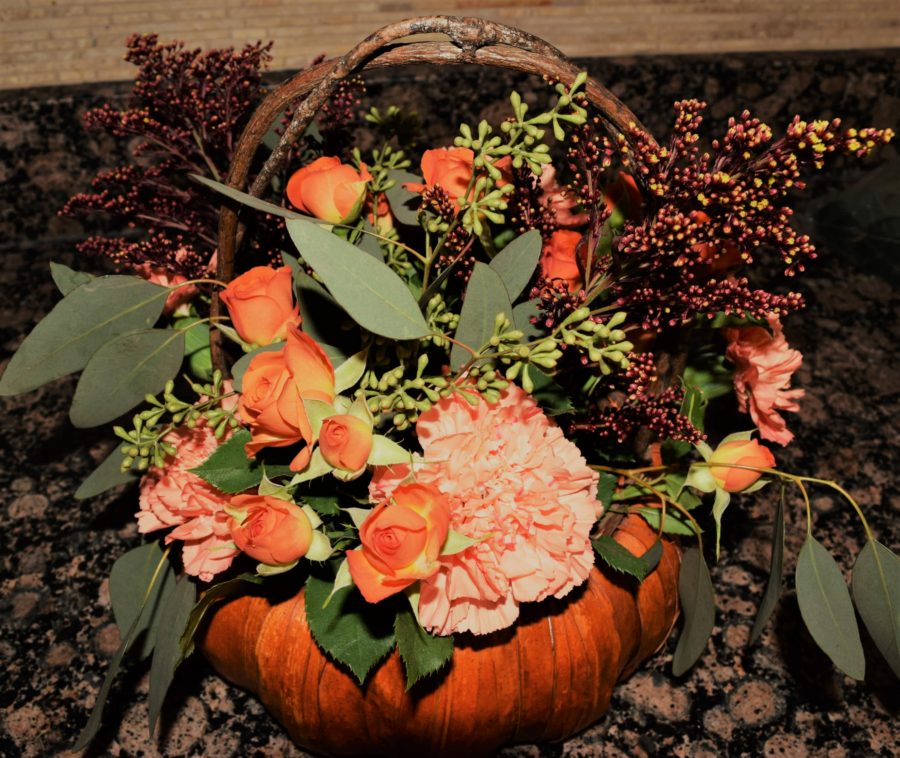
Last week we talked about Thanksgiving tablescapes.  One of the key elements of many of those gorgeous tables was a glorious centerpiece or floral arrangement, or even several floral moments on one table.  Lots of people are intimidated by arranging flowers.  I get it.  Truthfully it does take a little more finesse than just removing the cellophane and plopping them in a vase.   Understandably, lots of people shy away from DIY’ing it and just call up FTD and order a centerpiece.  While convenient, the problem with this is twofold.  One, they are sooo expensive and two, they never look like they do in the “representative” online photo.  They are usually crammed with cheap greens, foregoing the proper number of expensive flowers that you were supposed to get.  I’ll bet that if you try making your own arrangement once, you may never buy that expensive garbage ever again.  Here’s how you can DIY your Thanksgiving centerpiece!  I made 2 medium and 2 small arrangements, plus a leftover scrap arrangement for just $46 in flowers.  We have a flower wholesaler nearby where one can get virtually any flower, and their prices are pretty reasonable.  If you don’t have a wholesaler open to the public near you, you could do something similar with about 5 bunches of flowers from Costco or the grocery store, it may cost just a few more dollars.  For this arrangement, I picked up a bunch of orange spray roses (those are the mini-ones), a bunch of peach carnations (which, sadly, get a bad rap), a bunch of seeded eucalyptus, and a deep burgundy solidago (i.e. goldenrod).

dsc_0149-2


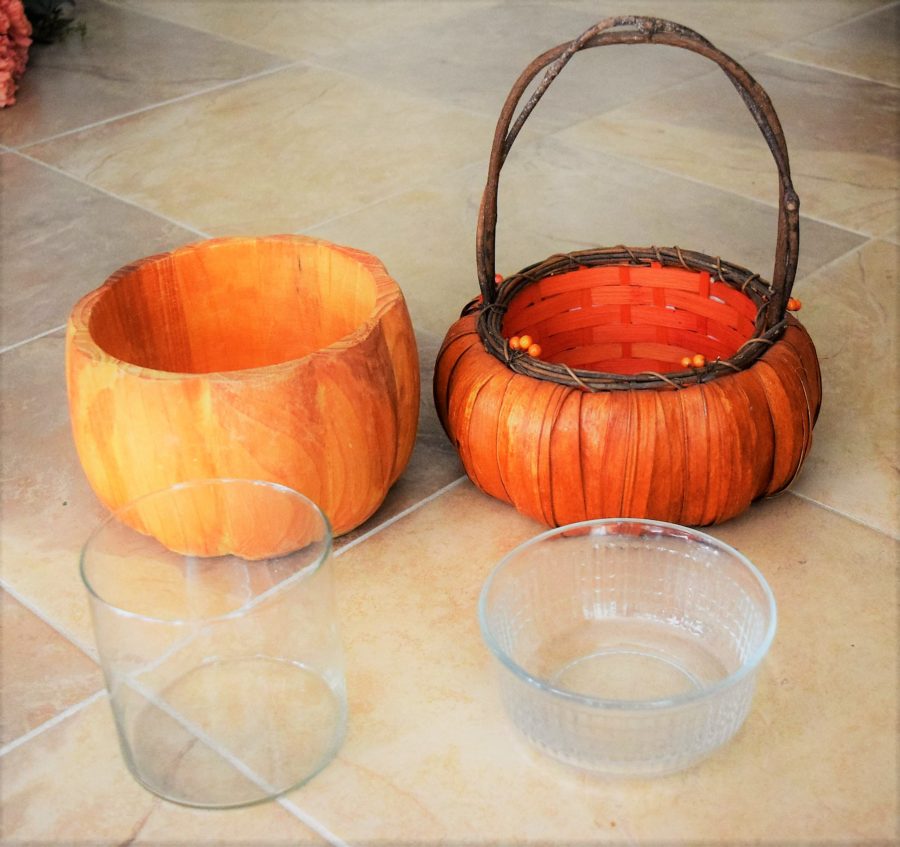
I already had a few random containers that would work well for a fall centerpiece, a wooden pumpkin, a pumpkin basket and 2 small pedestal candle holders that became vases and my leftovers went in an old Patron tequila bottle (hint – they make great stem vases once you finish with the tequila).

dsc_0152-2


Other supplies I used were 2 containers to fit inside my pumpkins (since they weren’t watertight), garden snips/shears, and a few pieces of oasis floral foam and some clear floral tape.

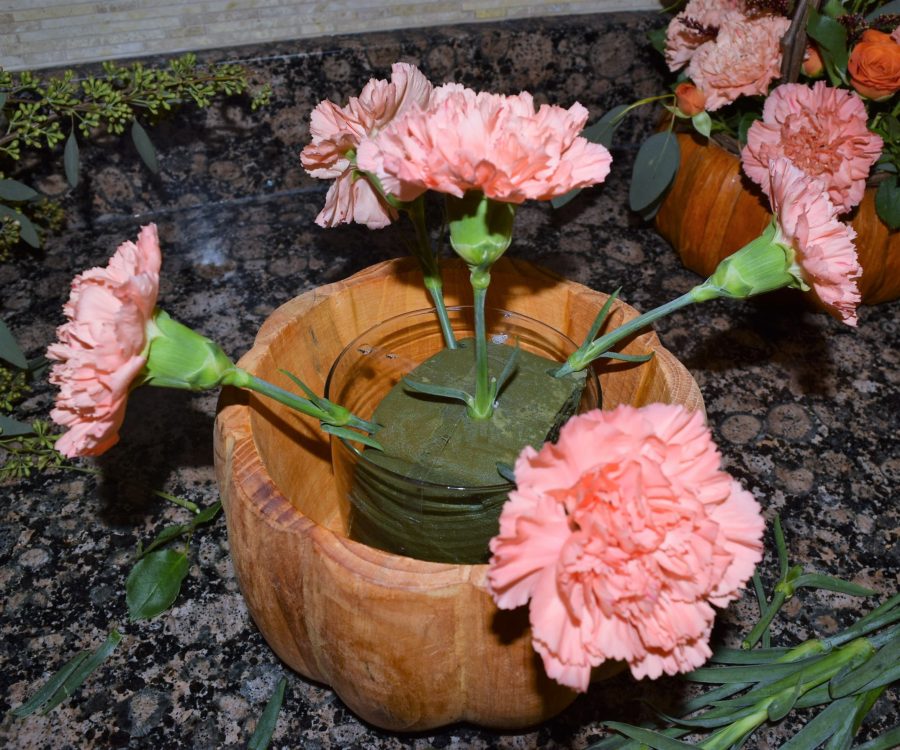
I started by inserting a good size chunk of oasis into the inside containers and drenching them in water.  Oasis needs to be wet in order to insert the stems into it.  Next each flower stem as you insert it (don’t do them all at once) so that they stand only two or three inches above your container and make the first 5 or so flowers symmetrically placed.  Here you can see that I placed one in the middle and 4 others sideways at each corner of the oasis.

dsc_0162-2


Then add your secondary flower, in this case I kept a lot of greenery on the spray roses, the leaves looked nice and it meant that there was one less green I had to buy.  Alternatively, if you’re using flowers that don’t have nice leaves you can snip in your garden or trim your house plants.

dsc_0158-2


Next I filled in holes with the solidago and the seeded eucalyptus which both had a nice contrast in deep burgundy and soft green.

dsc_0161-2


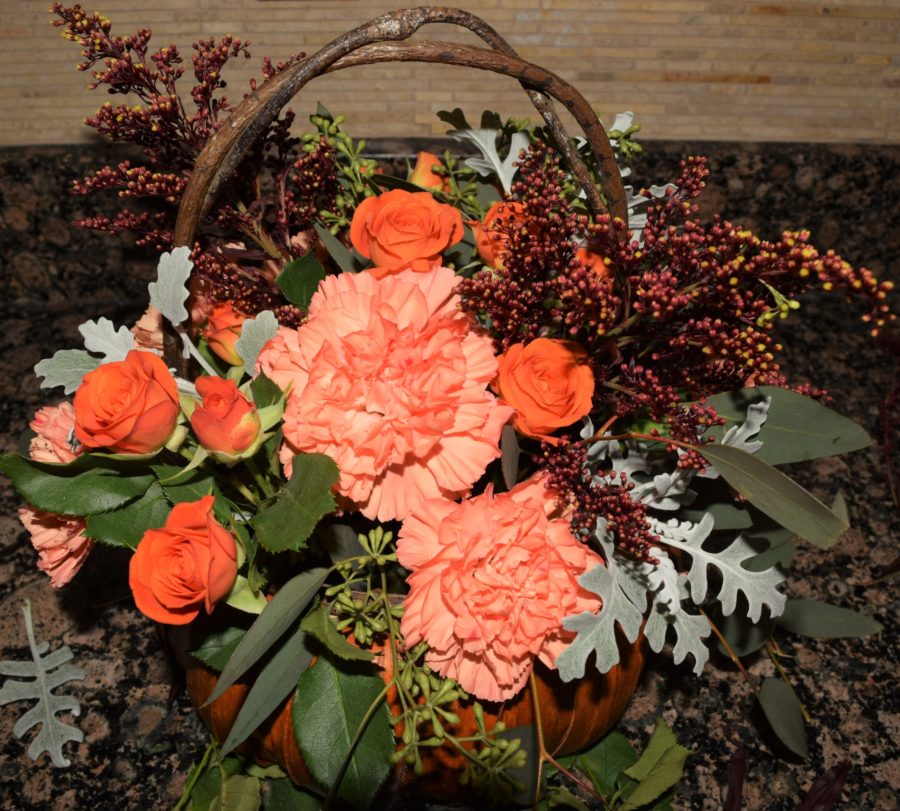
I still thought there wasn’t enough contrast so I went out in my garden and clipped a few stems of dusty miller which added a nice frosty mint green contrast.

dsc_0164-2


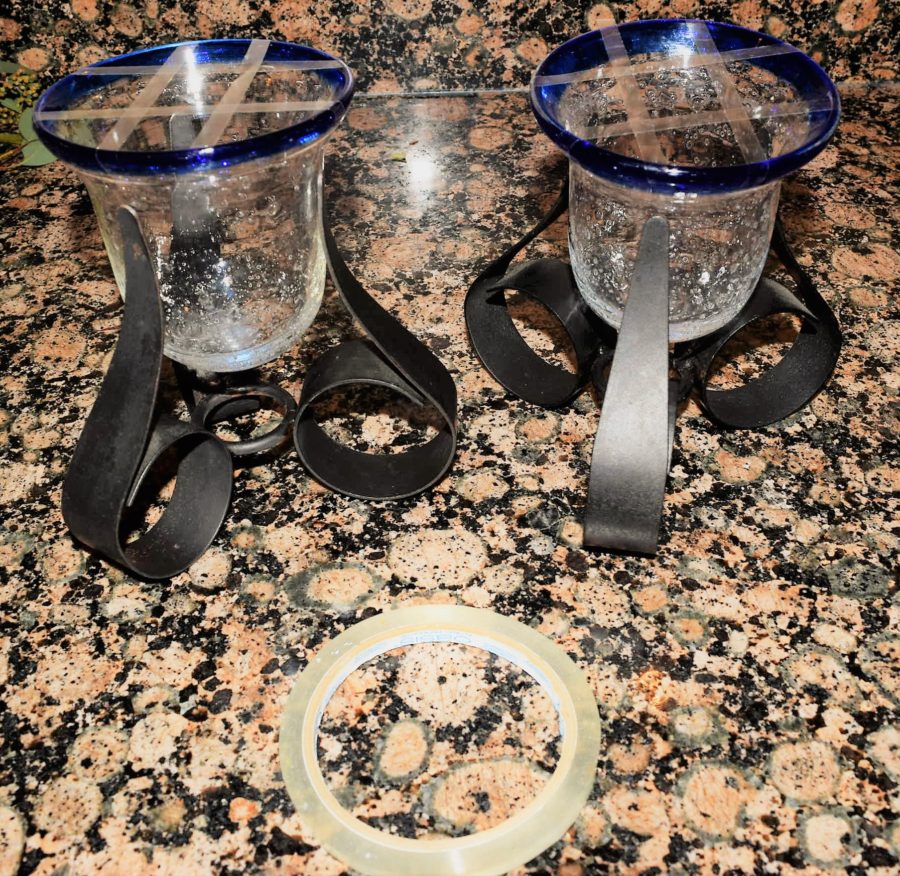
After making the two pumpkin arrangements I noticed that I still had a ton of flowers left, so I took these two small candle holders and made a grid pattern on the top with clear floral tape.  Why the grid, you ask?  This is a trick florists use to keep their arrangements standing in their clear glass vases perfectly.  Without the tape the flowers would flop around and not stay put where you actually wanted them.

dsc_0166-2


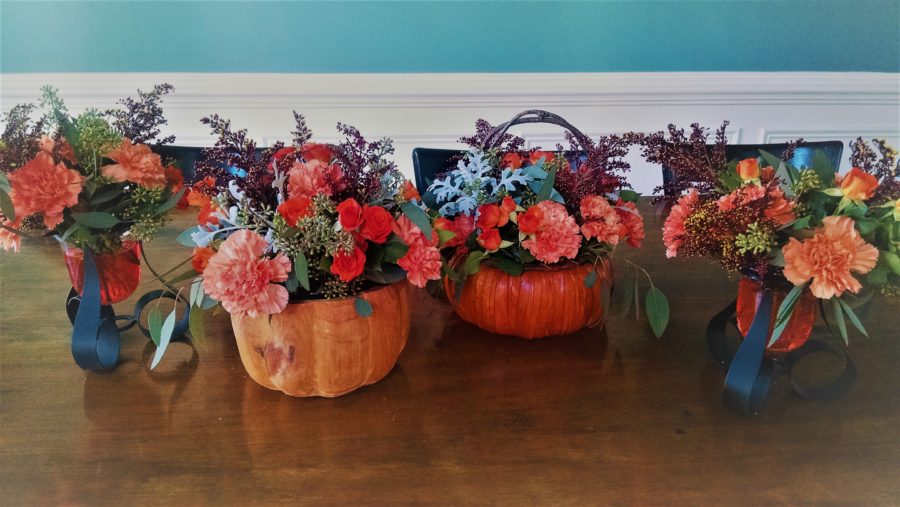
I then repeated the process of inserting main flowers first symmetrically around the vase, then adding in secondary flowers, and finally greens. Even after completing these I had a good bit of eucalyptus remaining which I simply stuck in an old Patron bottle with a few feathers.  I haven’t decided how I’m going to display them yet with my set table but here is the group of the 4 flower arrangements completed.  Will you take on the DIY centerpiece challenge?  We’d love to see them.  Add a comment and show us your work!

flowers-2